Name, group and tag your monitoring locations for easy management
How to change names, sort locations into groups, and assign tags so you can search, filter, and view your data by these labels.
Note. A monitoring location is the entity you name, group, and tag; its underlying data stream is a datasource (its ID starts with
D). You'll find them on the Monitoring Locations page in the left sidebar under SENSOR NETWORK.
- Each monitoring location has exactly one name.
- Each monitoring location can belong to one group (or stay Ungrouped).
- Each monitoring location can carry several tags.
Why add a group or tags?
Groups and tags help you organize your network and filter it quickly.
For example, if your project monitors at schools, beside roads, and in parks, you may want to put each location into a group such as "School", "Roadside", or "Park" depending on where it sits. Then, for every location in the "School" group, you can add tags that capture extra detail — the type of school, the district, the campaign phase, or anything else relevant to you.
Any user in your organization can edit a location's name, group, and tags, and the change is reflected for everyone in the organization.
Once your locations carry groups and tags, you can search and filter by those fields anywhere a location list appears — Monitoring Locations, Live Data, and Historical Data.
Where this lives
- Log in to the Clarity Dashboard.
- In the left sidebar, under SENSOR NETWORK, open Monitoring Locations.
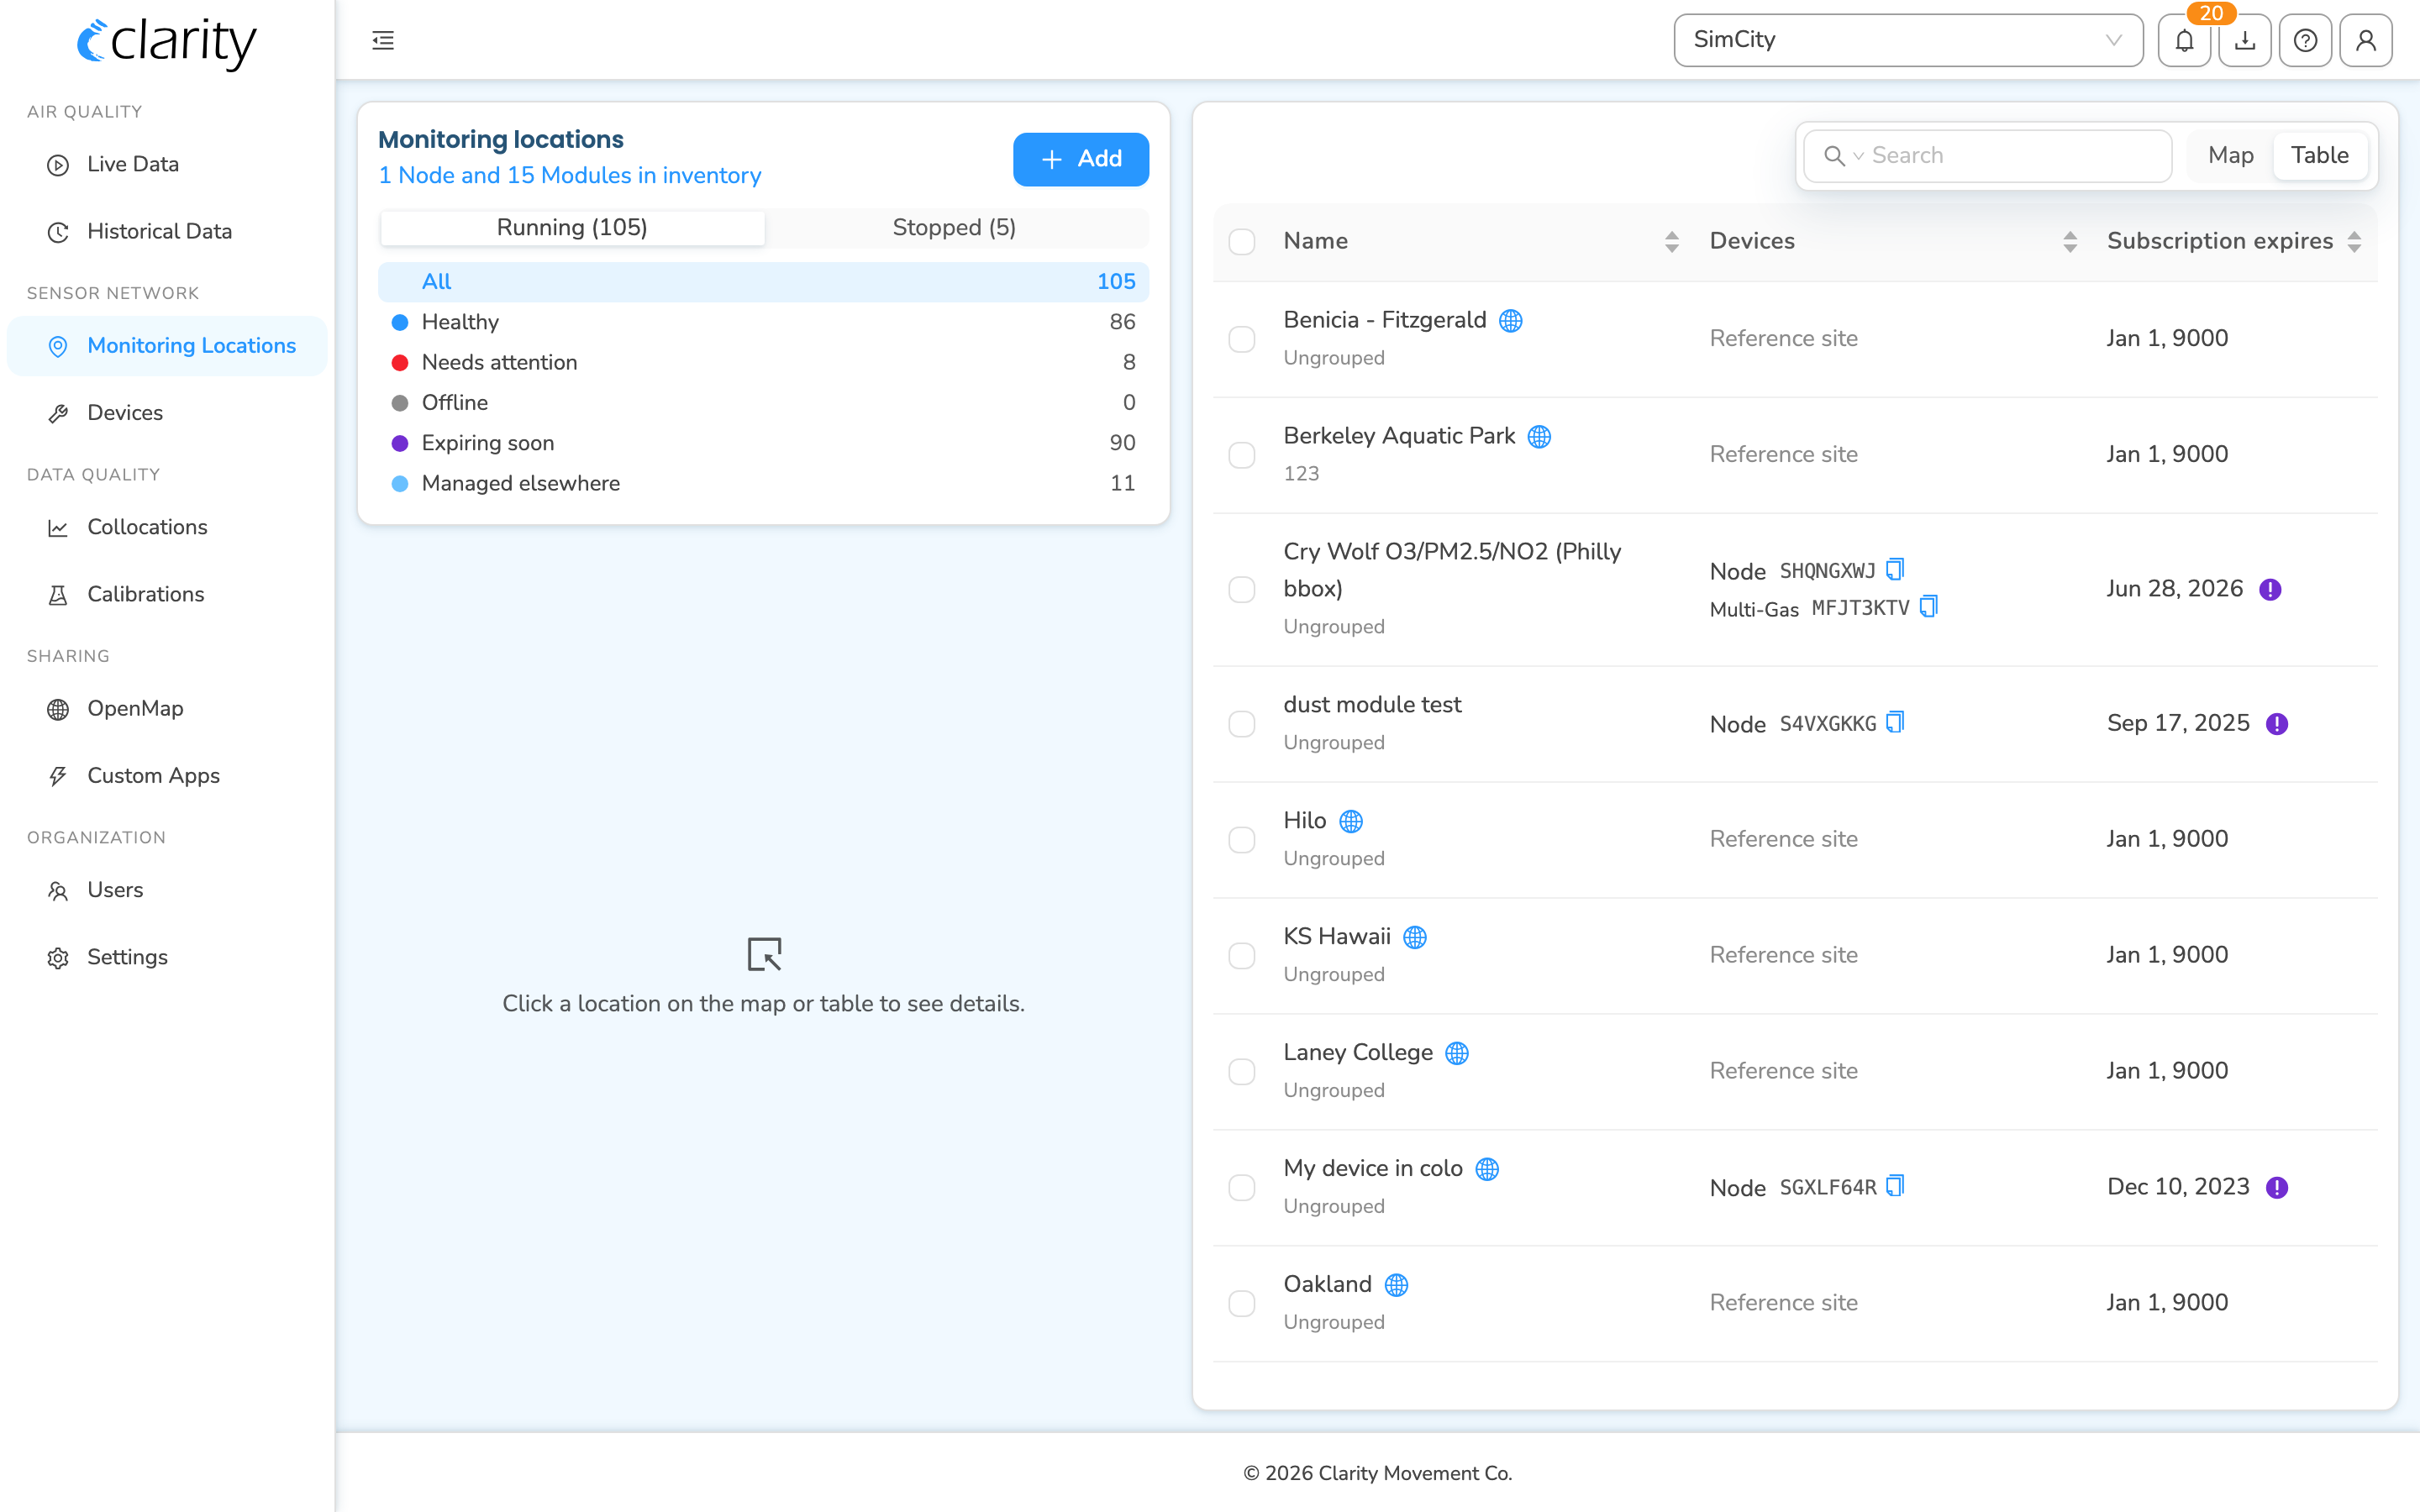
The Monitoring Locations page shows your network as a table (the default view) or a map — switch between them with the Map / Table toggle at the top-right of the main pane. The left column holds the Monitoring locations control card (fleet counts and filters) and a details panel that fills in when you select a location.
Edit the name, group, and tags of one location
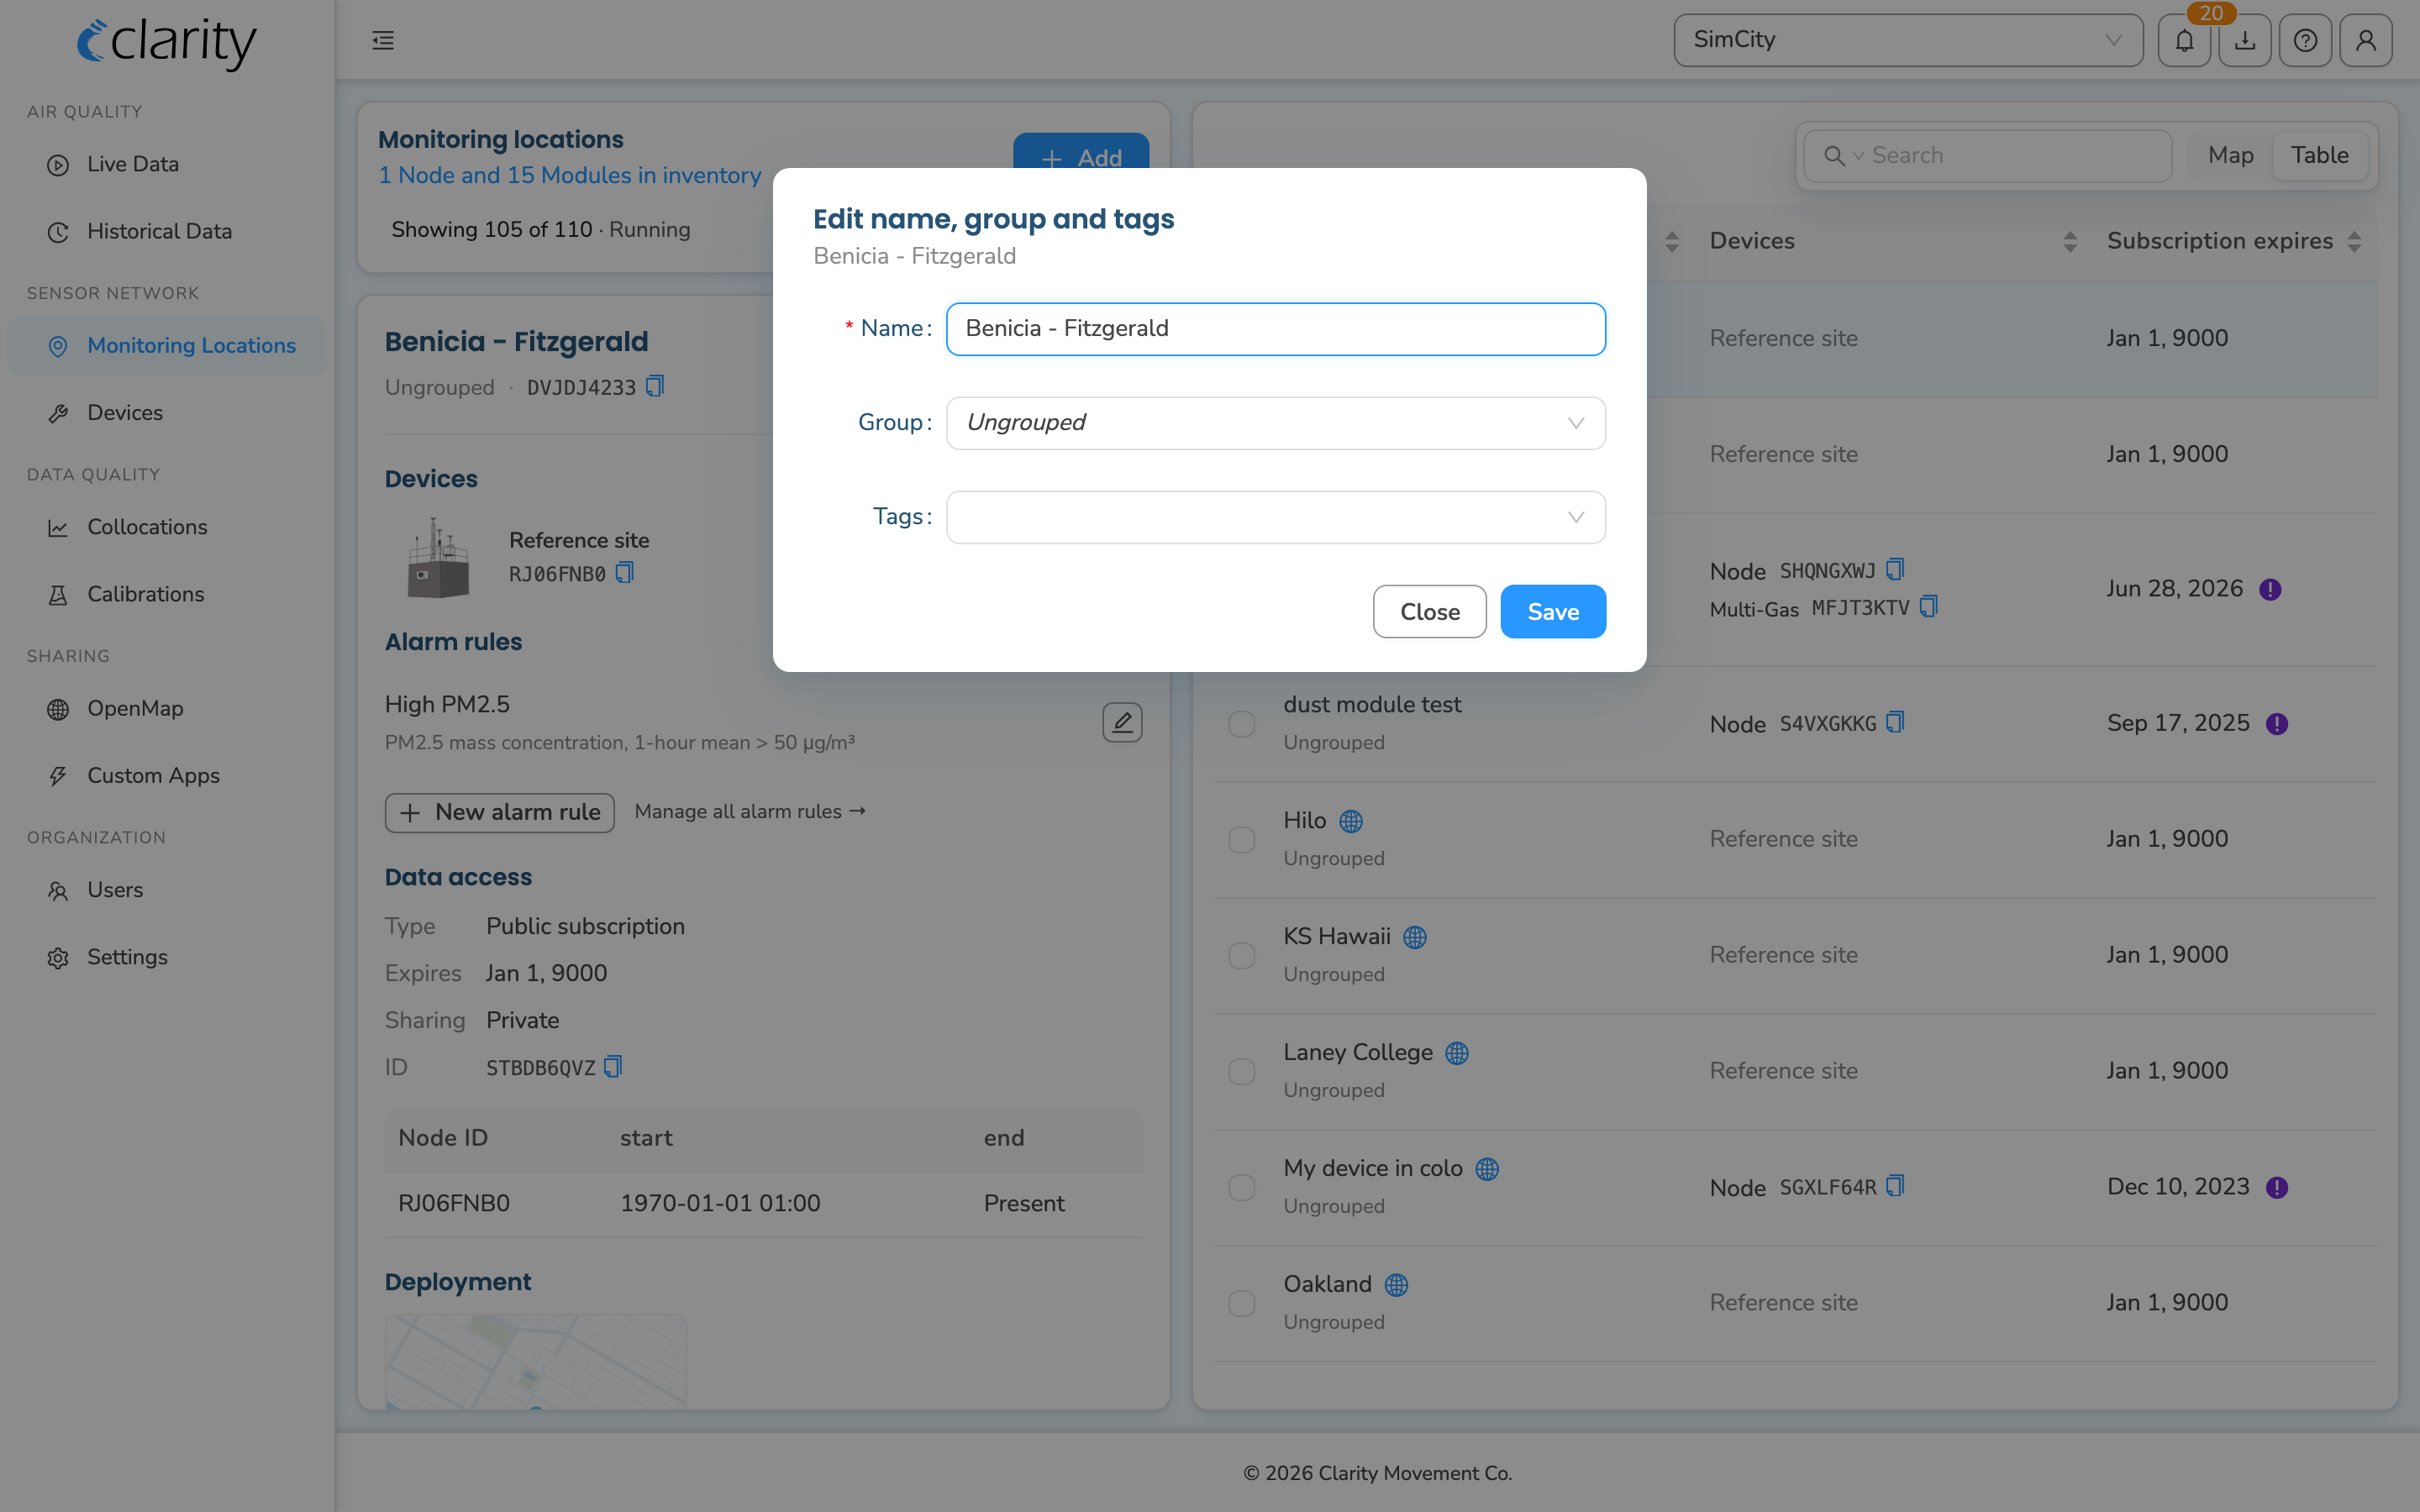
- On Monitoring Locations, find the location you want to edit and click its row in the table (or click its marker on the map). The left-column details panel opens for that single location.
- At the top of the details panel, next to the location's name, click the edit (pencil) icon.
- The Edit name, group and tags dialog opens. Here you can:
- Name — type a new name. (Required — you can't save a blank name.)
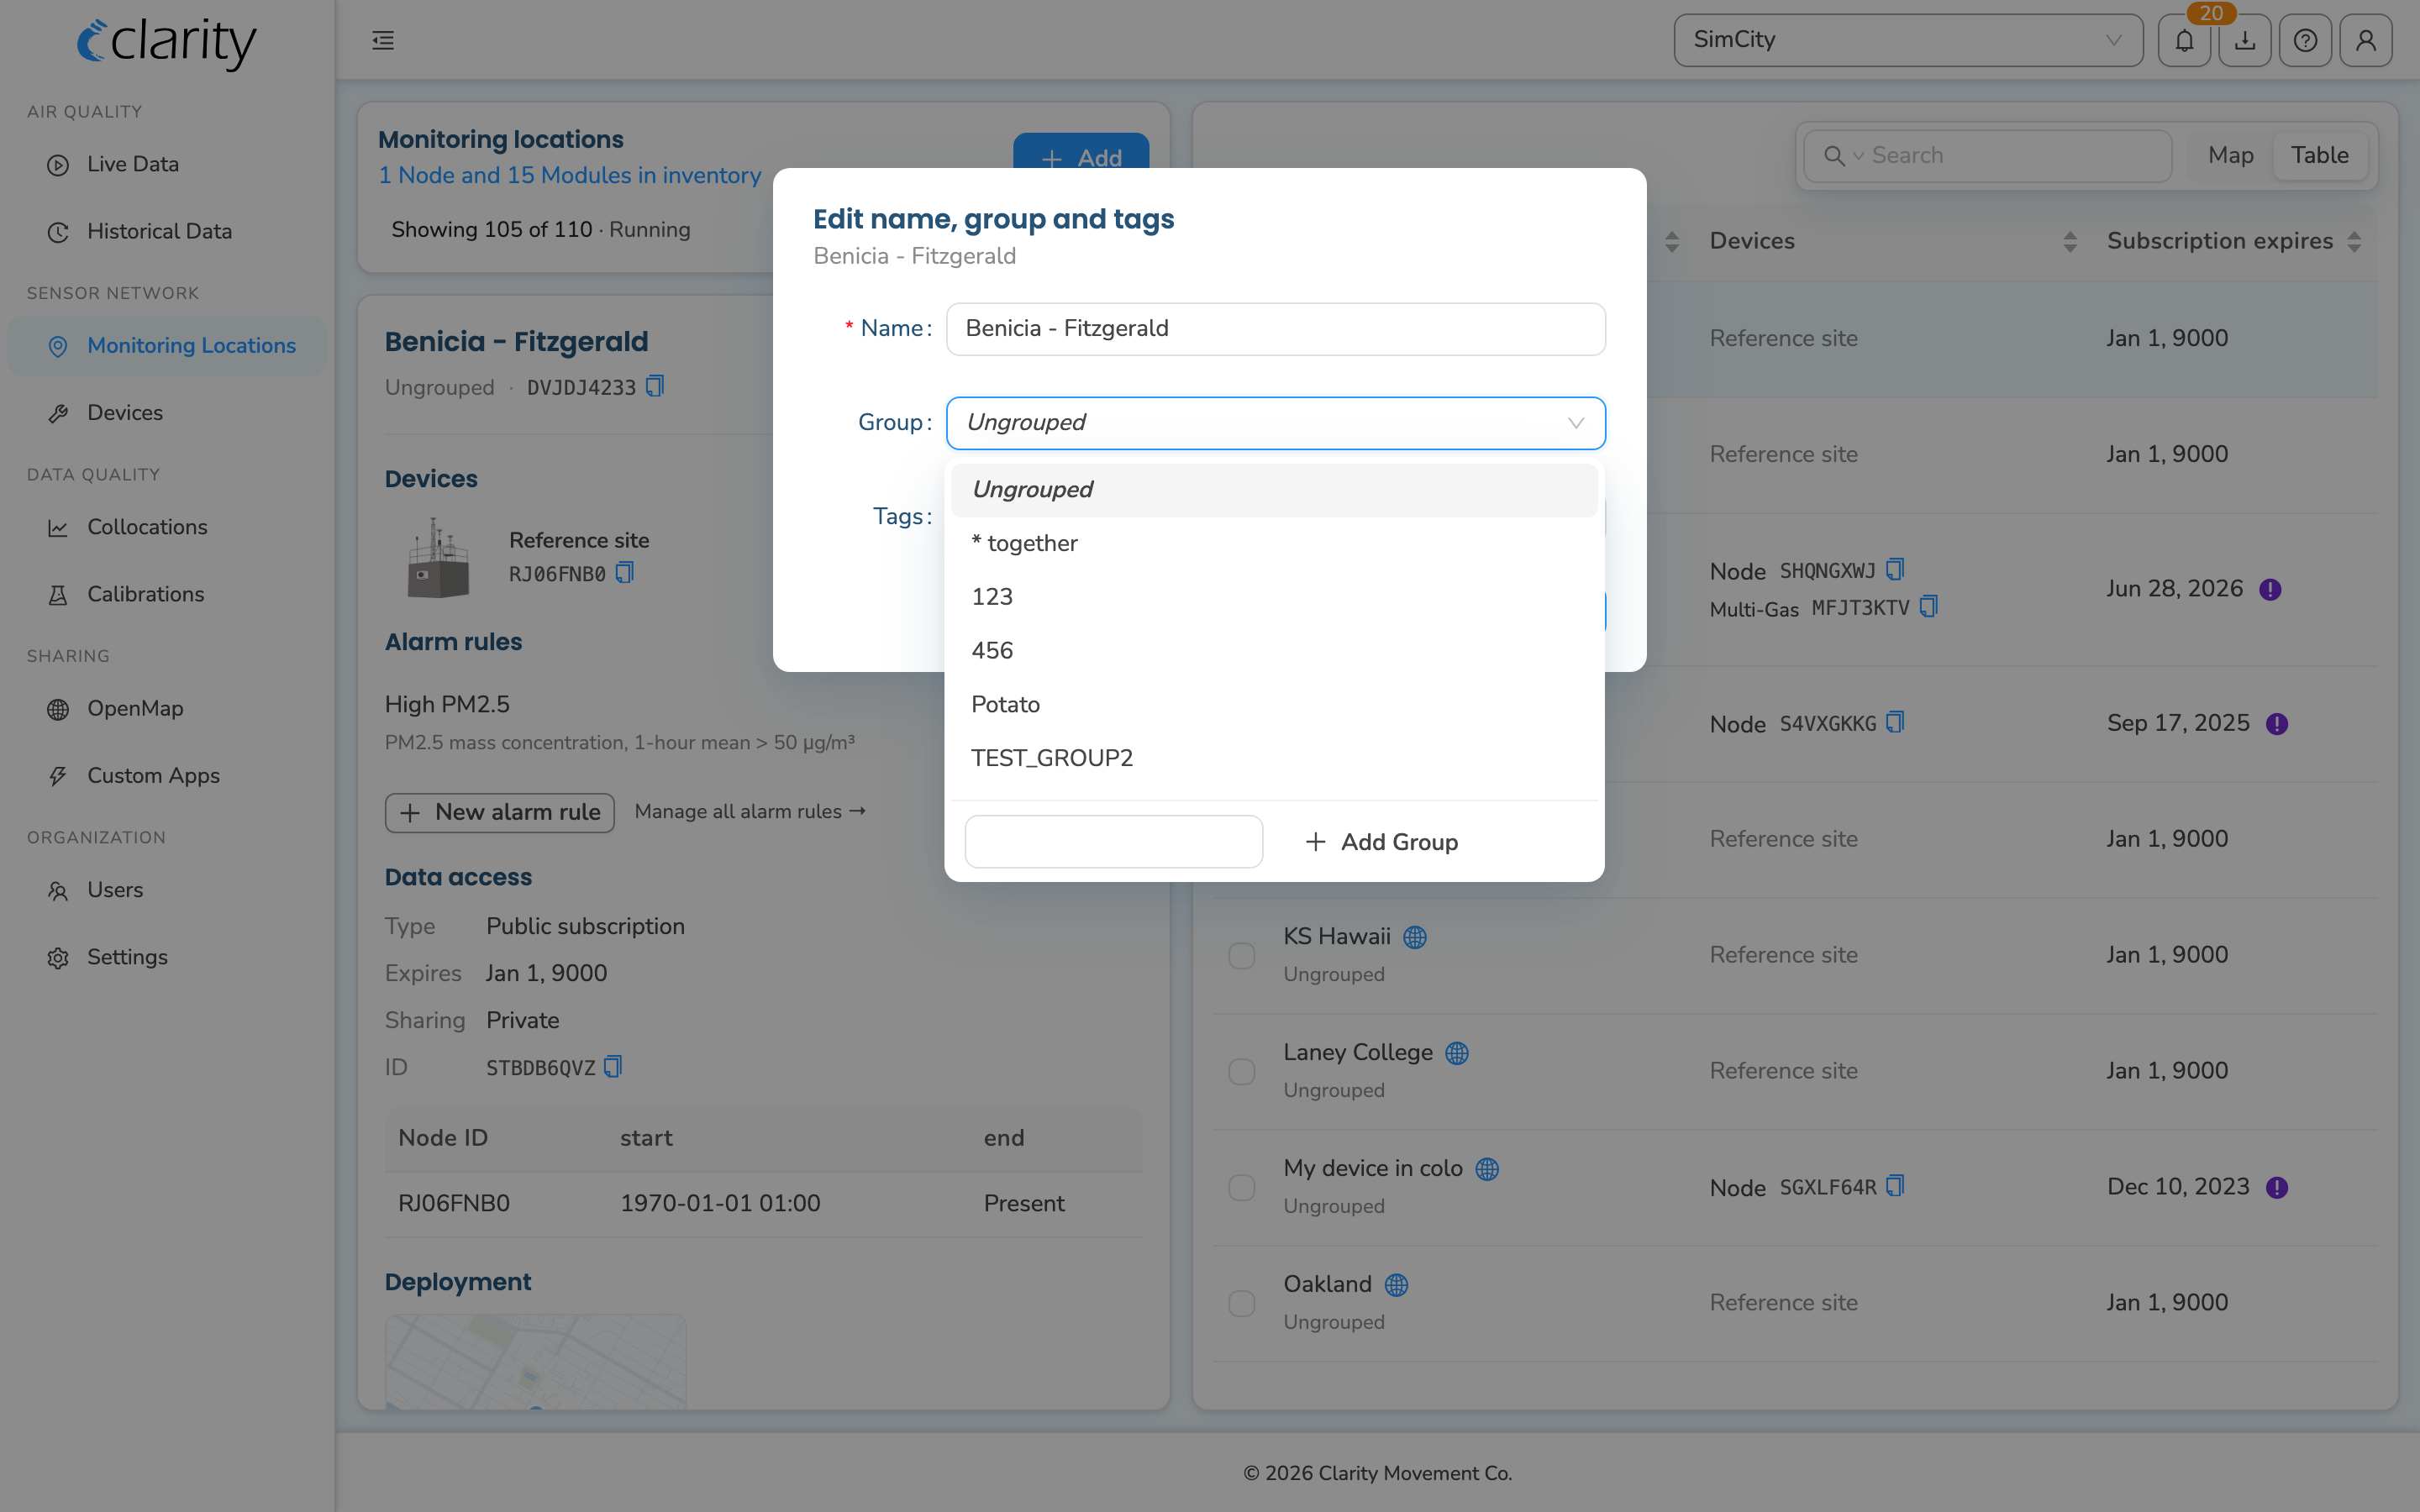
- Group — pick an existing group from the dropdown, or create a new one: open the dropdown, type the new group name in the box at the bottom, and click Add Group. Choose Ungrouped to remove the location from any group.
- Tags — type a tag and press Enter to add it, pick from existing tags, or remove a tag you no longer want. You can add several.
- Click Save. You'll see an "Updated." confirmation and the panel refreshes with the new details. (Click Close to dismiss without saving.)
Repeat for any other location you want to label.
Set a group or tags for several locations at once
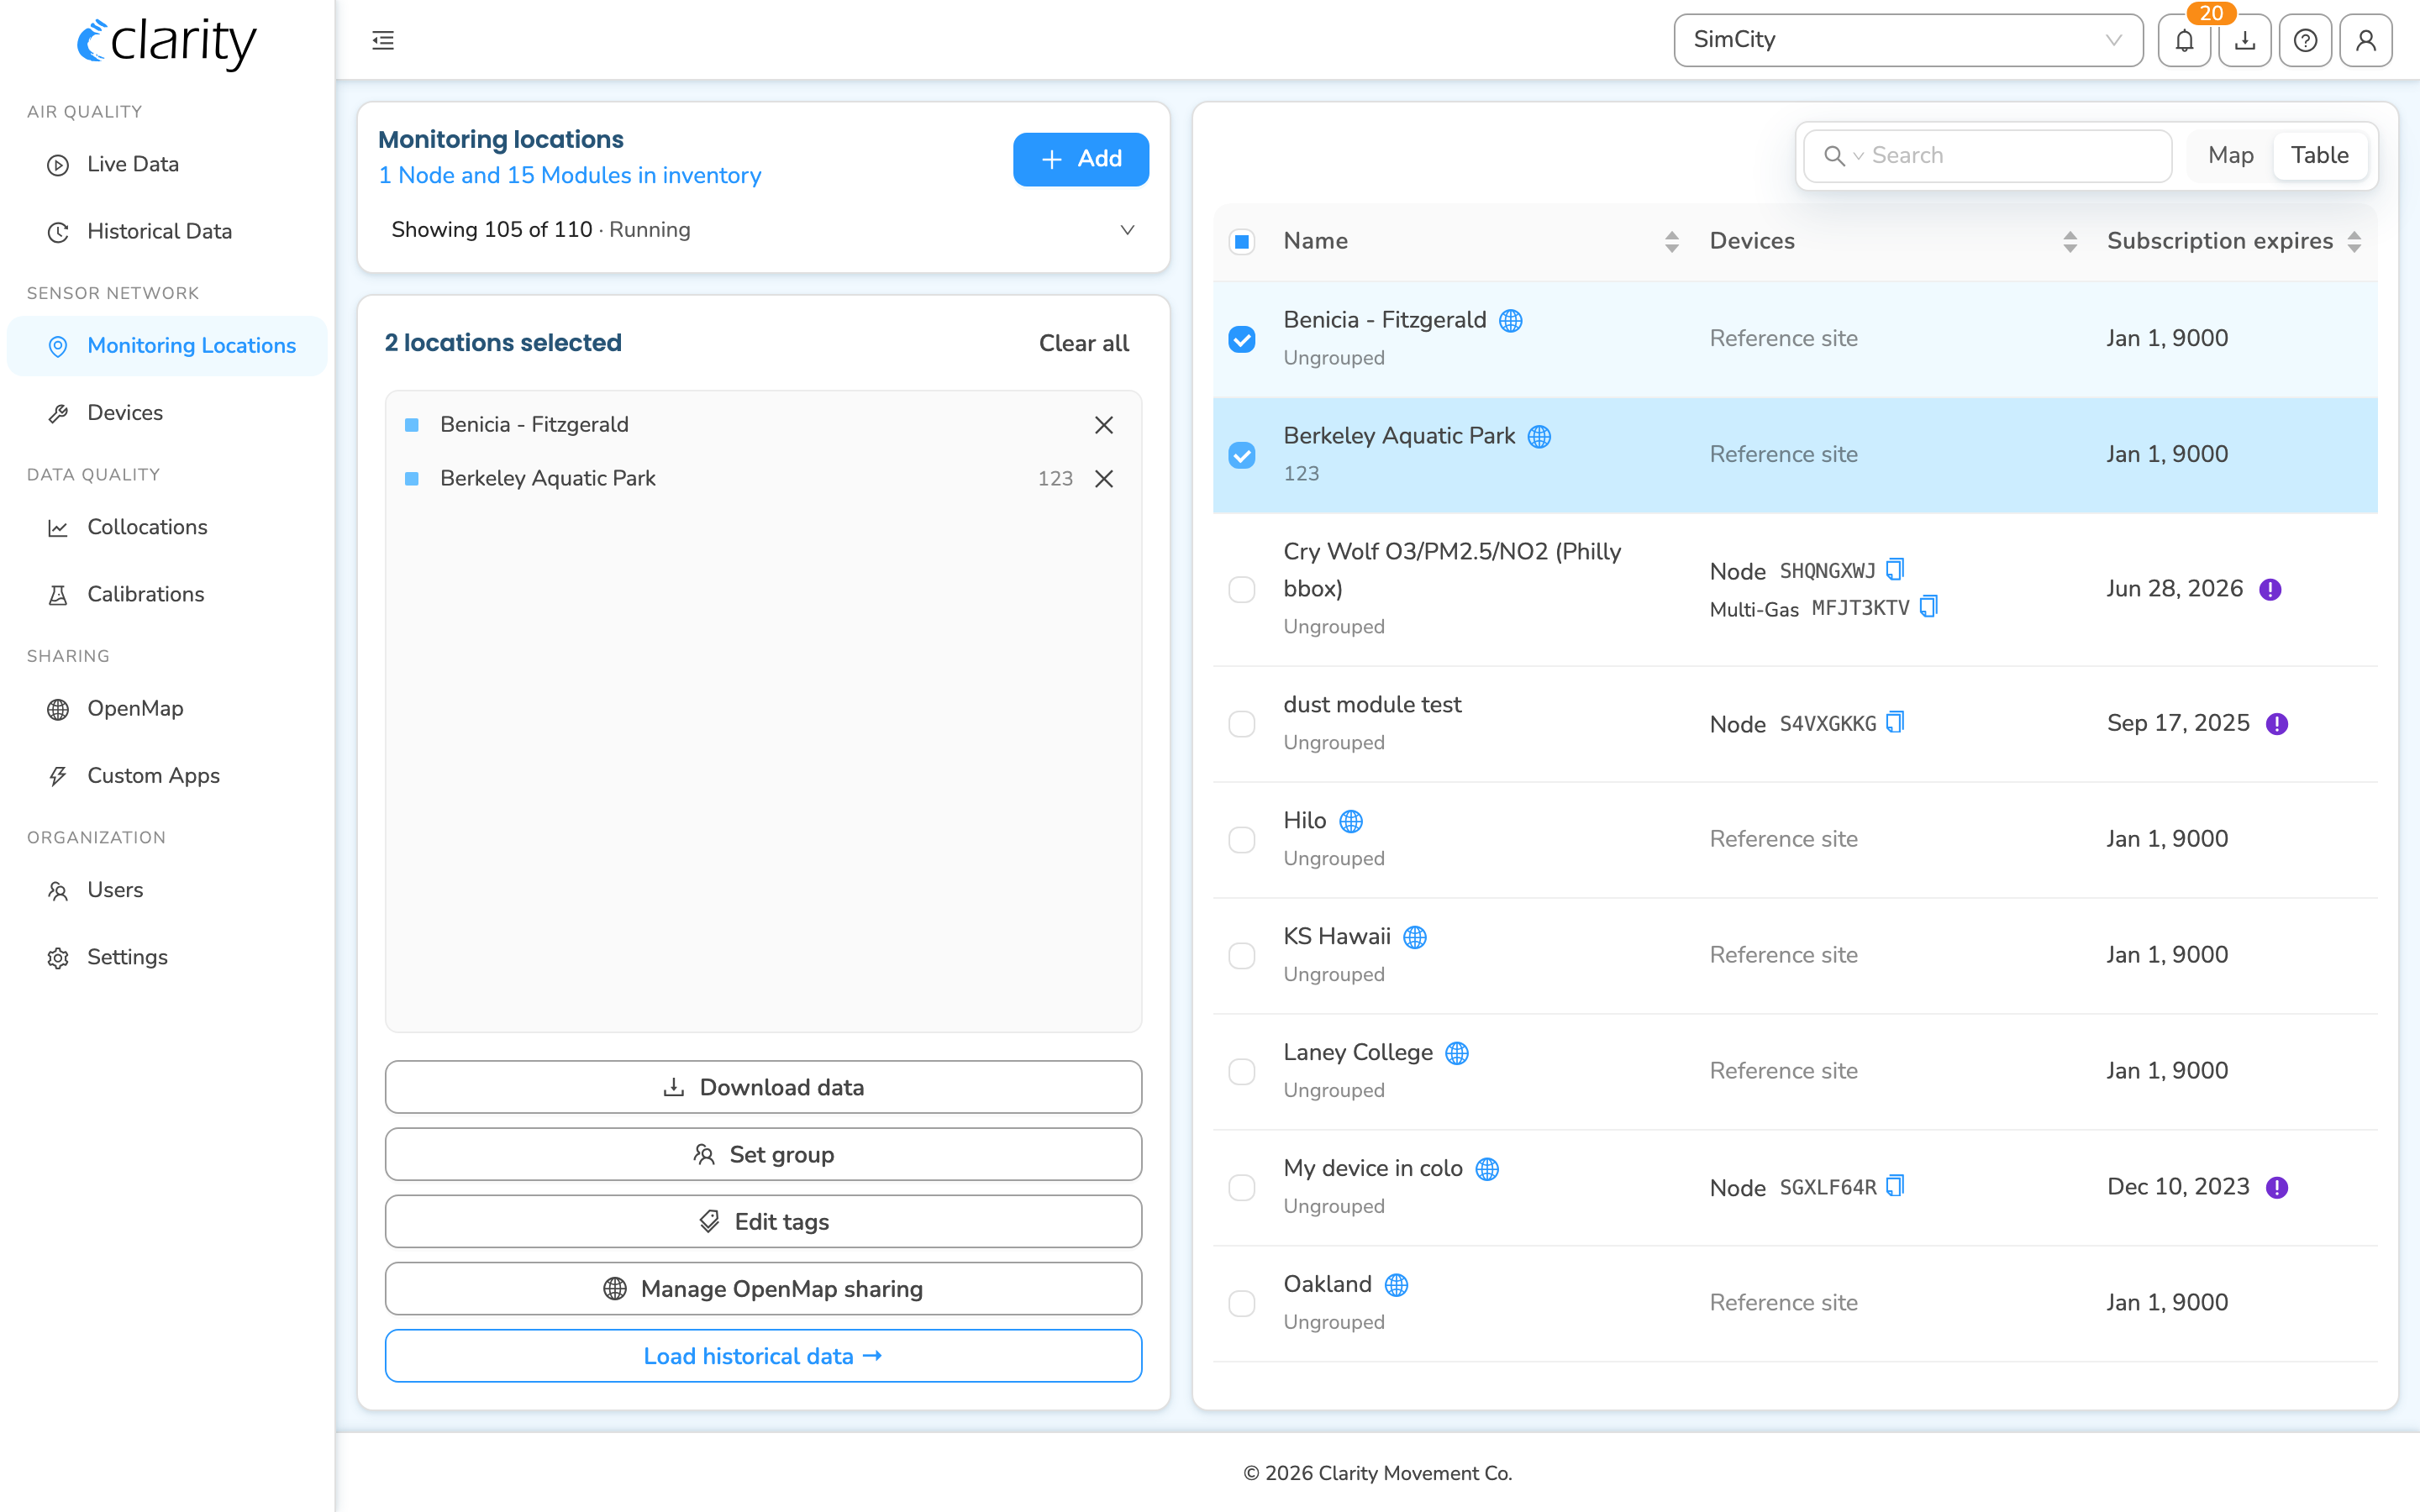
You can apply a group or tags to several locations at once. Select multiple locations and apply a group or tags to all of them in a single step.
- On Monitoring Locations, select more than one location:
- In the table, tick the checkboxes on the rows you want (the header checkbox selects or clears every visible row), or
- On the map, click each marker you want to include.
- The left column switches to a multi-select panel headed "N locations selected", listing everything you picked. (Click a row in that list to narrow back down to just that one; click the X on a row to drop it from the selection; Clear all empties the selection.)
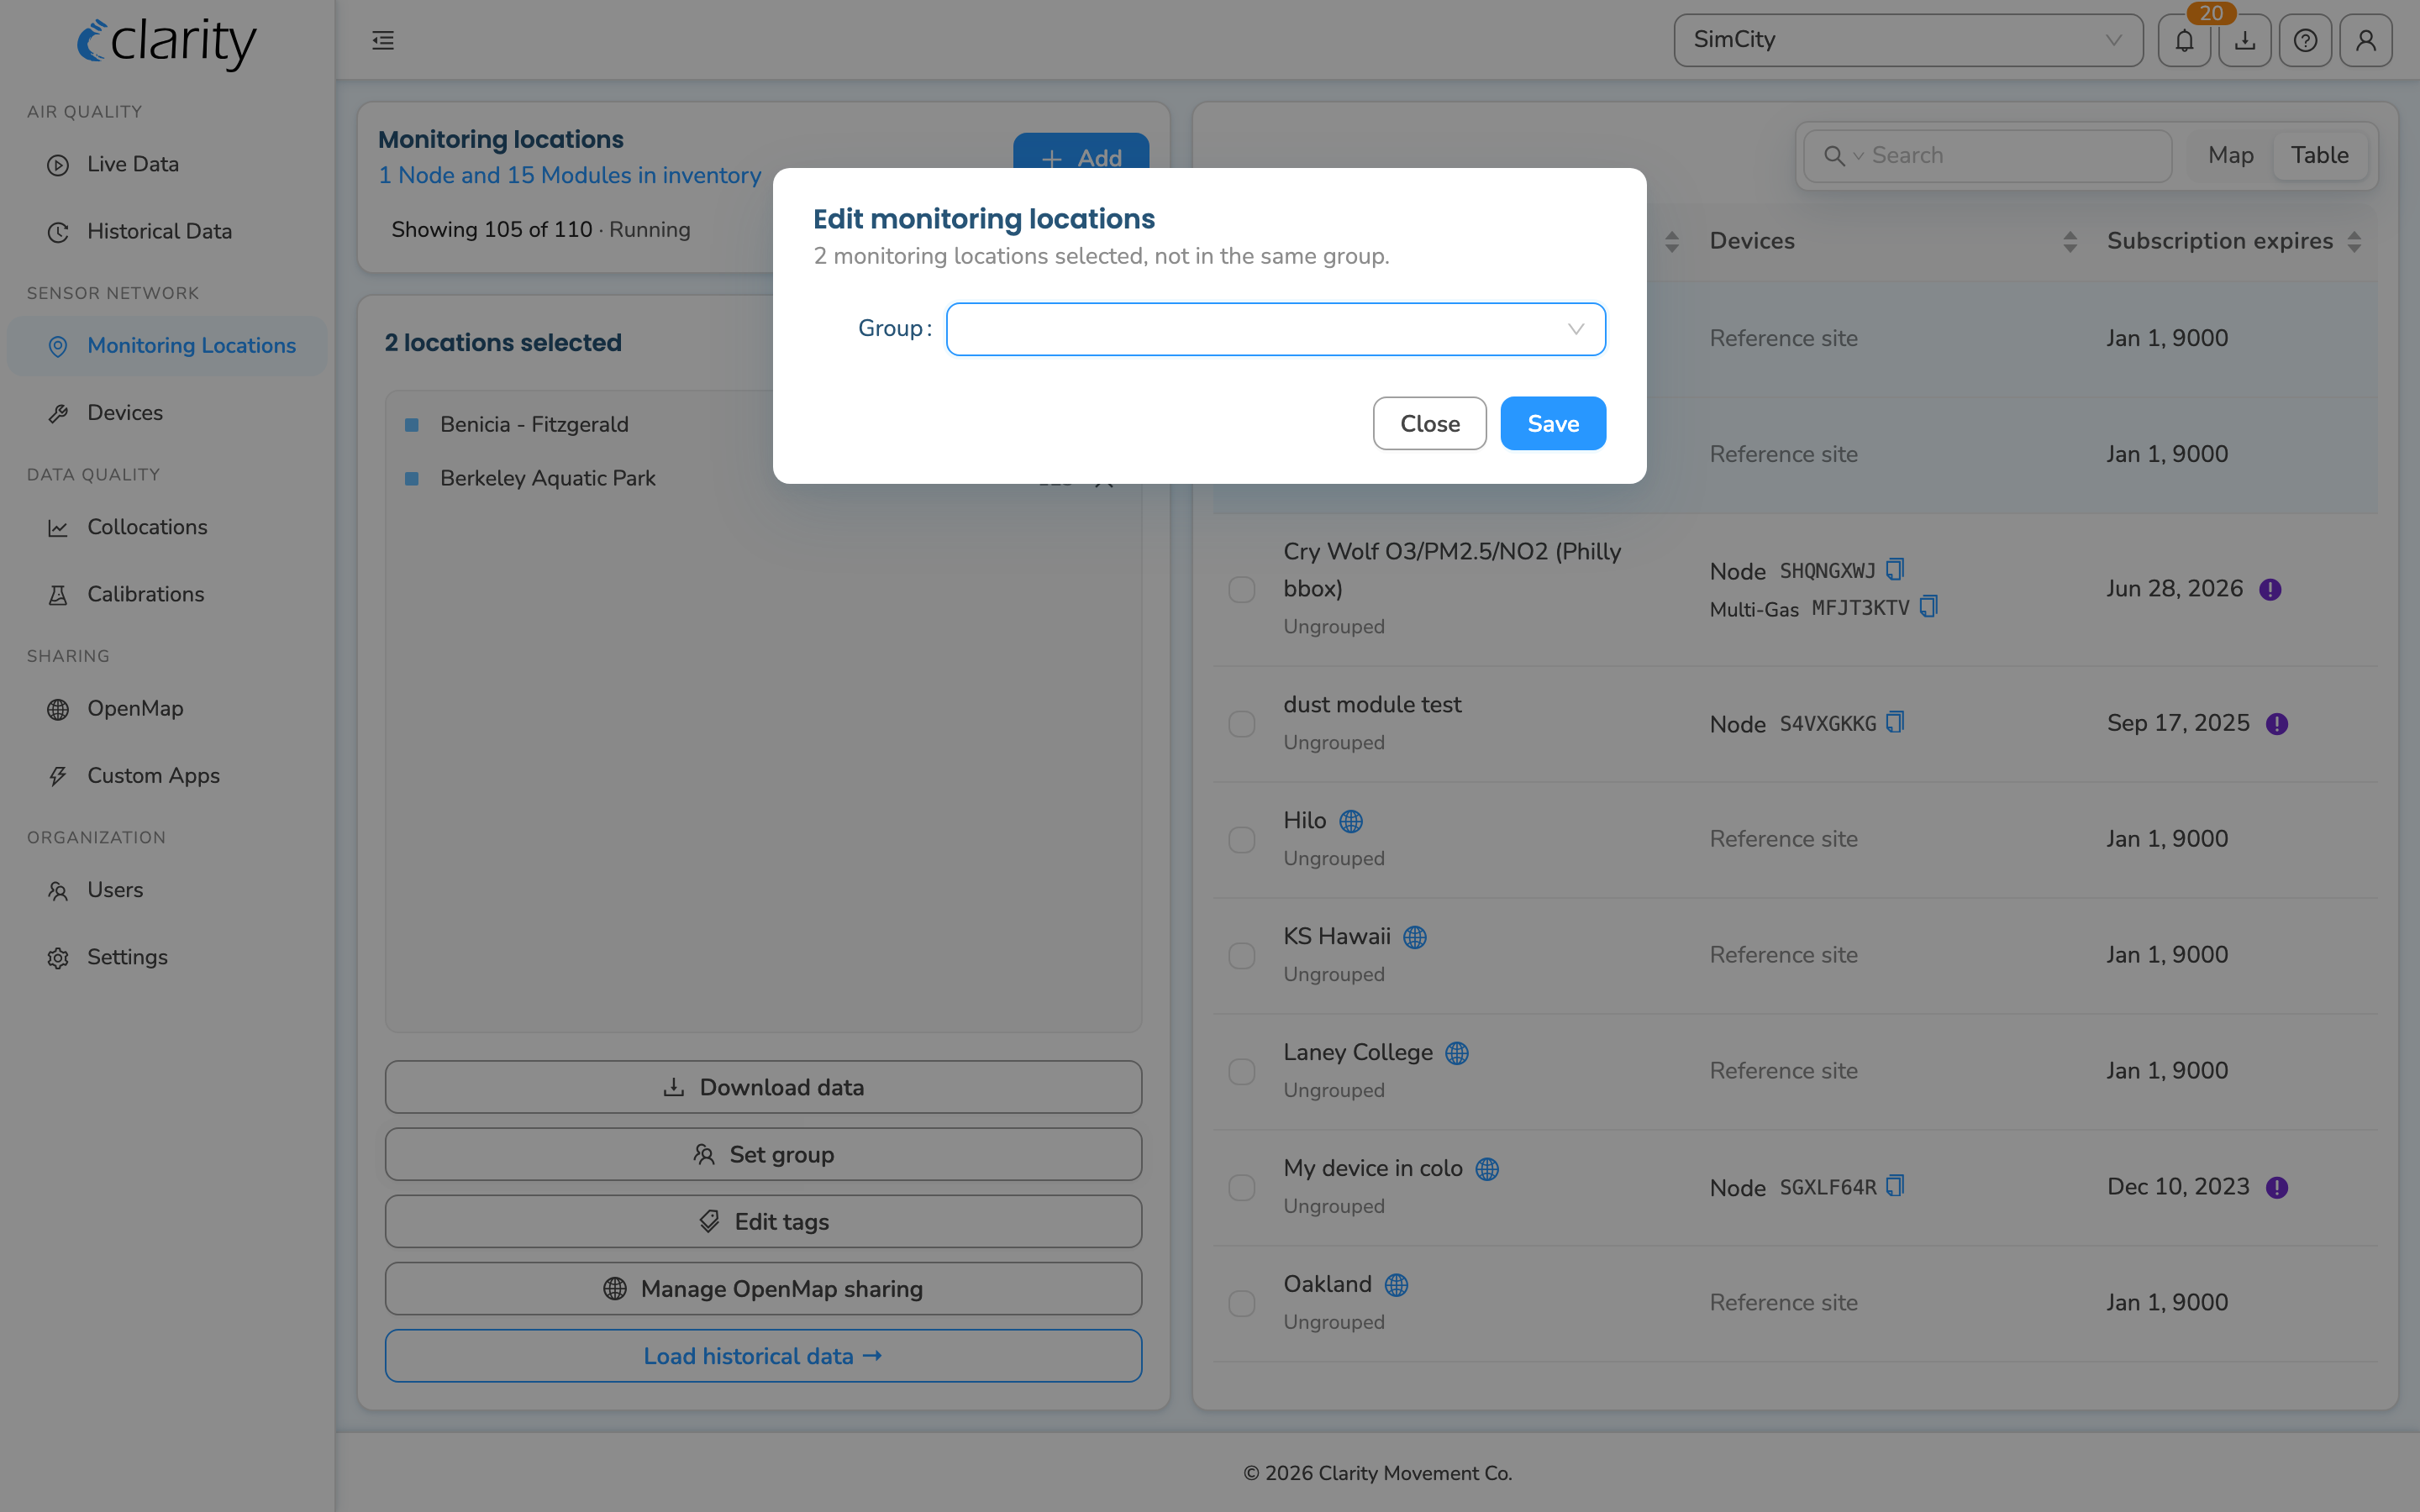
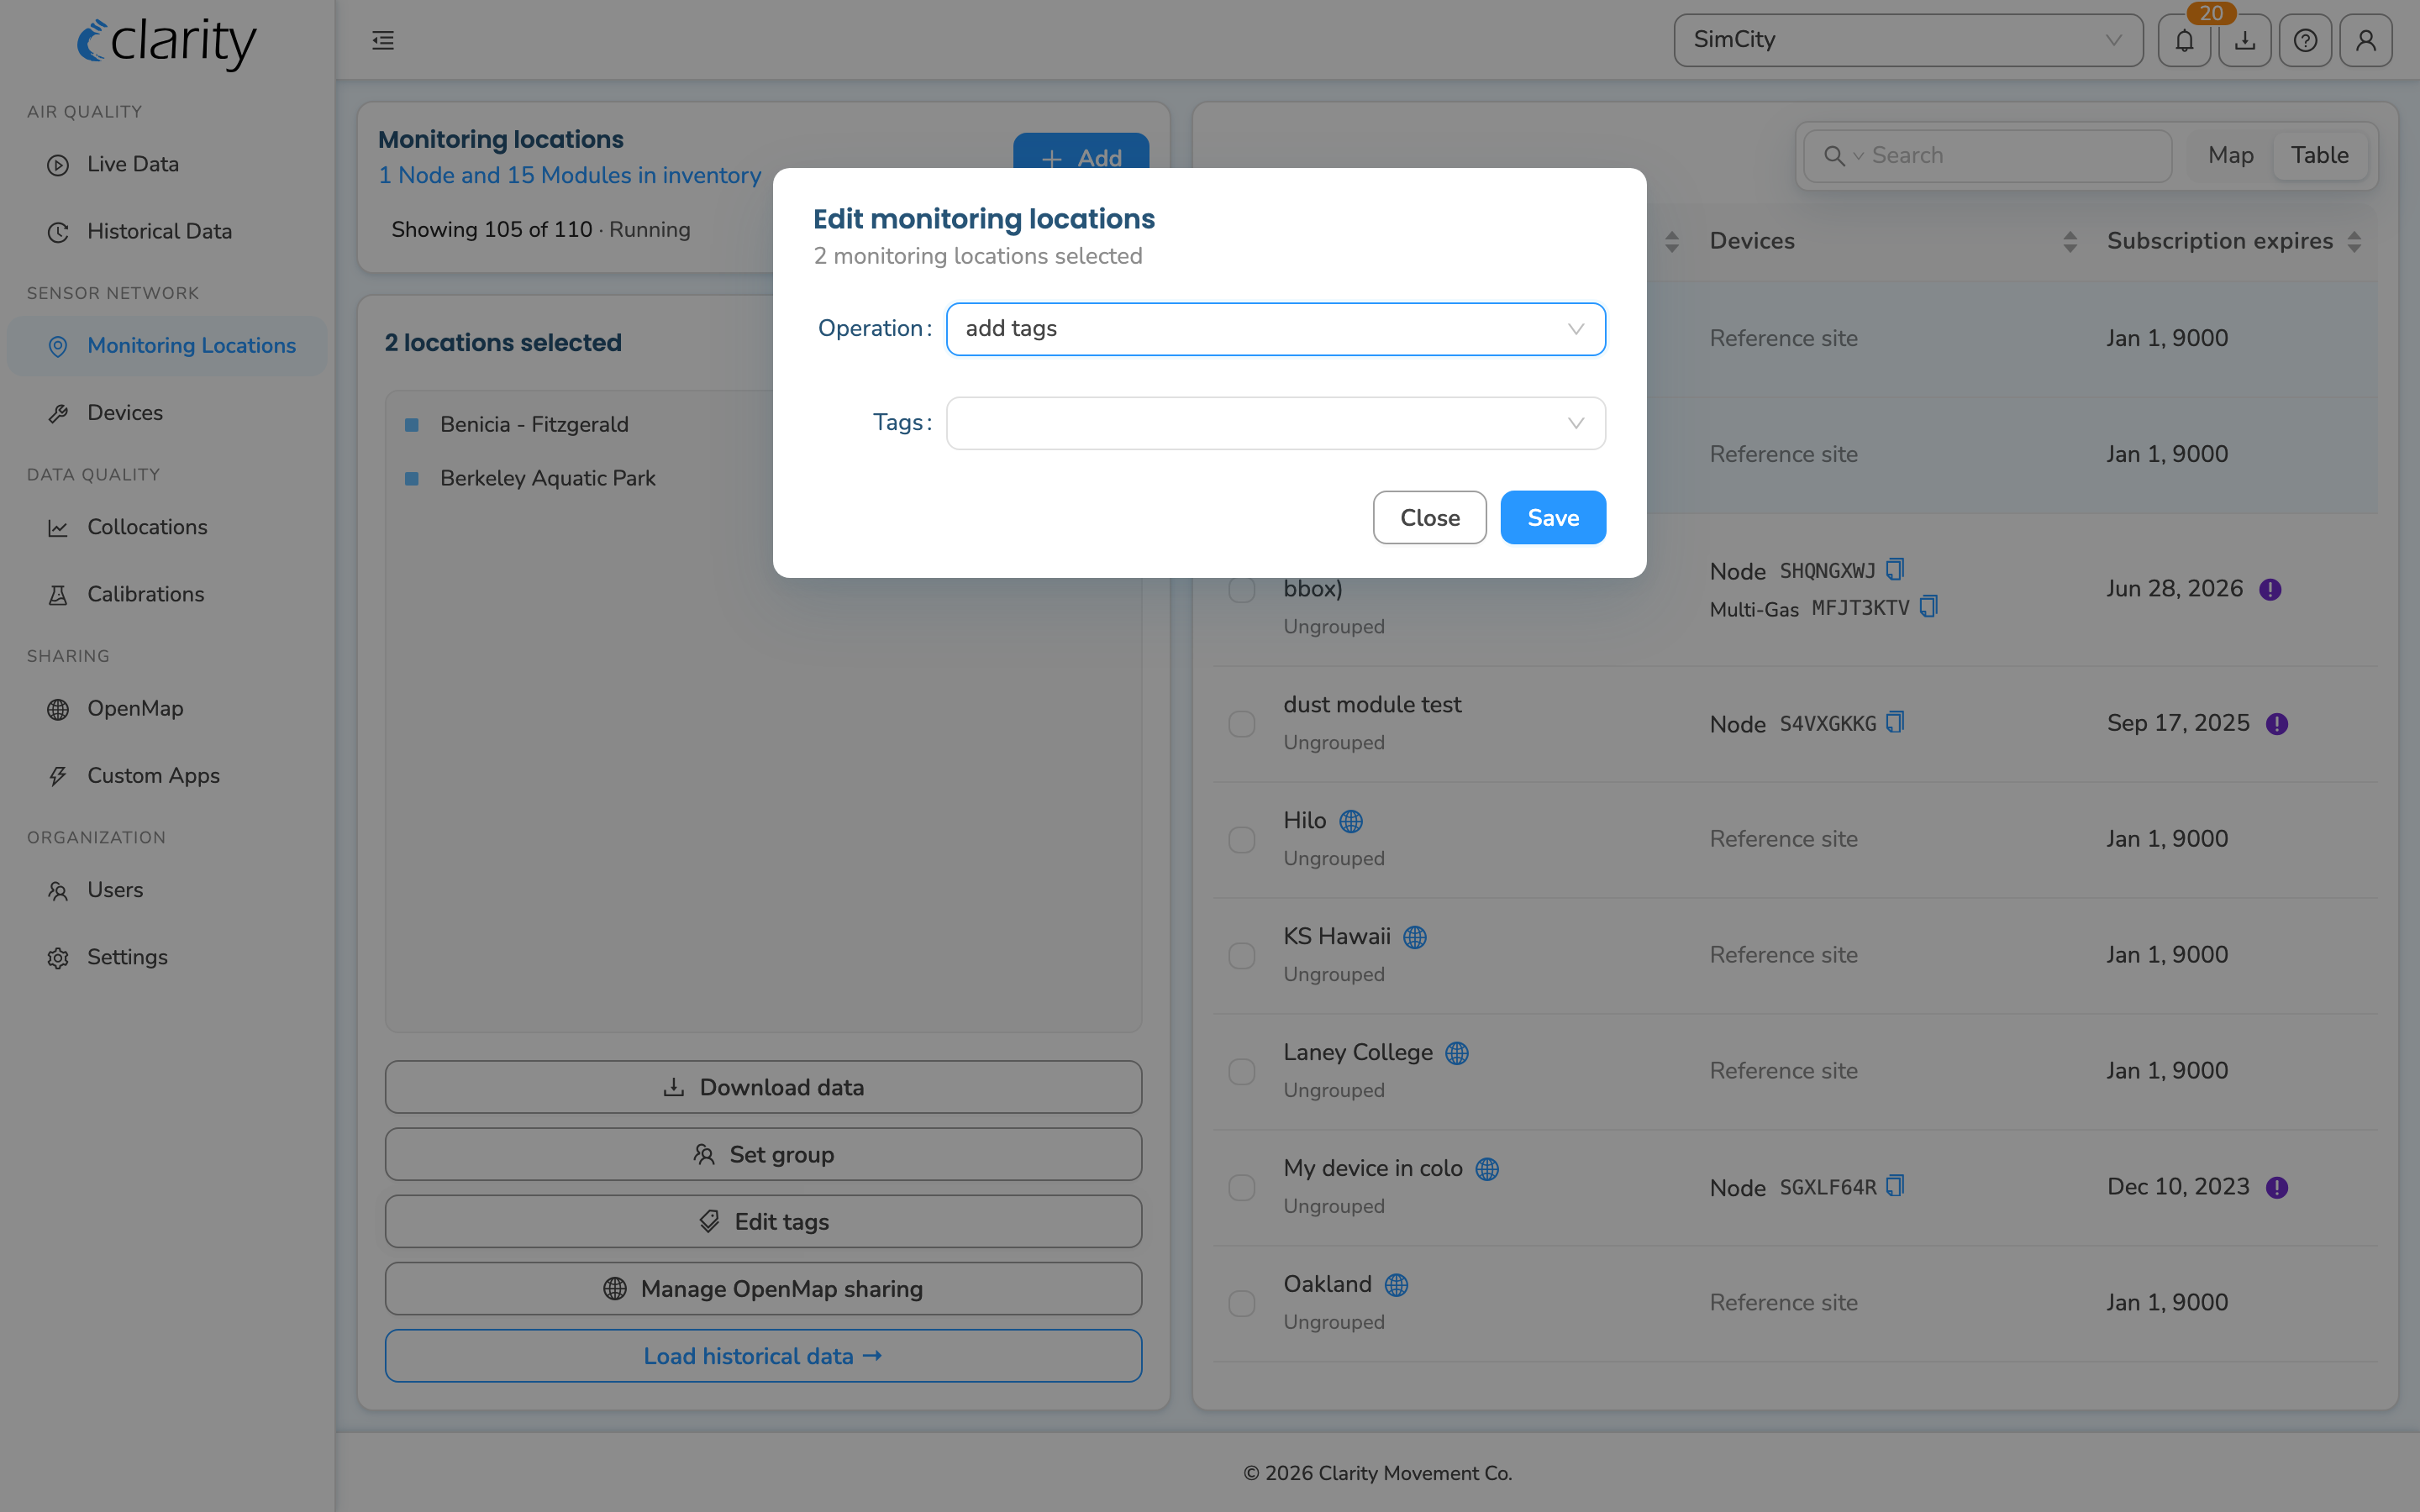
- Choose an action:
- Set group — opens the Edit monitoring locations dialog. Pick or create a group (same "Add Group" inline control as above), then Save. The group is applied to every selected location. The dialog's subtitle tells you whether the selected locations are currently in the same group, a mix, or not yet grouped.
- Edit tags — opens the Edit monitoring locations dialog with an Operation selector. Choose add tags or remove tags, enter the tags, then Save to apply that change across the whole selection.
- You'll see a confirmation that the group or tags were updated for the selected locations.
Filter and search by name, group, or tag
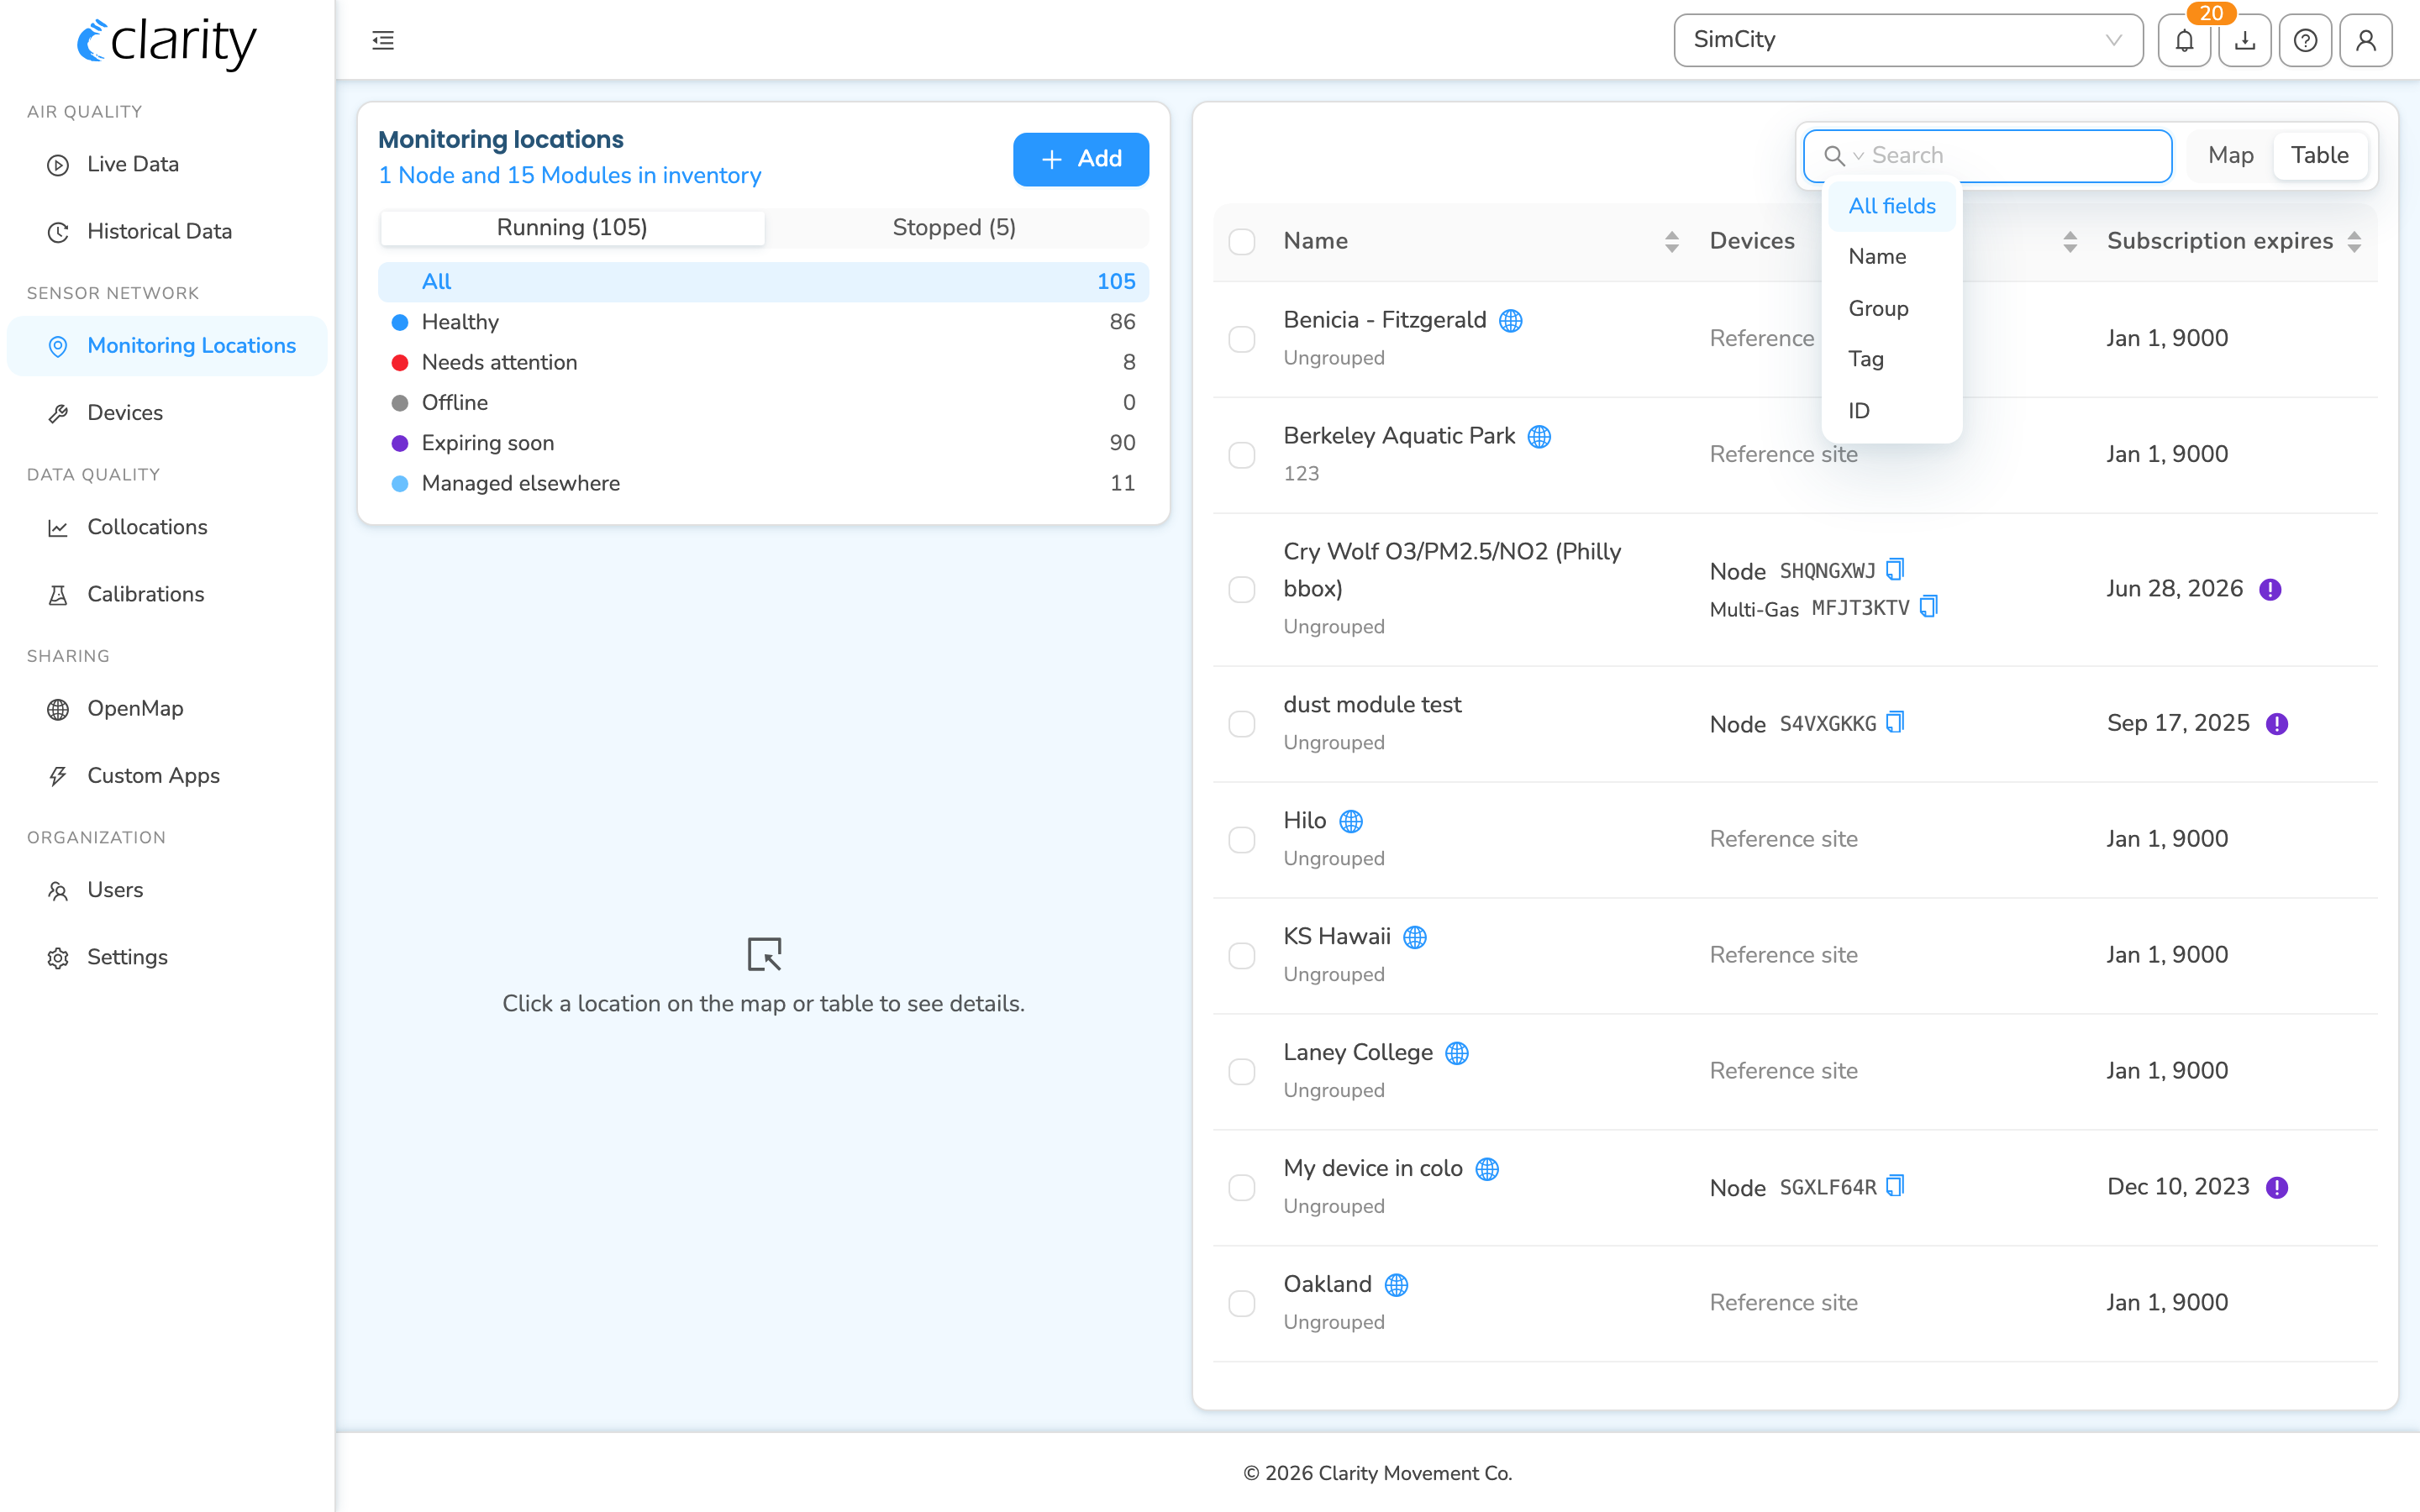
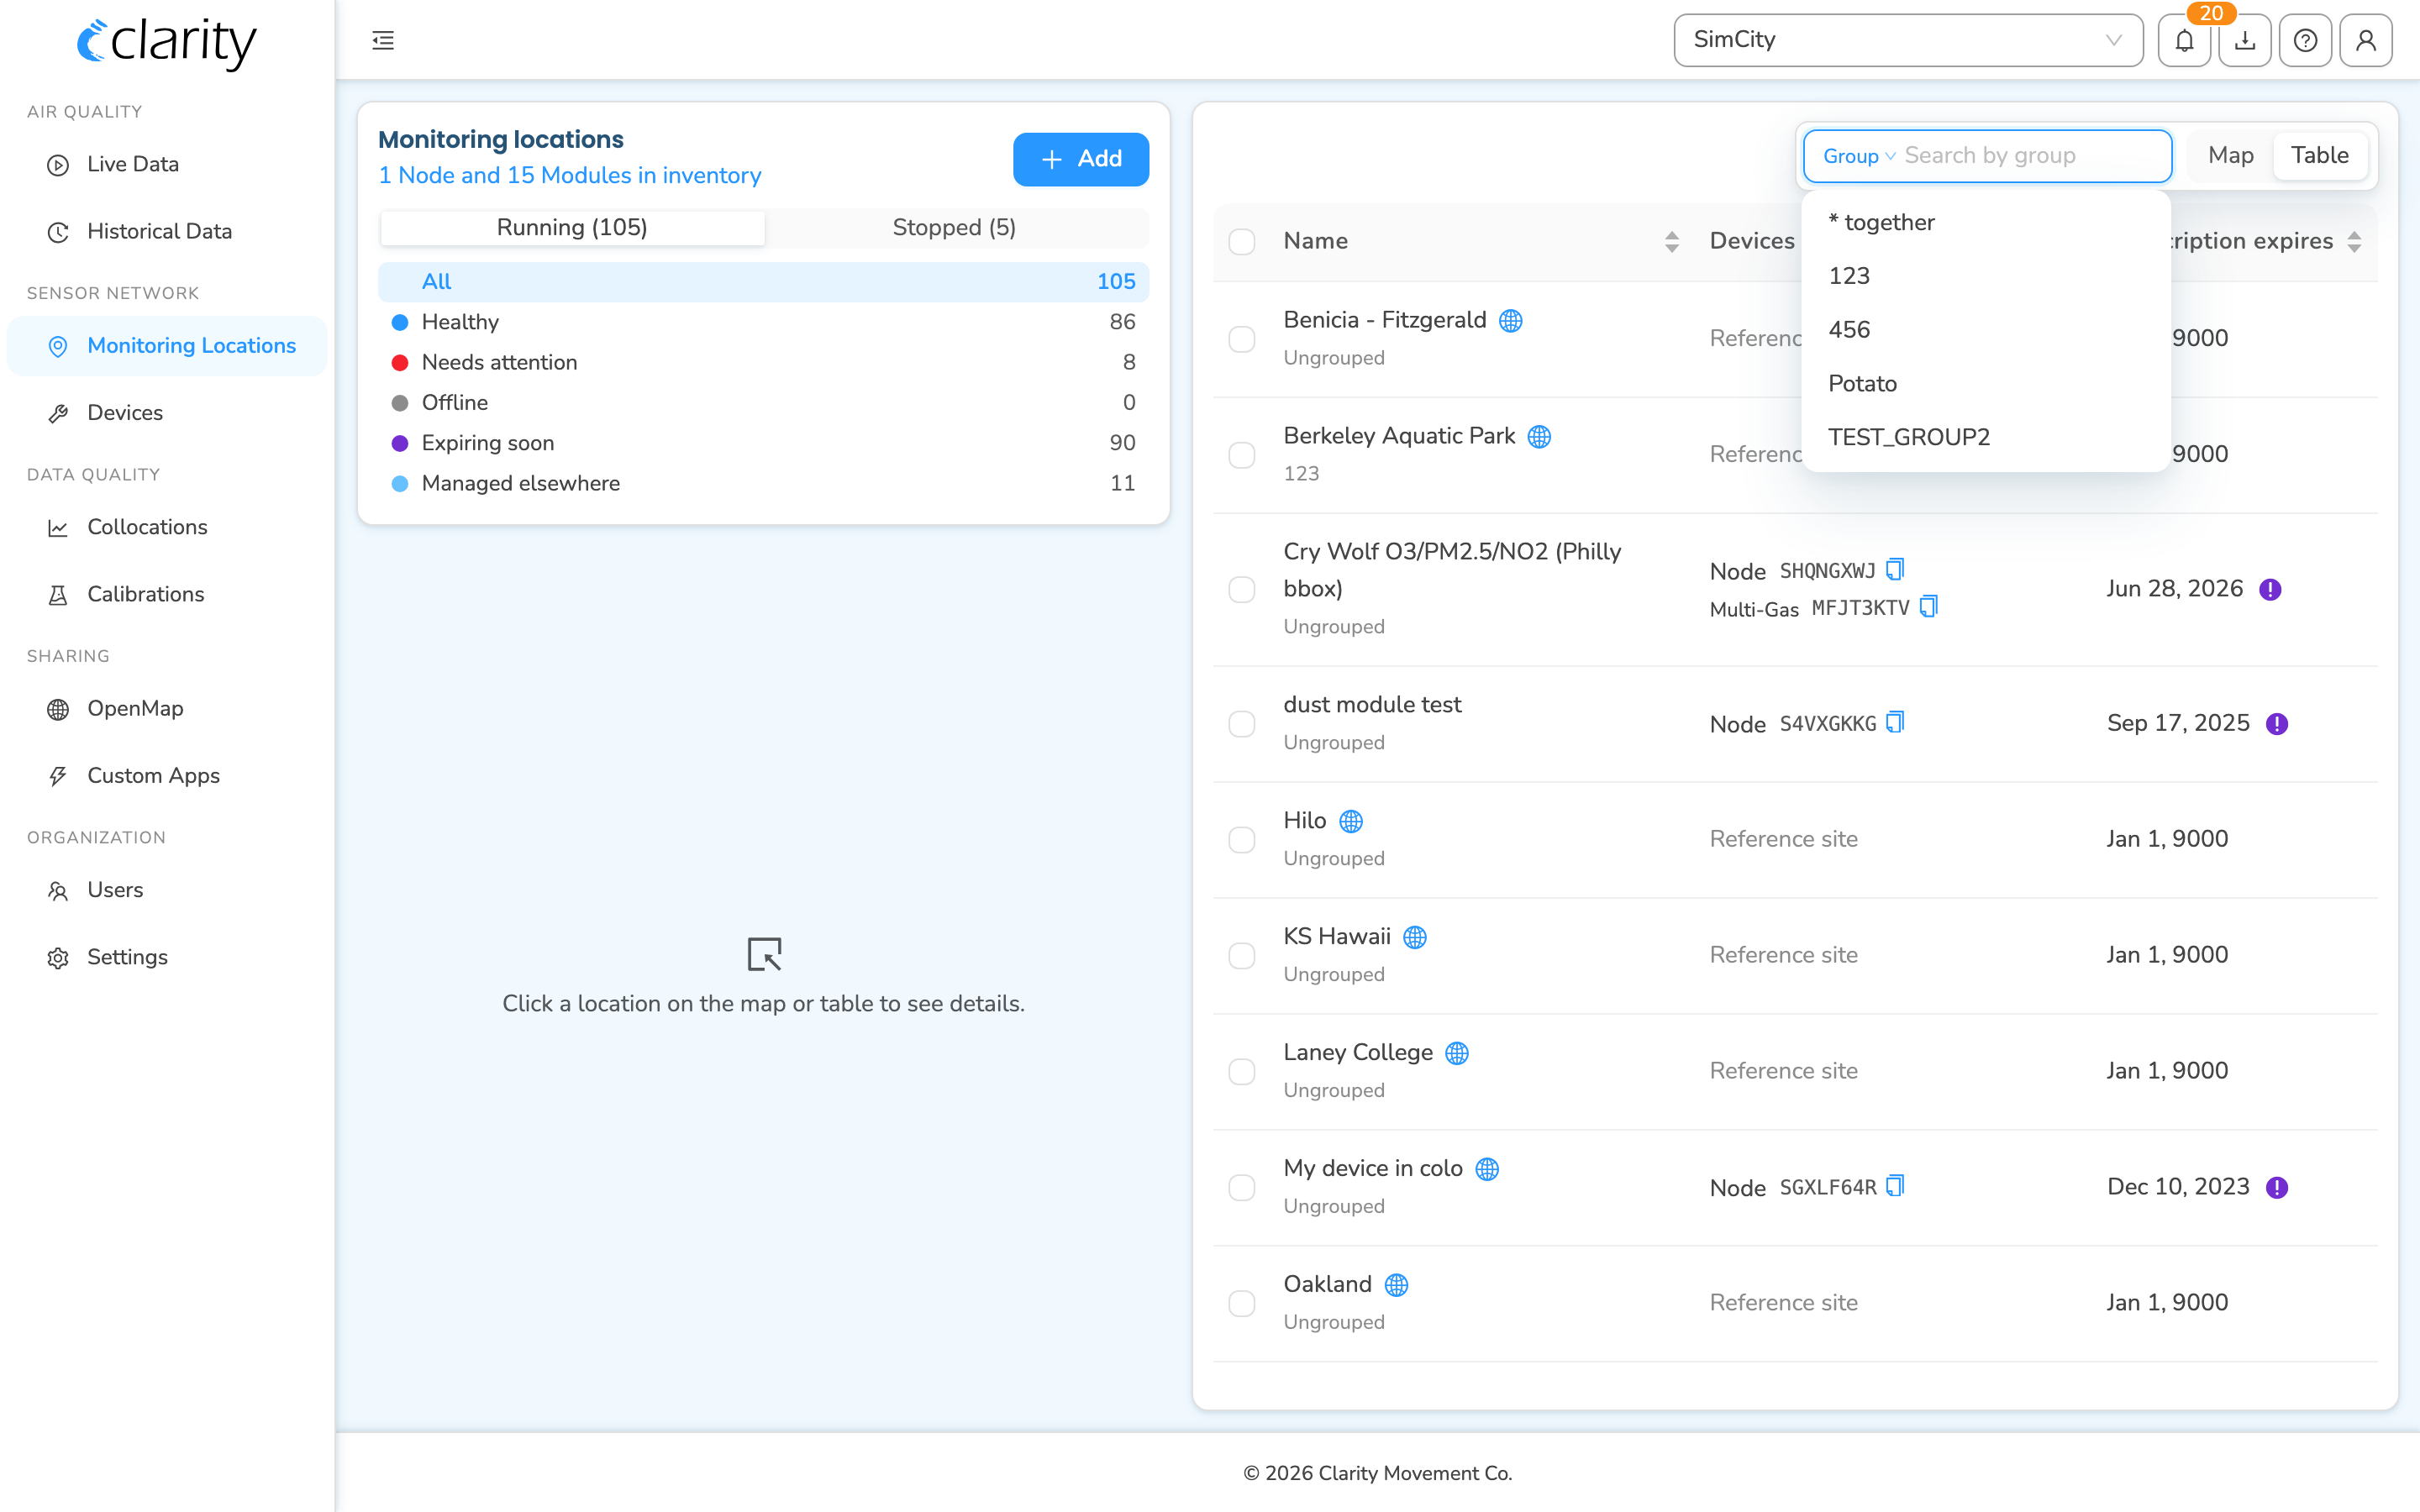
Once your locations carry groups and tags, use the search box at the top-right of the Monitoring Locations map/table to find them.
- Type any text to search across all fields at once — name, group, tags, and IDs (datasource
D…, nodeA…, paired moduleM…). - Click the small picker on the left of the search box to scope the search to a single field: All fields, Name, Group, Tag, or ID. When you pick Group or Tag, the box suggests your existing groups/tags as you type.
The same name/group/tag search works on Live Data and Historical Data, so the labels you set here pay off across the Dashboard.
What's next
- Manage your nodes on Dashboard.
- Understand what a monitoring location is.
- Get an overview of your network on Live Data.
- Subscribe to device alarms on Dashboard.
Was this article helpful?
Yes, thanks! / Not really
Still need a hand? Email us at support@clarity.io or create a support ticket, and our team will get back to you.