Managing your organization's users
Note: Only users with the Org Admin role can perform the actions below.
As an Org Admin, you can manage everyone who has access to your organization from a single page. You can:
- Add people to your organization
- Edit a person's roles
- Manage a guest's location access
- Remove people from your organization
All of this lives on the Users page.
Where to find the Users page
From the left sidebar, open Organization > Users. Users is a top-level entry in the ORGANIZATION group near the bottom of the sidebar.
The Users page opens on two tabs:
- People — everyone who can access your organization (this is where you add, edit, and remove users).
- Applications — API integrations created by or connected to your organization. (Managing applications and API keys is covered in a separate article.)
Each tab label shows a live count, for example People · 16 and Applications · 2.
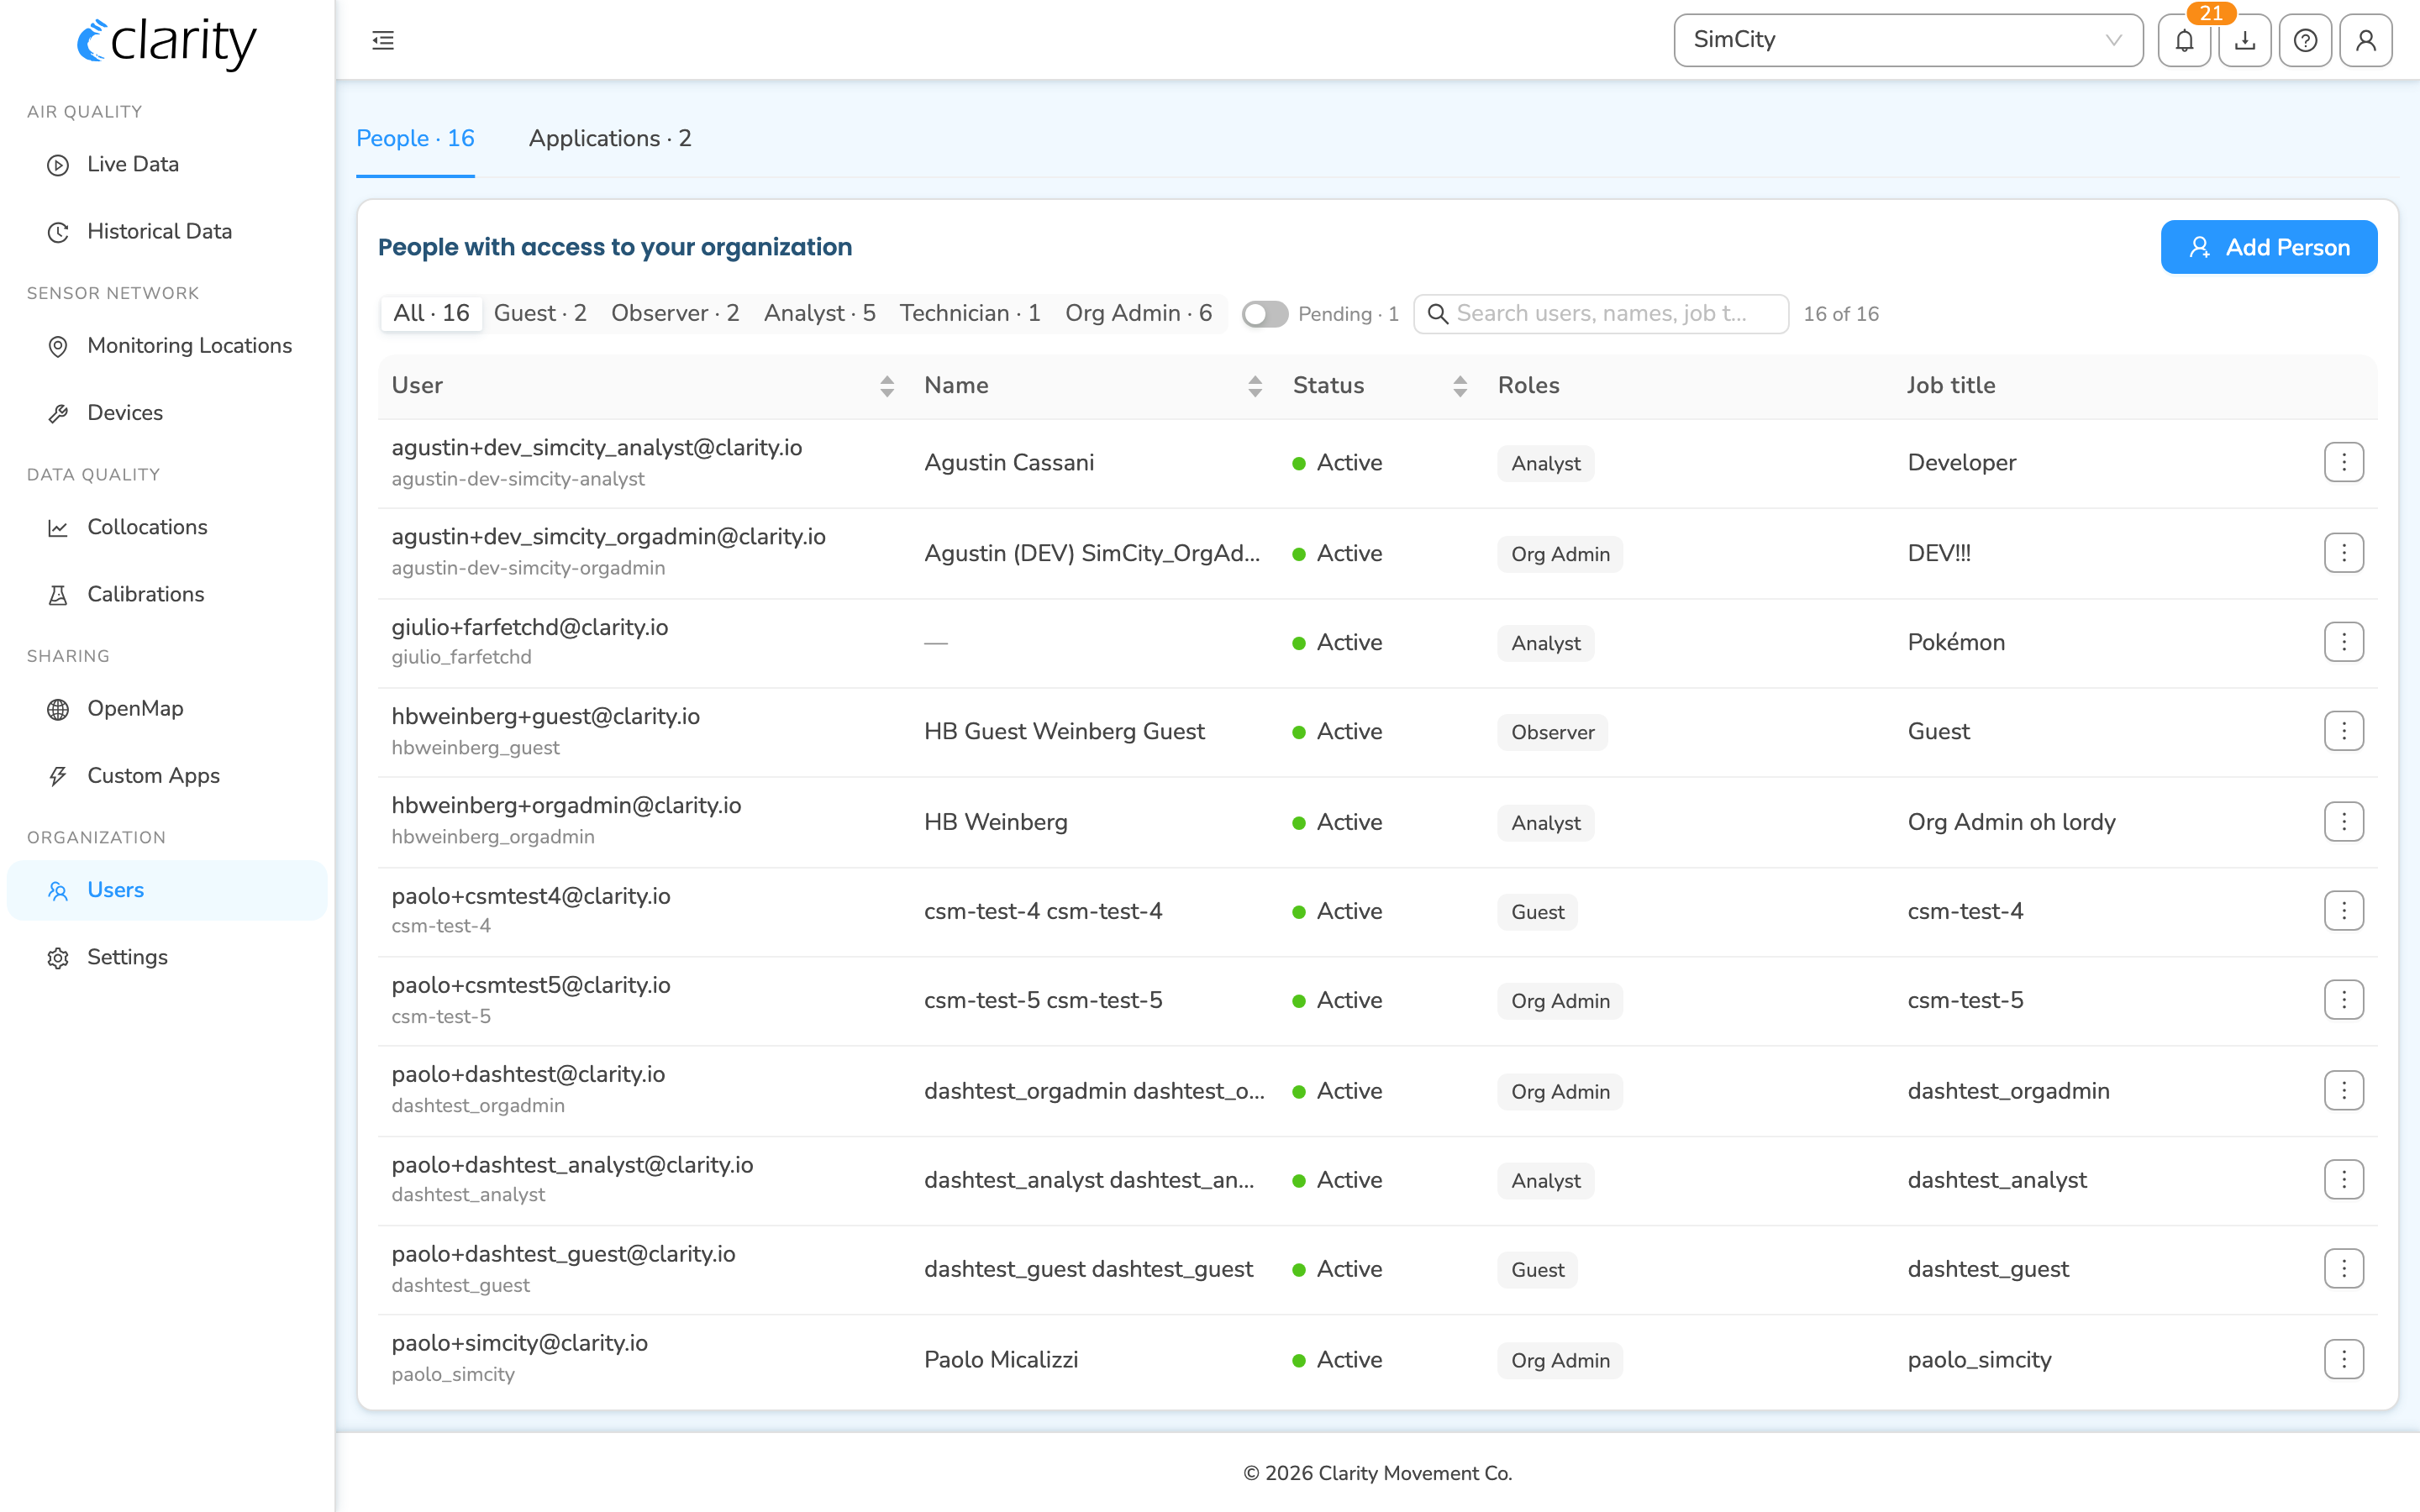
Reading the People list
The People tab shows one unified list of everyone with access. Each row shows:
- User — the person's email, with their username underneath once they've signed up.
- Name — first and last name (a dash until they complete sign-up).
- Status — a colored dot: green Active means they've finished signing up; grey Pending means they've been invited but haven't completed sign-up yet.
- Roles — the roles assigned to that person, shown as tags.
- Job title — if they've set one.
Above the list you'll find tools to narrow it down:
- A role filter (All / Guest / Observer / Analyst / Technician / Org Admin), each with a count.
- A Pending toggle to show only people who haven't finished signing up yet.
- A search box that matches across emails, usernames, names, and job titles.
How to add a person to your organization
- Log in to the Clarity Dashboard.
- From the left sidebar, open Organization > Users. You'll land on the People tab.
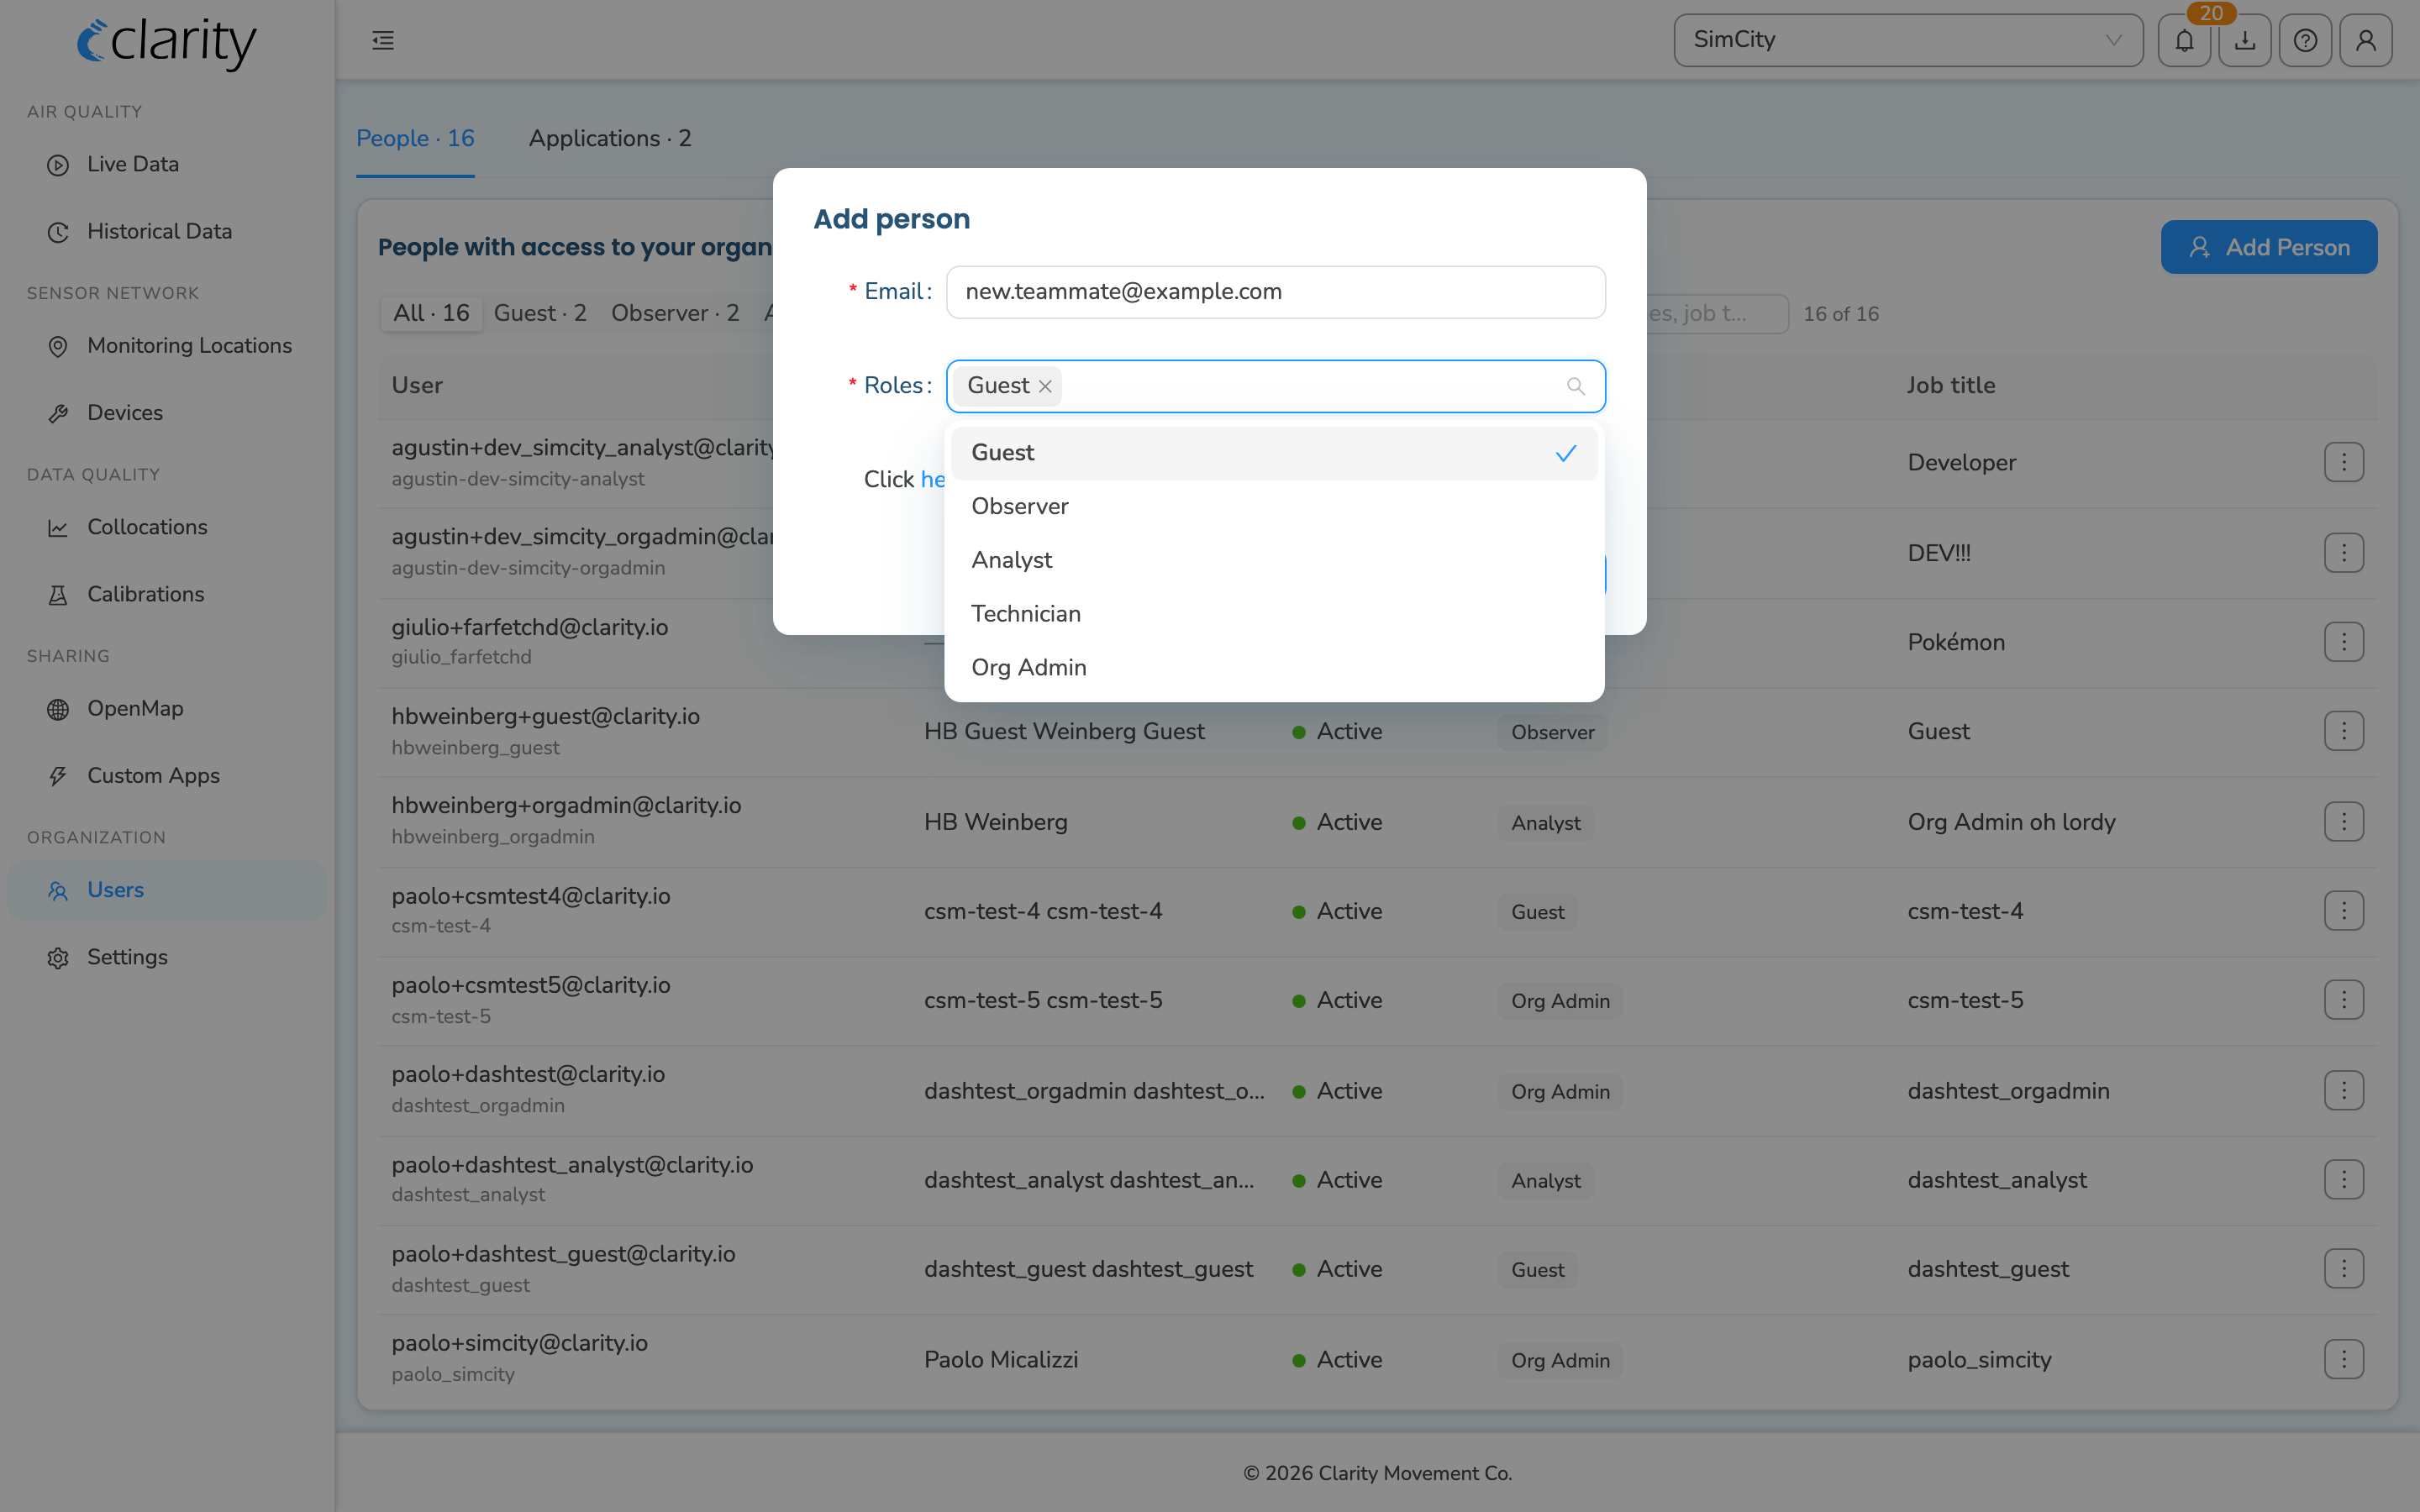
- Click the Add Person button at the top right of the People list. The Add person dialog opens.
- Enter the email address of the person you want to invite.
- In the Roles field, select one or more roles to assign. (To learn more about user roles, see Understanding Clarity Dashboard user roles and permissions. A link to the same article appears inside the dialog.)
- Click OK to add the person.
What happens next depends on whether the person already has a Clarity account:
- If they already have a Clarity account, they appear in the list right away with an Active status, and an automated email lets them know they've been added. They can switch between organizations using the org selector at the top right of their top bar.
- If they don't have a Clarity account yet, they appear in the list with a Pending status, and an automated email invites them to sign up. Once they finish signing up, their status changes to Active. (Use the Pending toggle above the list to view just these invitees.)
How to edit a person's roles
- Log in to the Clarity Dashboard.
- From the left sidebar, open Organization > Users (the People tab).
- Find the person in the list. Hover over their row and click the ⋮ (Row actions) button at the right end of the row.
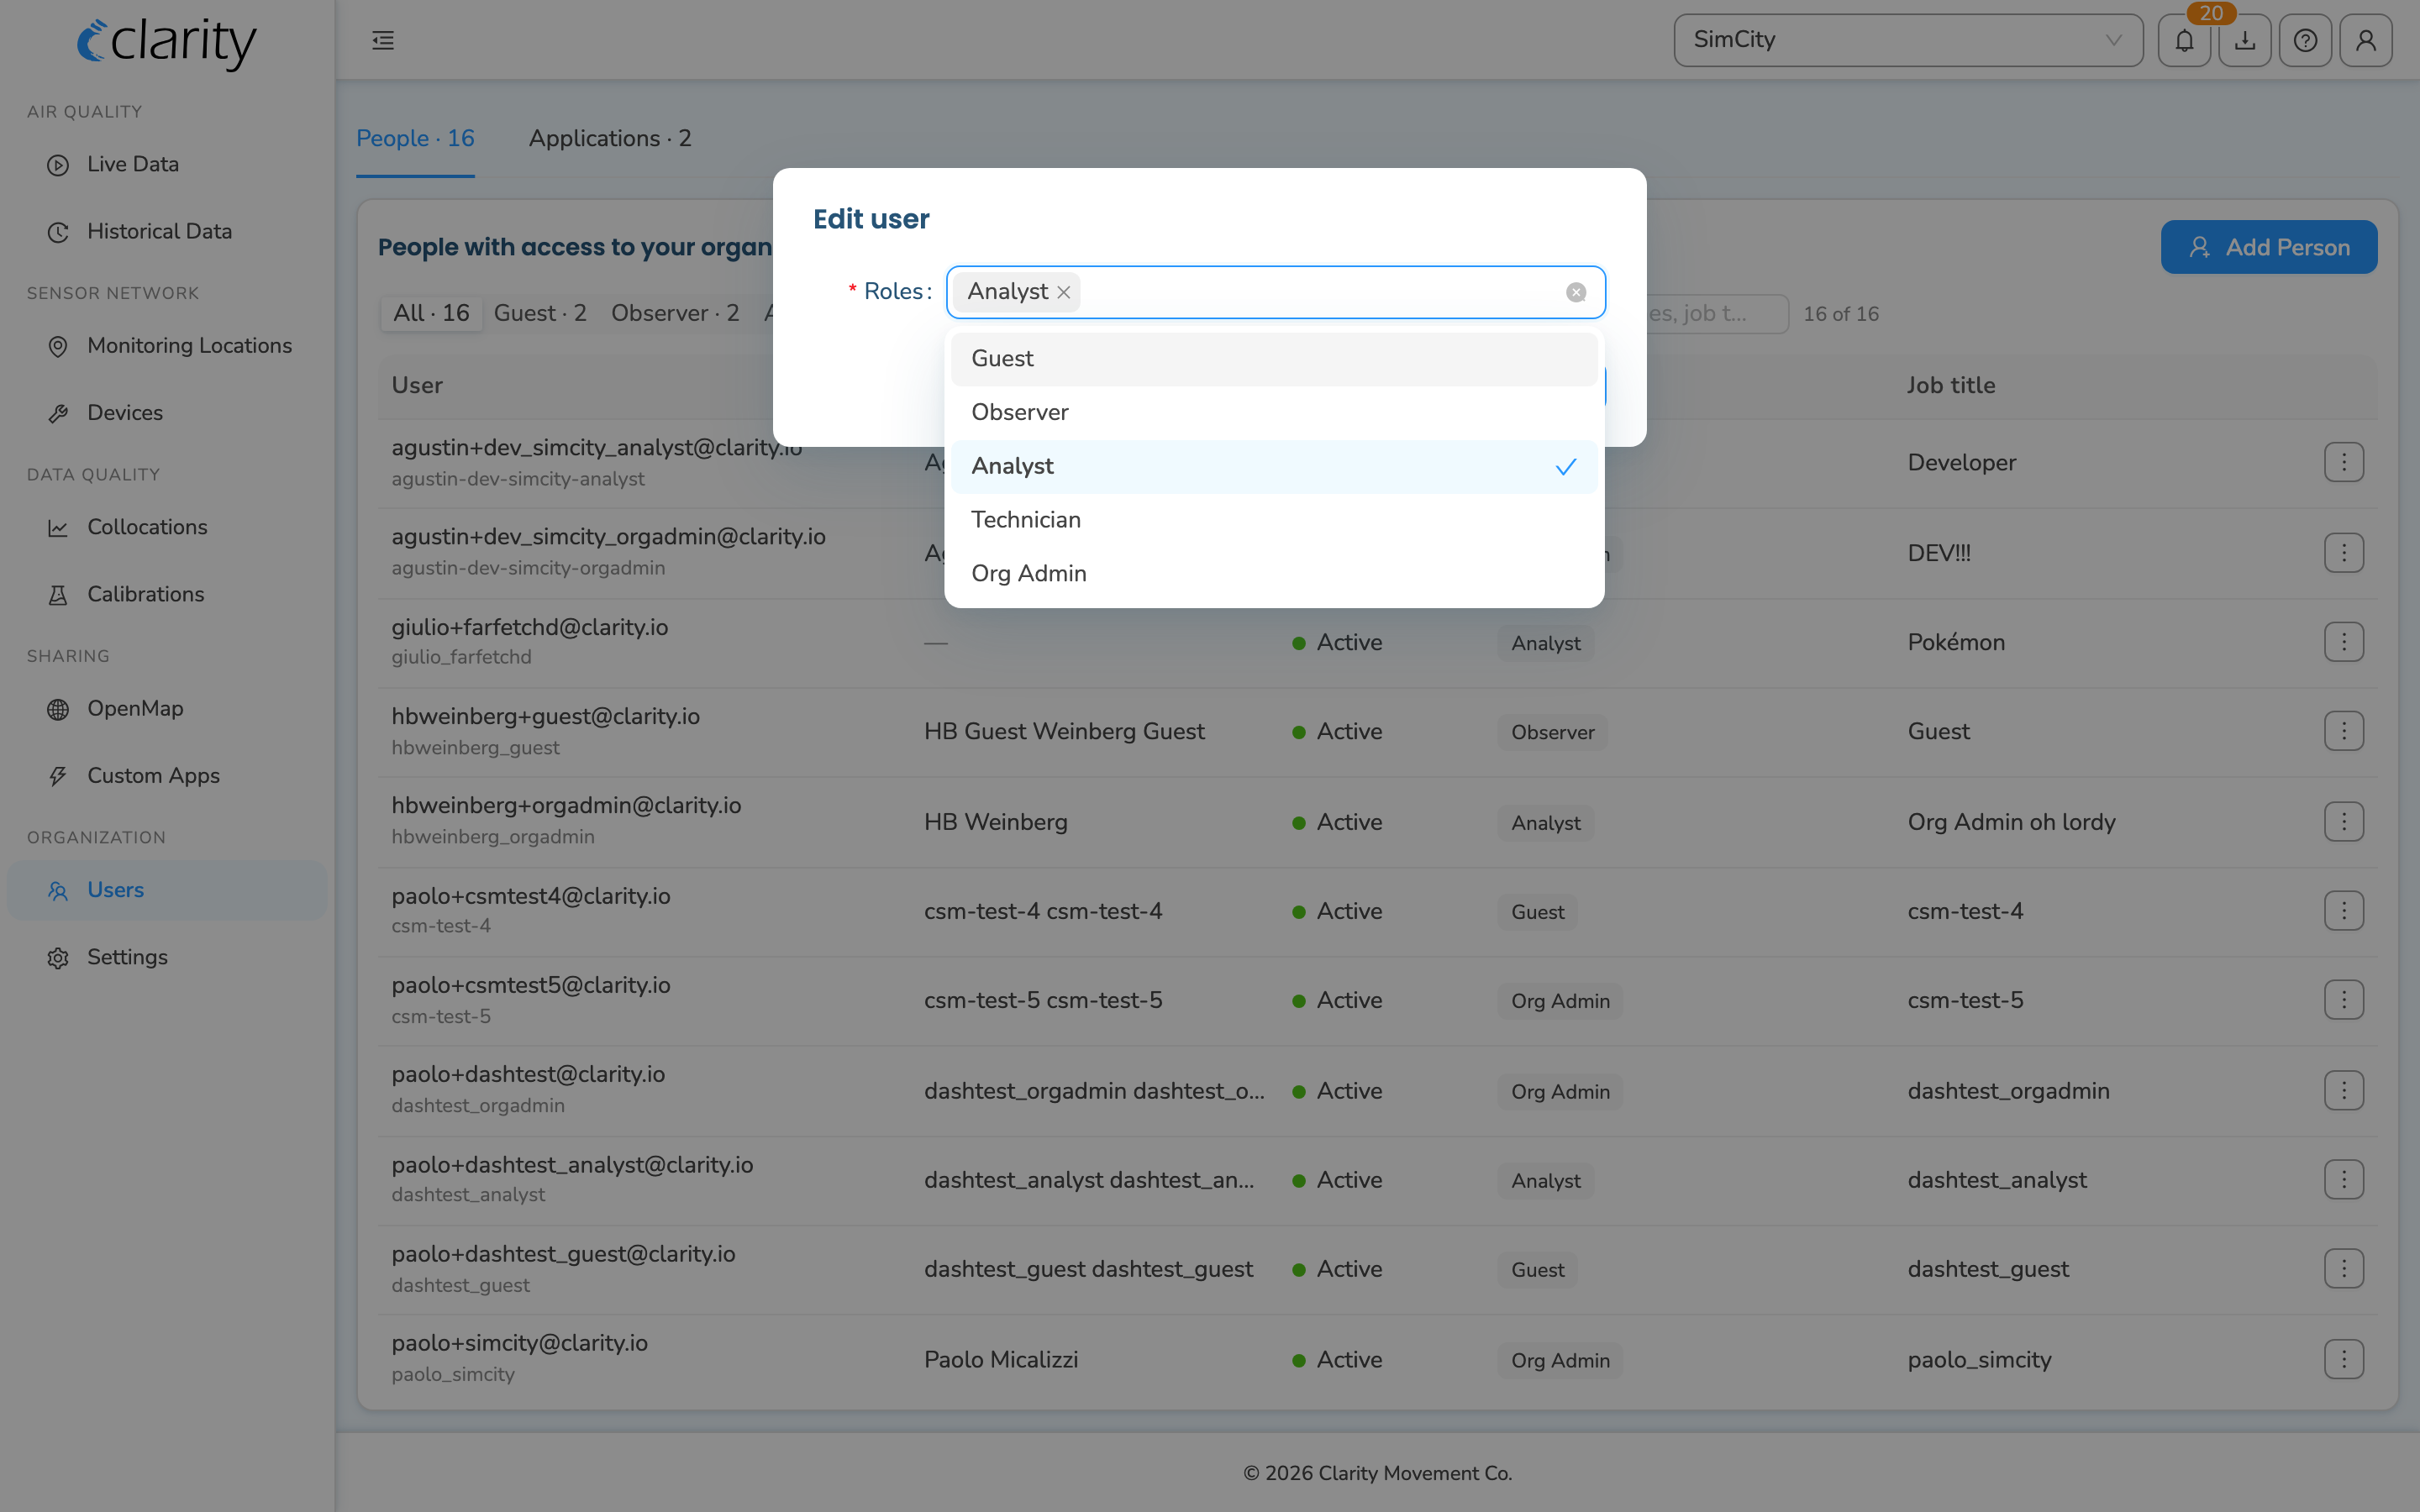
- Choose Edit role(s). The Edit user dialog opens.
- In the Roles field, add or remove roles as needed. (At least one role is required.)
- Click OK to save the changes.
The person's role tags update in the list once the change is saved.
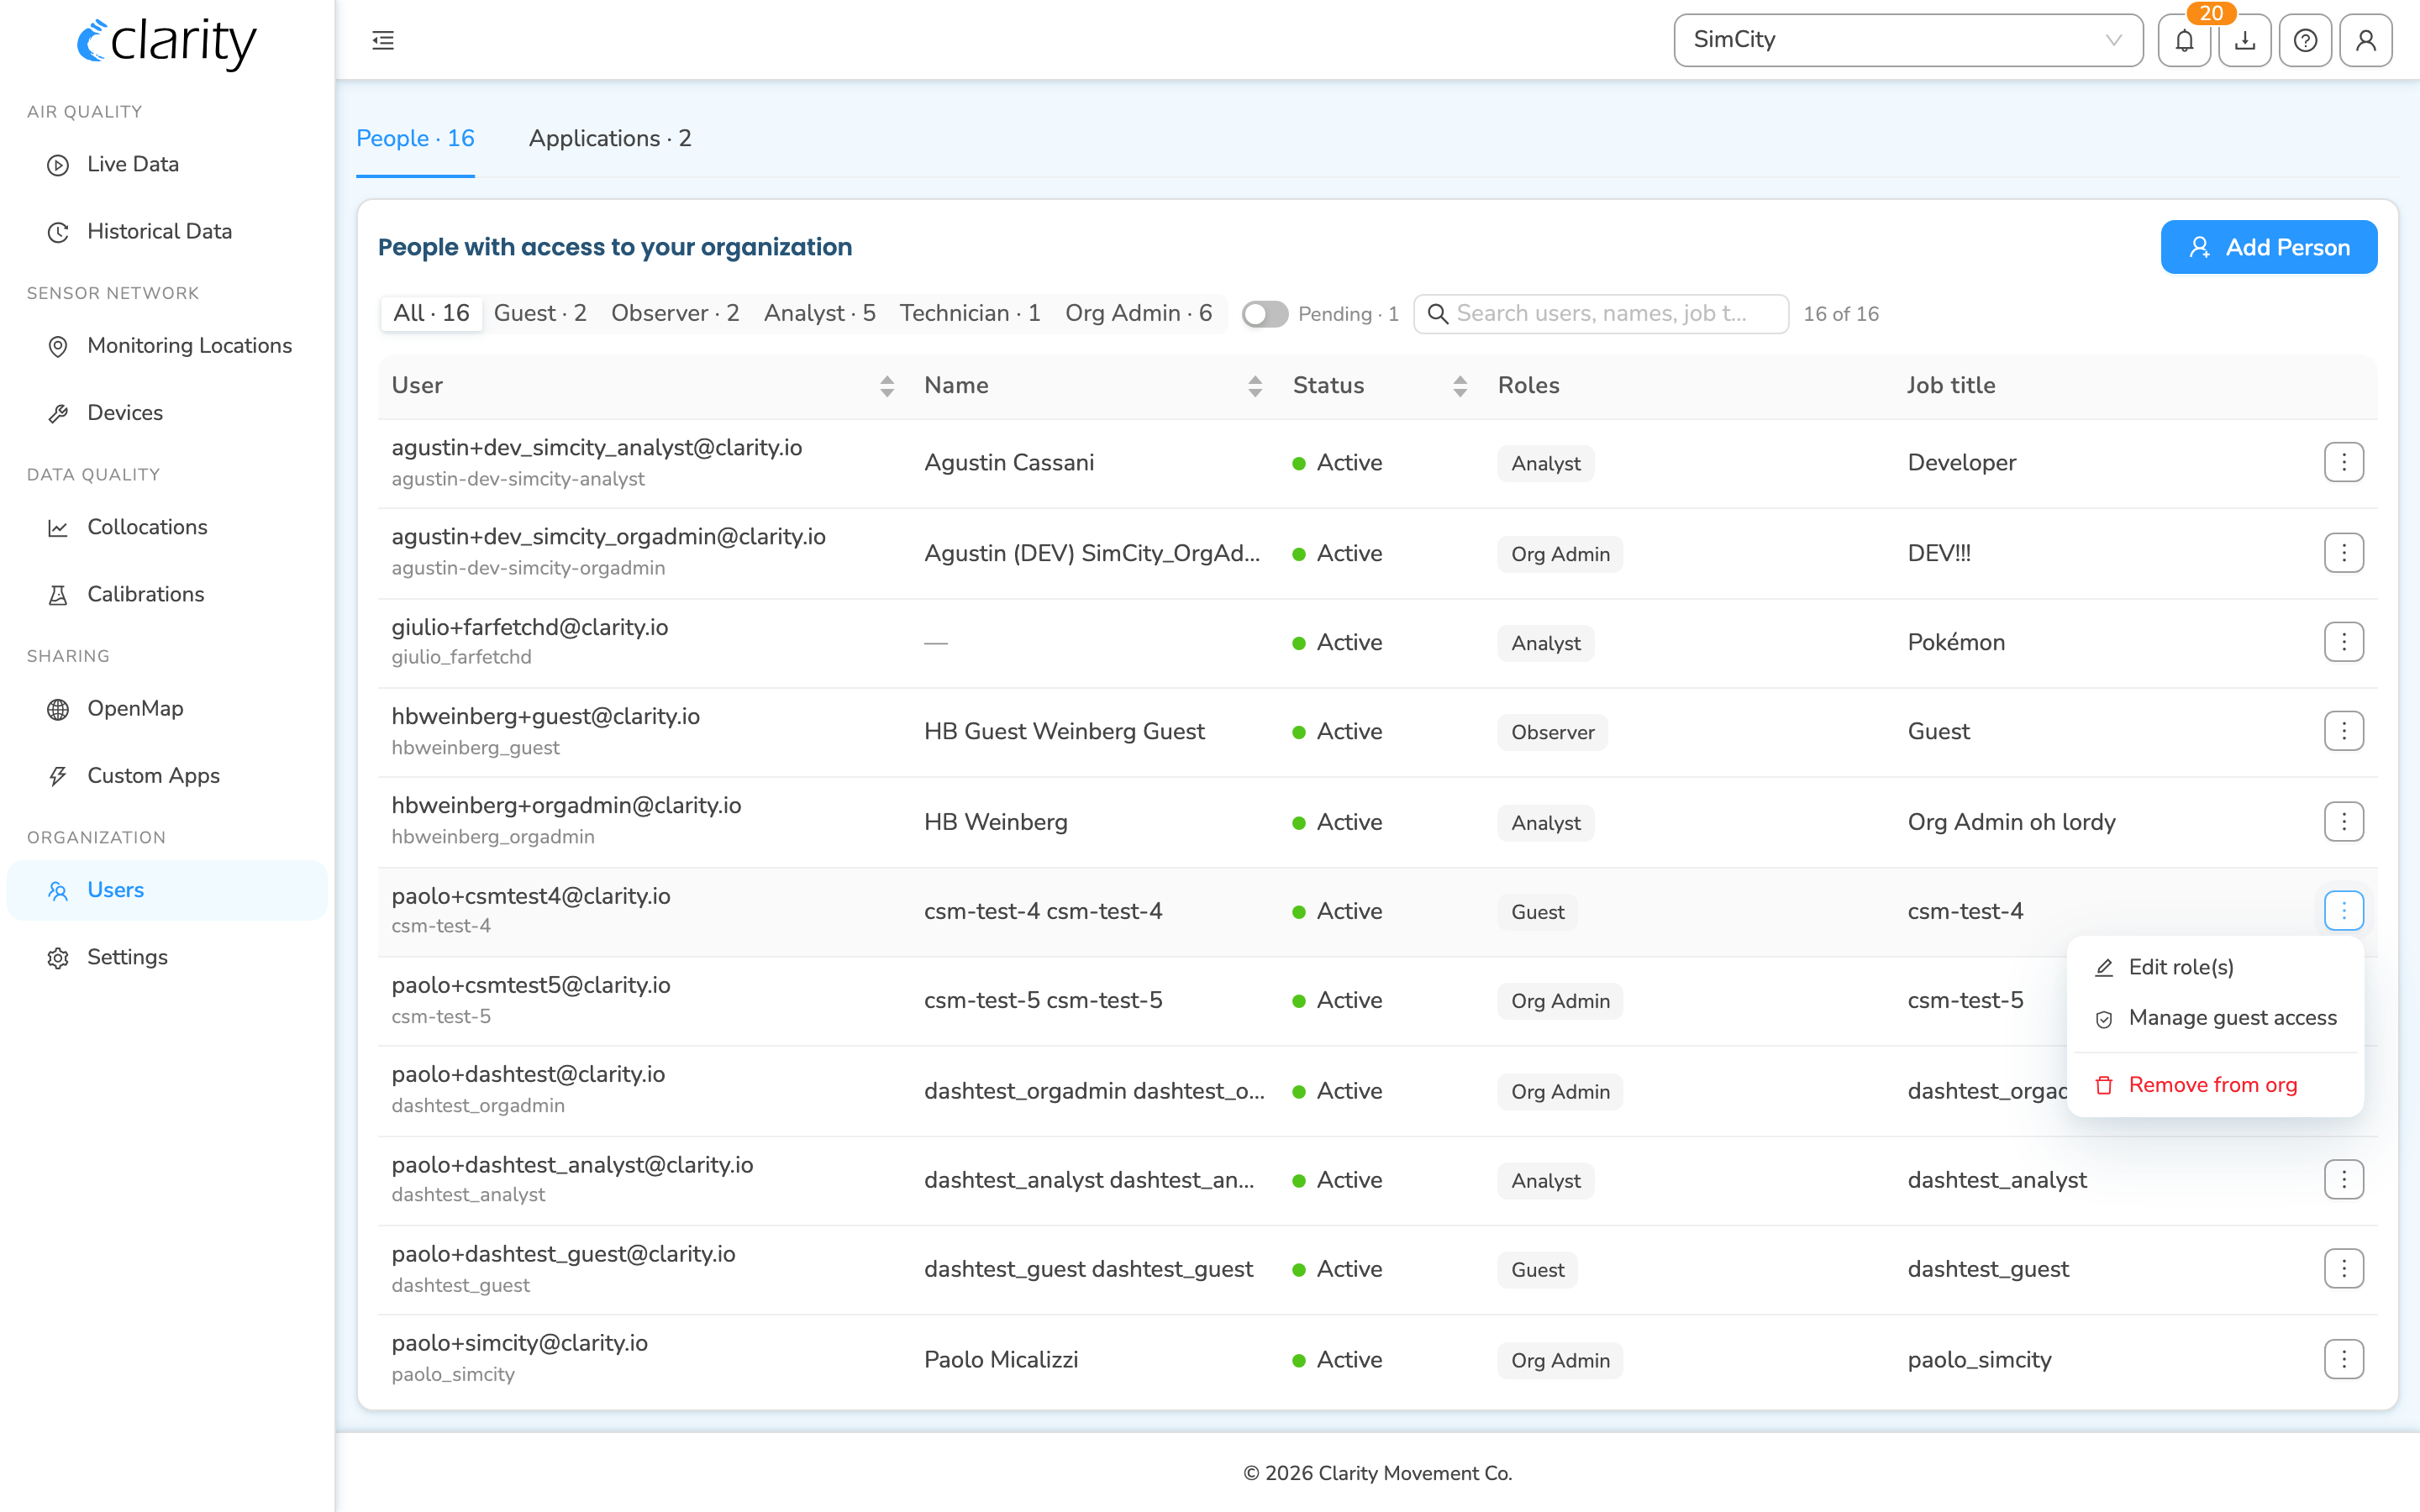
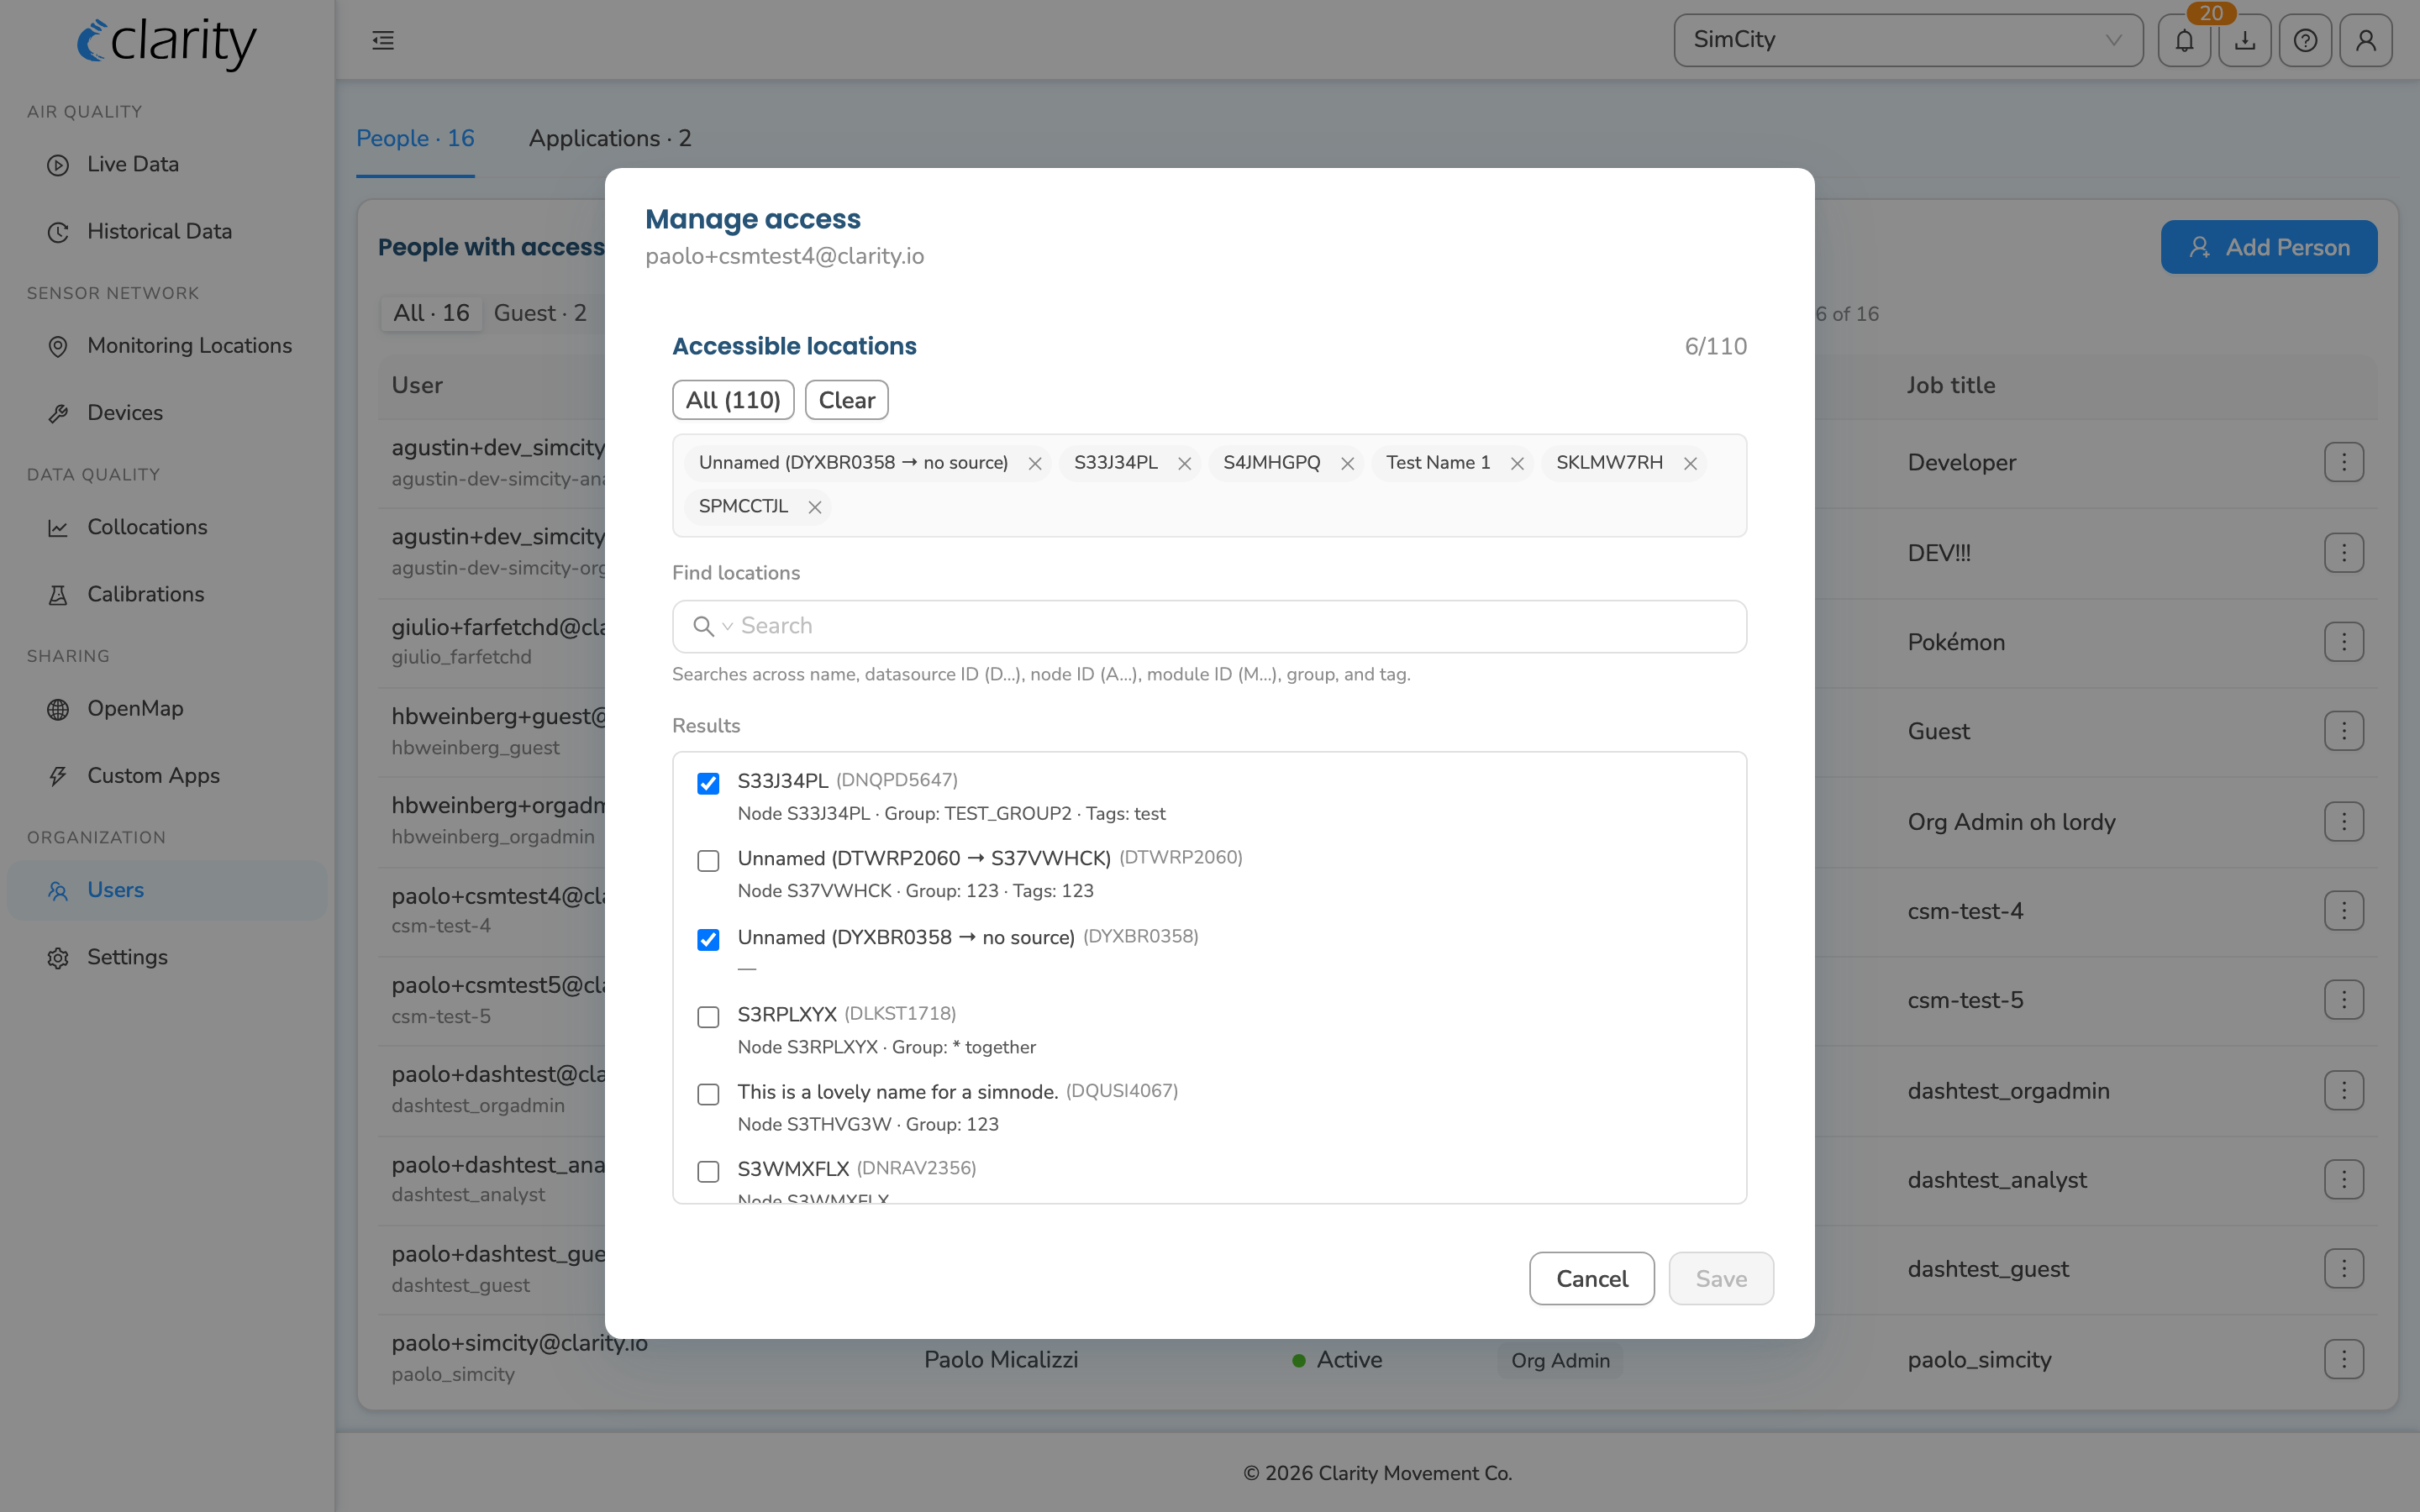
How to manage a guest's location access
Guests can only see the monitoring locations you grant them, so they get an extra action for managing exactly which locations they can view.
- On the People tab, find a person whose role includes Guest.
- Open their ⋮ (Row actions) menu and choose Manage guest access. The Manage access dialog opens, with the guest's email shown as the subtitle.
- Use the location picker to select which monitoring locations the guest can view. You can search the list, use All or Clear, and a running summary shows how many grants and revokes you've staged (for example,
+2 grant · −1 revoke). - Click Save changes to apply. (The button stays disabled until you've actually changed something.)
How to remove a person from your organization
- Log in to the Clarity Dashboard.
- From the left sidebar, open Organization > Users (the People tab).
- Find the person in the list, open their ⋮ (Row actions) menu, and choose Remove from org.
- In the Remove user from org confirmation dialog, confirm it names the right person and organization, then click Remove.
Note: You can't remove yourself — the Remove from org action doesn't appear on your own row.
Note: At this time, people removed from the organization are not notified by email.

If you have any questions, please contact our Support team and we'll get back to you shortly.
What's next
- Understand user roles and permissions.
- Manage a Guest's access to monitoring locations.
- Find your Organization ID on Dashboard.
- Change your organization's name.
Was this article helpful?
Yes, thanks! / Not really
Still need a hand? Email us at support@clarity.io or create a support ticket, and our team will get back to you.