Managing a Guest's access to monitoring locations on Dashboard
How to add a Guest to your Organization and manage which monitoring locations they can see.
A Guest is a user who can only view the data you explicitly share with them. As an Organization Admin you decide exactly which monitoring locations each Guest can see — and you can change that at any time.
Add a Guest to your Organization
- Log into Clarity Dashboard as an Organization Admin.
- In the left sidebar, under Organization, open Users. This opens the Users page on the People tab (it also has an Applications tab for API/app connections, which isn't covered here).
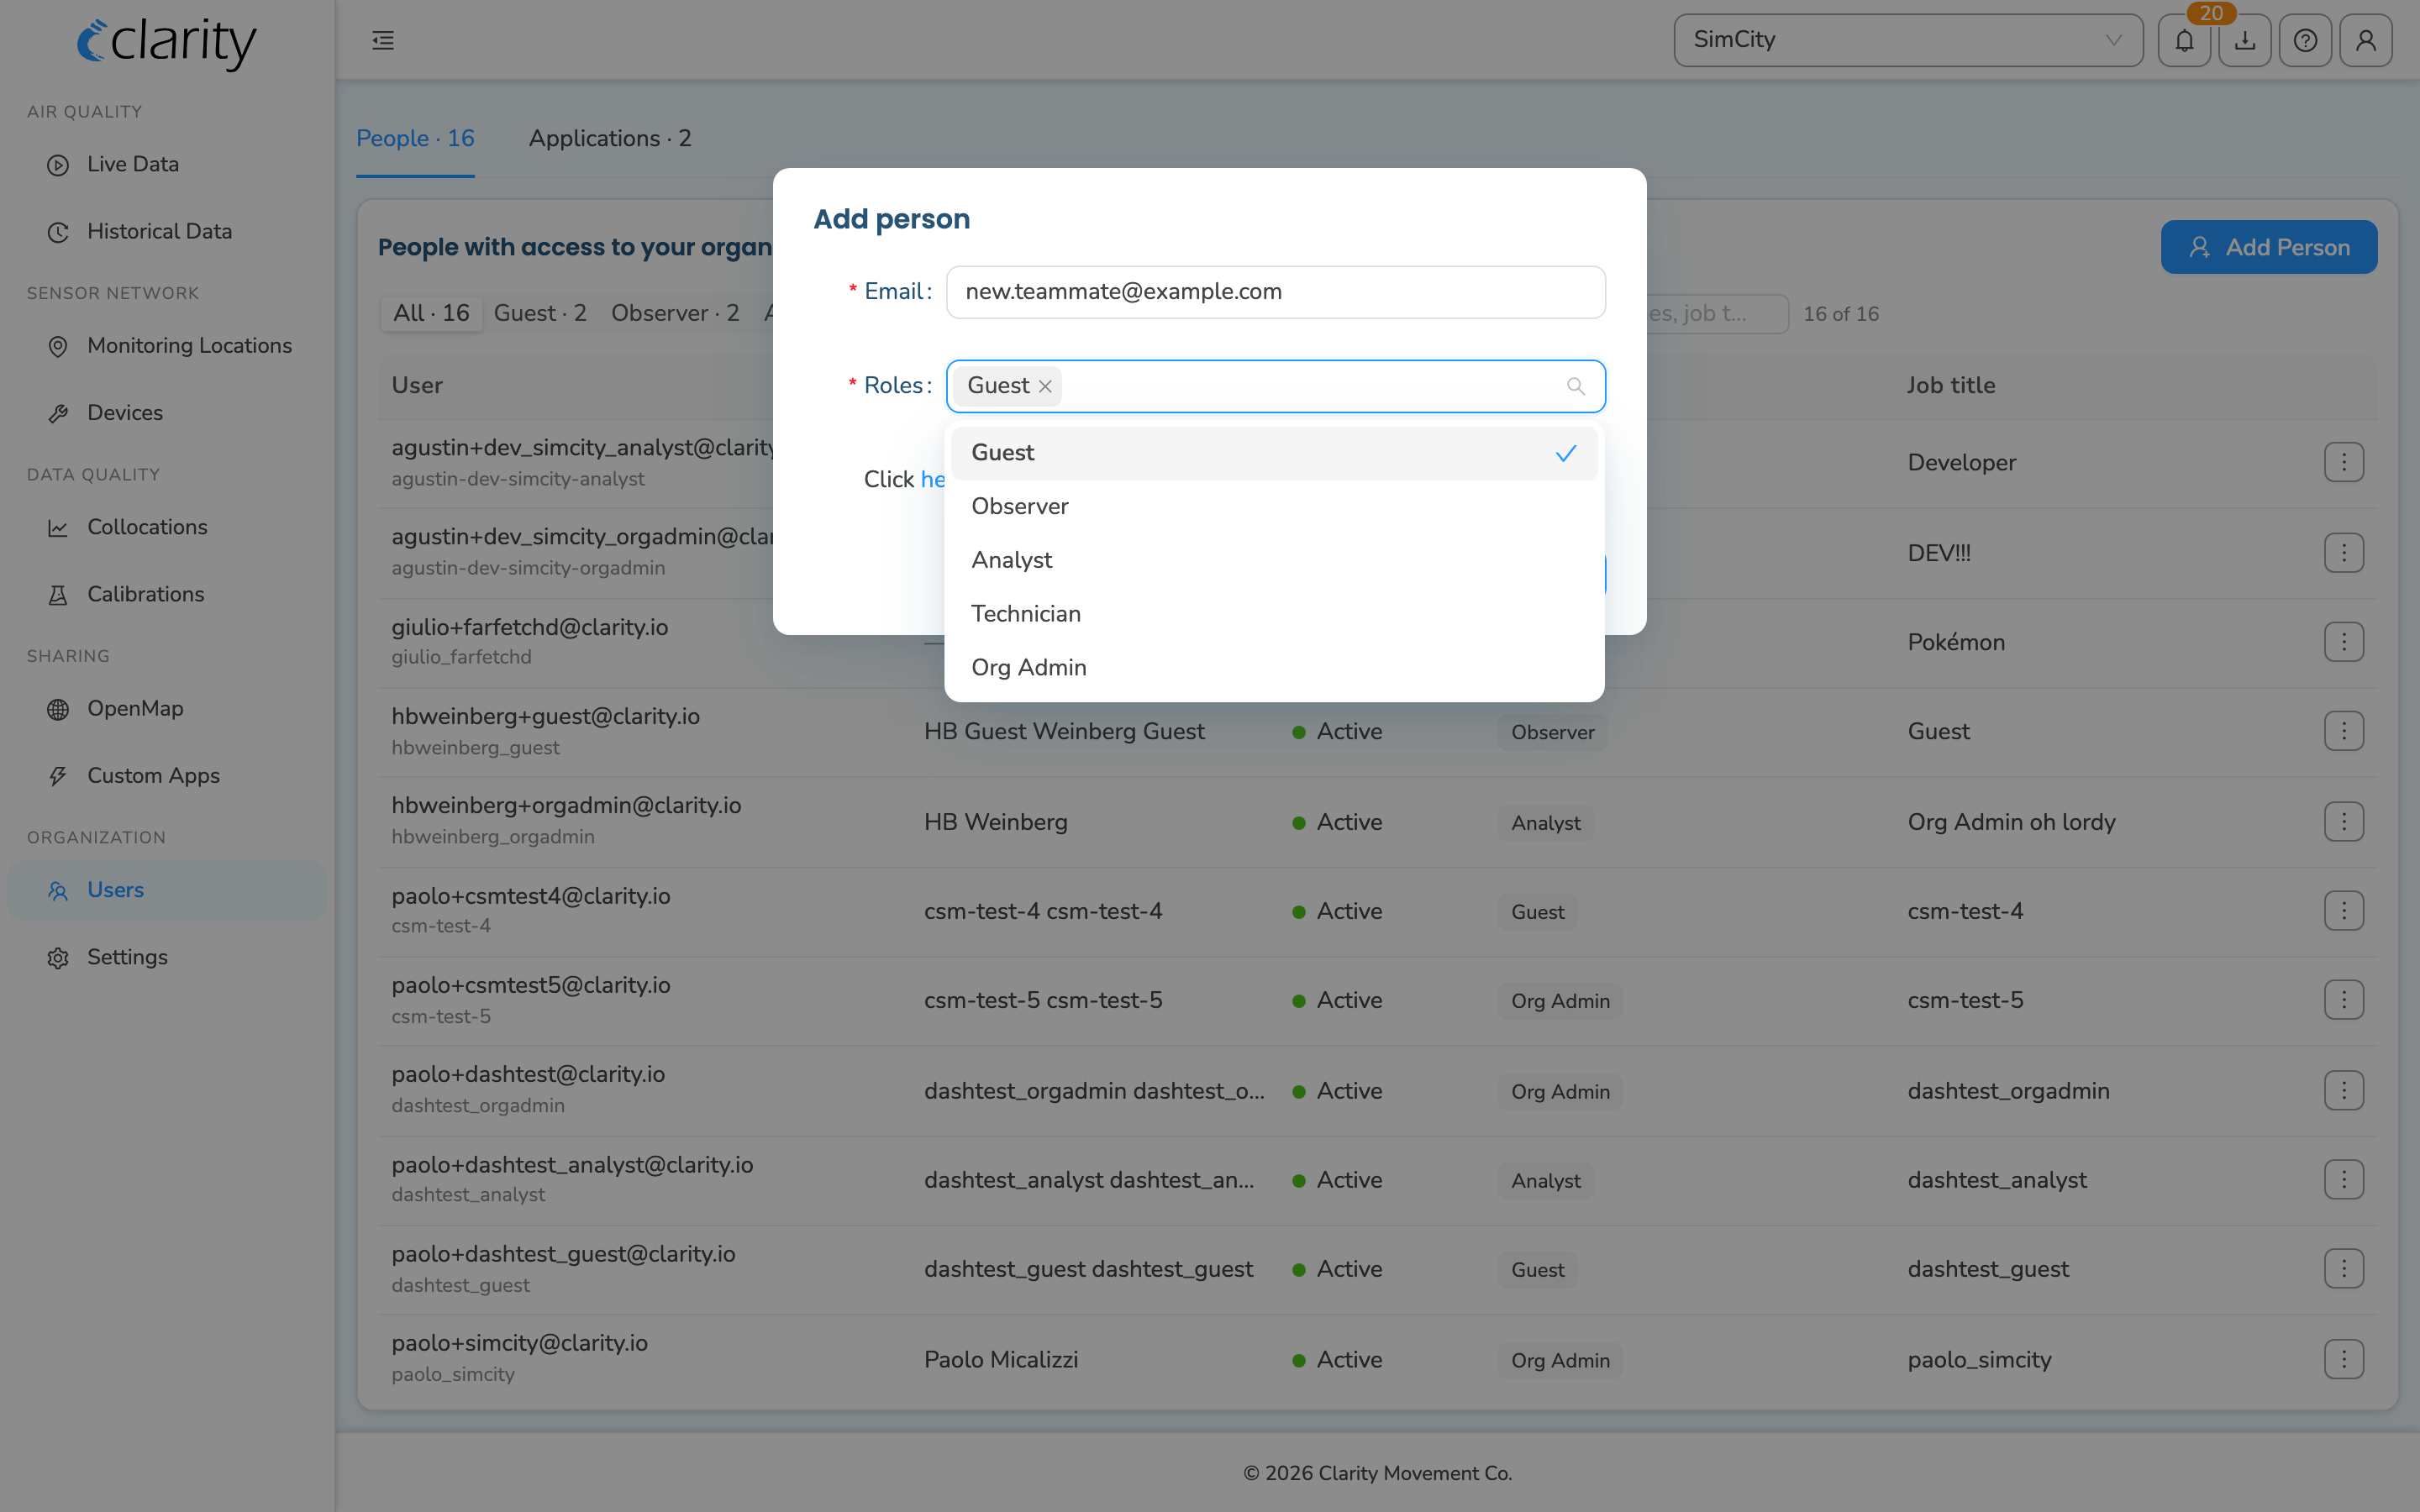
- Click the Add Person button (top right of the People with access to your organization panel).
- Enter the new user's email address and select Guest as the role.
- Click OK to submit.
- The new user will receive an invitation email to finish setting up their account.
For more information on user roles and permissions, refer to the article here.
Manage a Guest's access to monitoring locations
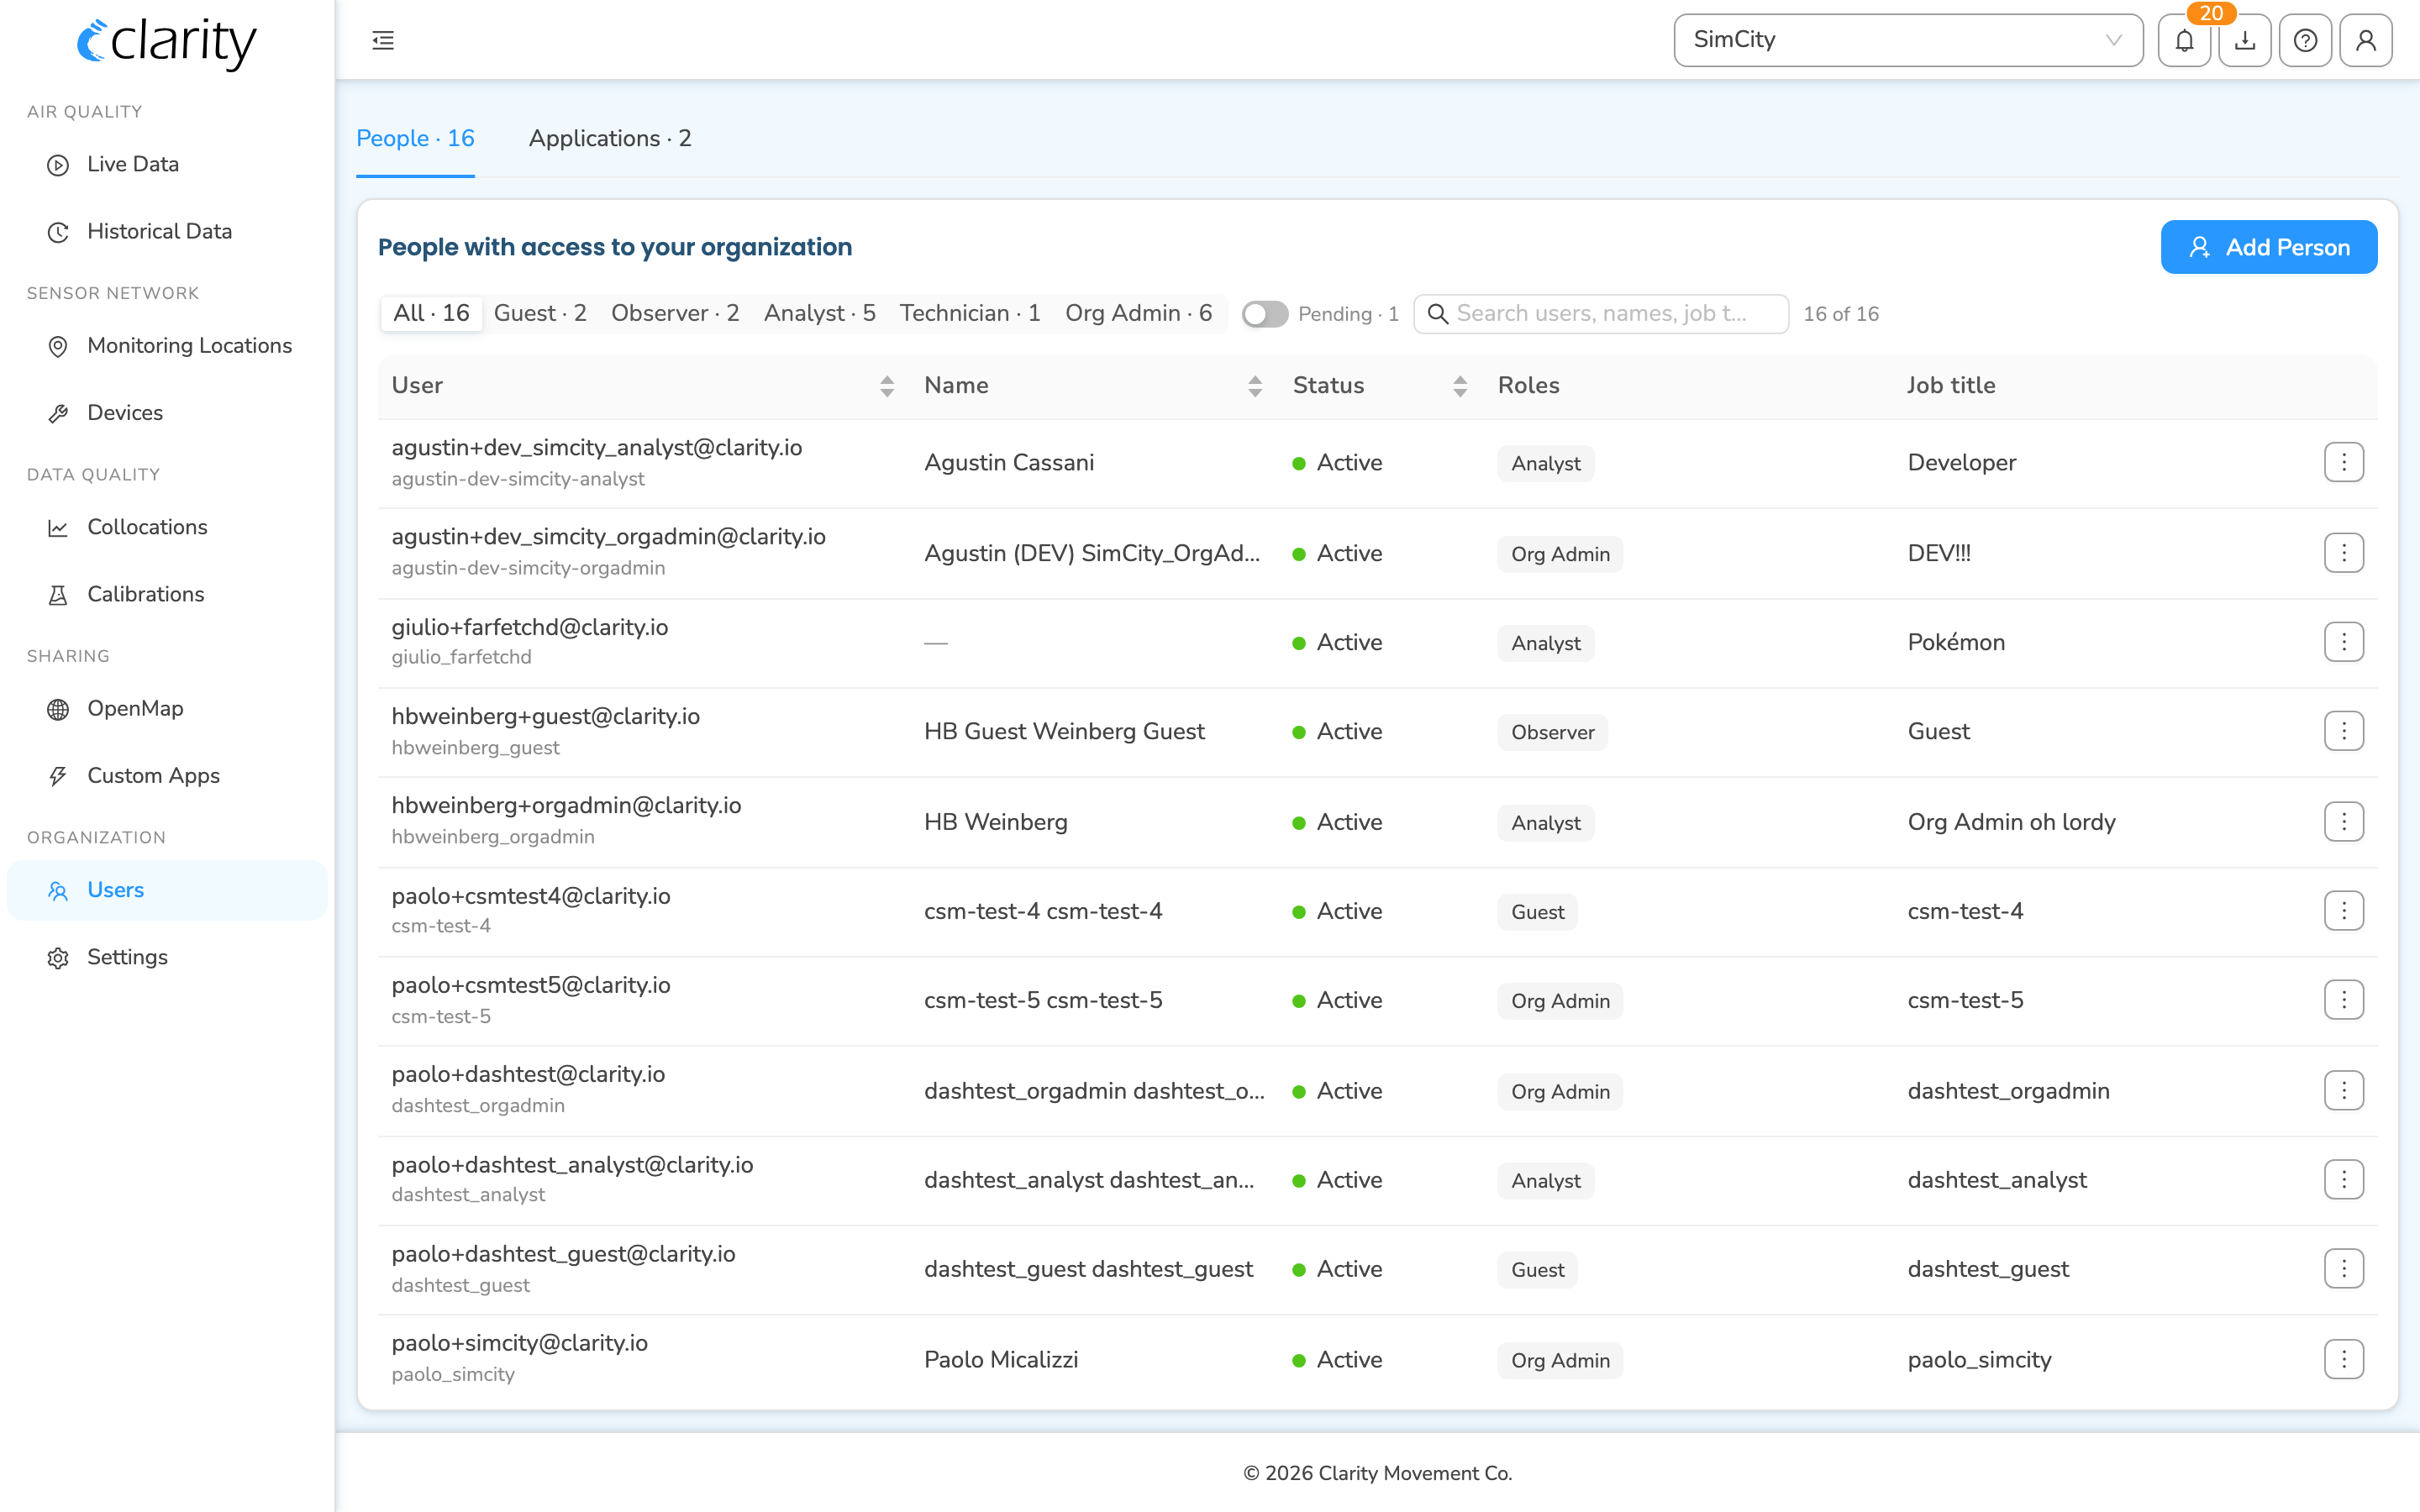
- In the left sidebar, under Organization, open Users (you'll land on the People tab).
- Find the Guest you want to manage. If you have added a Guest to your Organization (see above), their email will be listed in the People table — use the role filter (set it to Guest), the Pending toggle, or the search box if you have a long list. The Status column shows Active (signed up) or Pending (invited, not yet signed up).
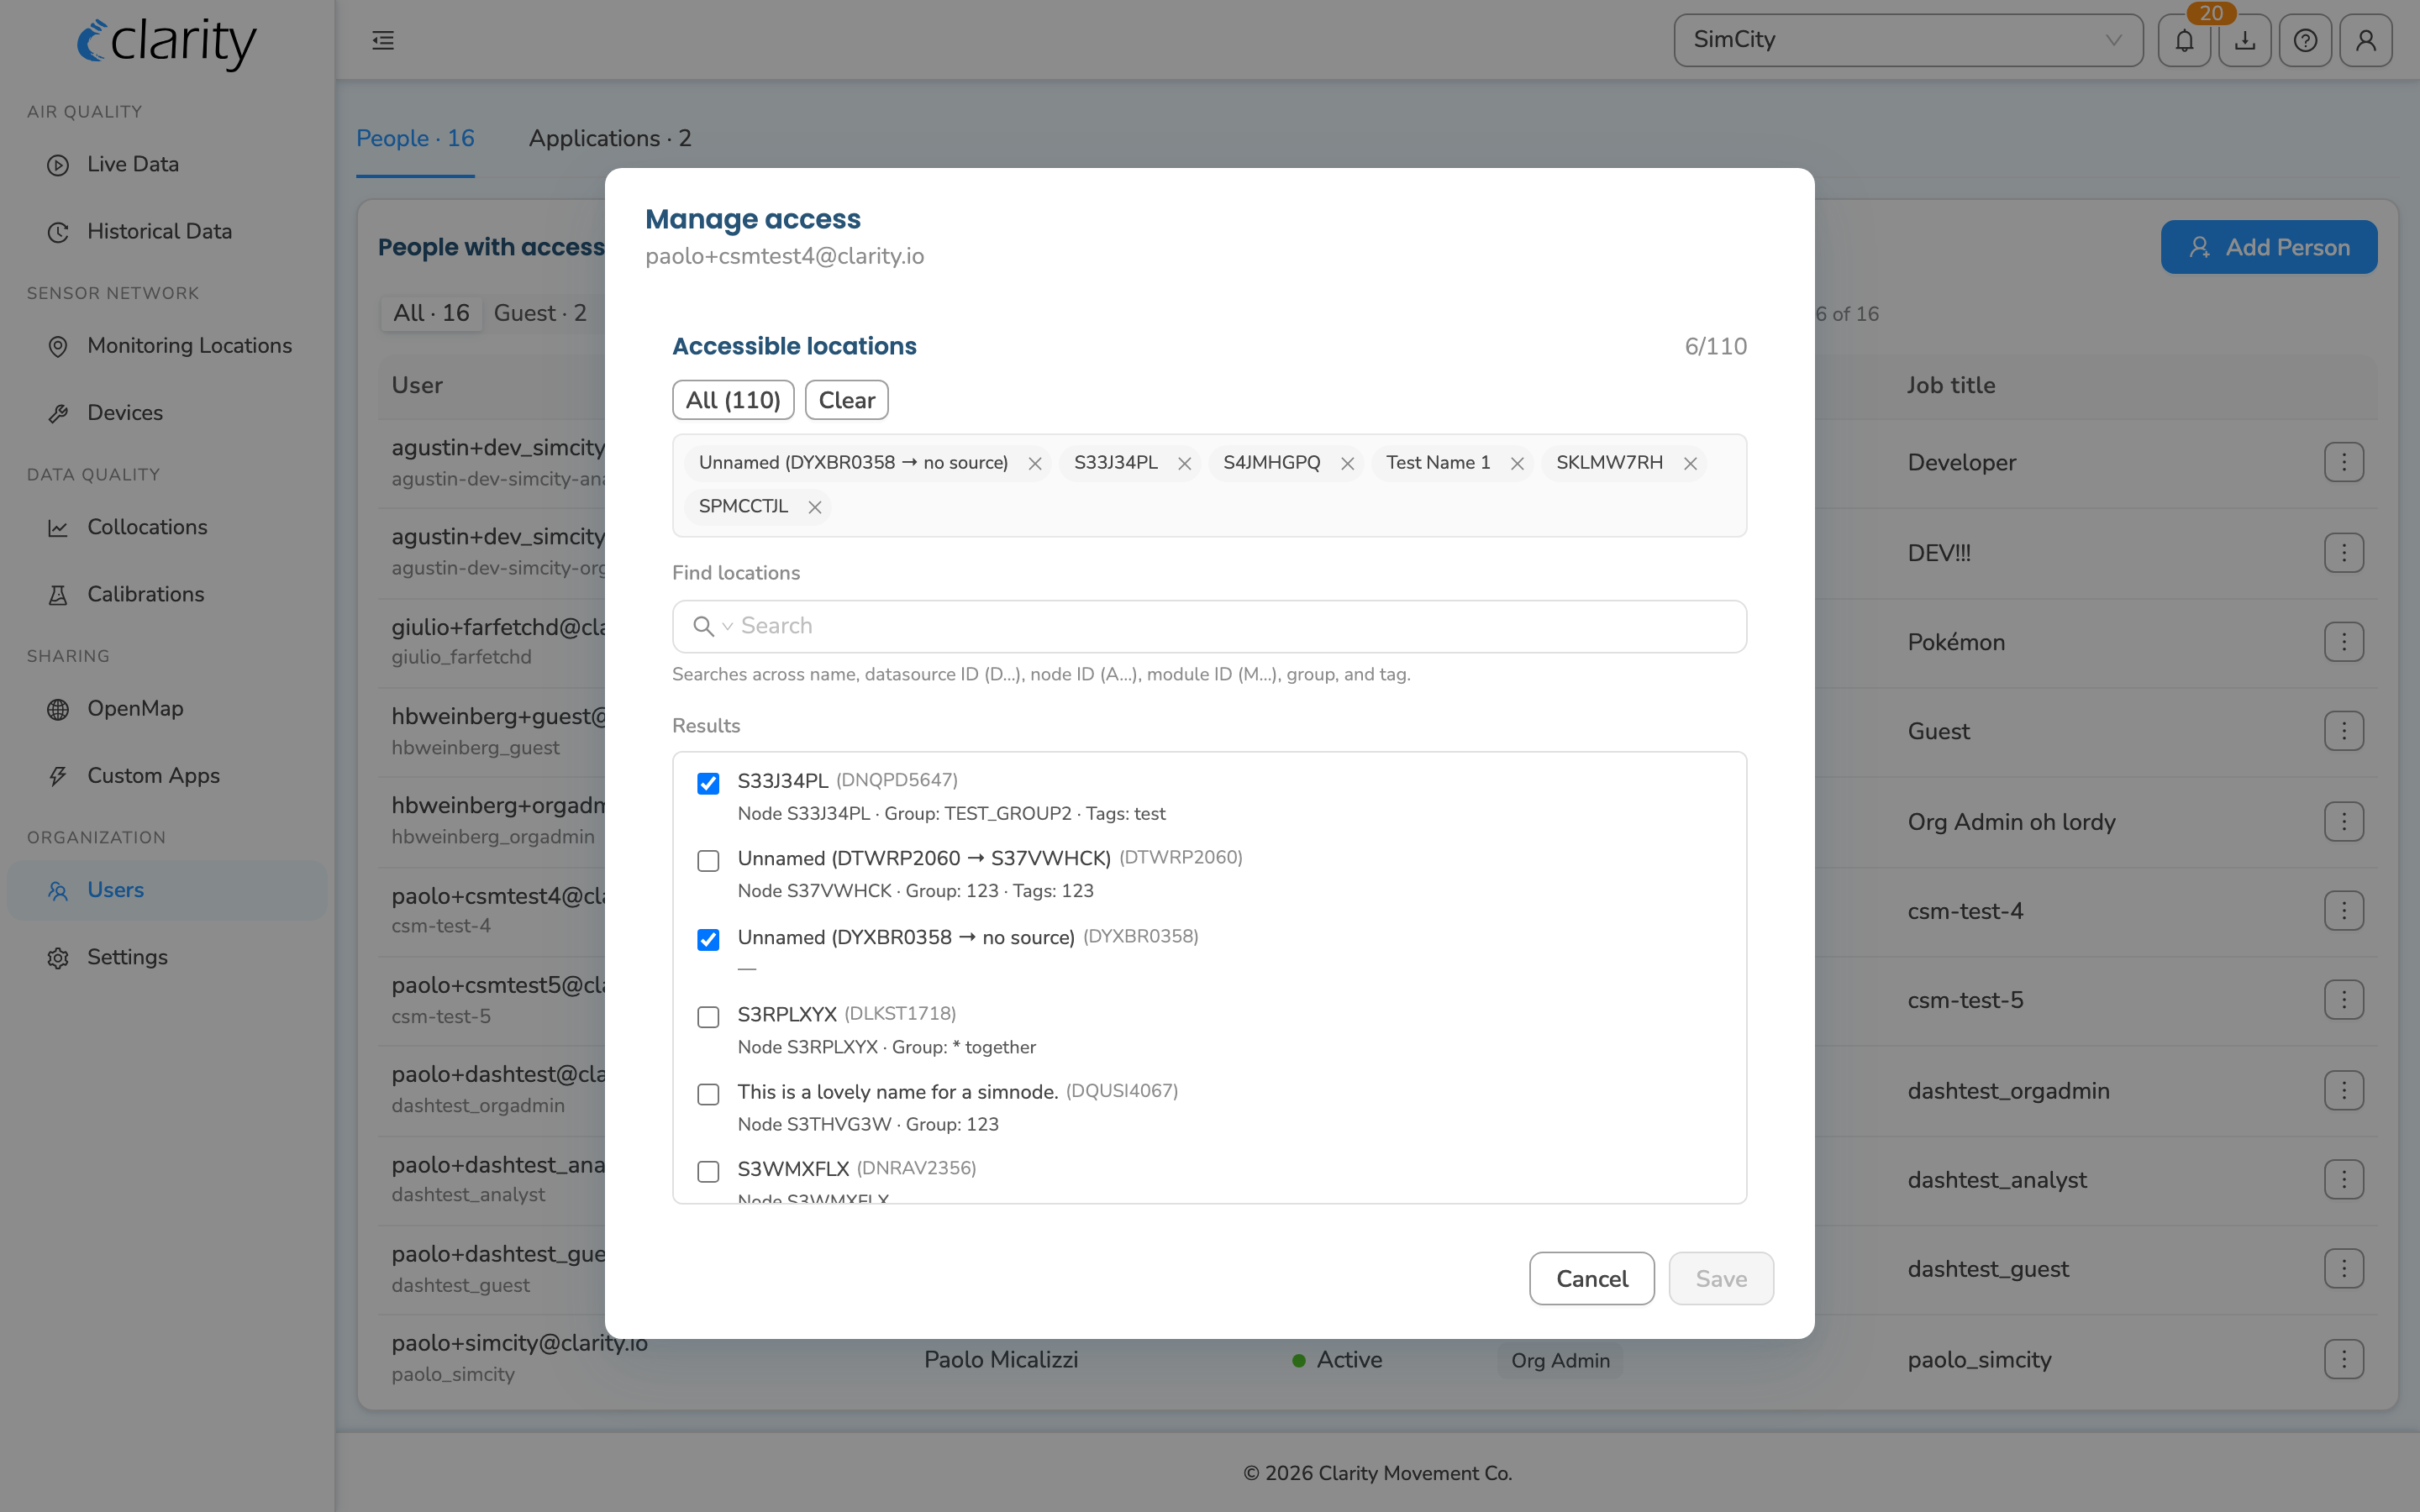
 3. On the Guest's row, open the actions menu (the ⋯ button at the end of the row) and choose Manage guest access. This opens the Manage access window for that Guest, right on the Users page.
4. In the Accessible locations picker, choose the monitoring locations this Guest should be able to see:
3. On the Guest's row, open the actions menu (the ⋯ button at the end of the row) and choose Manage guest access. This opens the Manage access window for that Guest, right on the Users page.
4. In the Accessible locations picker, choose the monitoring locations this Guest should be able to see:
- To grant access: find a monitoring location in the list below (or use the search box, or the All button to select everything) and add it. Selected locations appear as chips at the top of the picker.
- To remove access: deselect a monitoring location, or remove its chip from the top of the picker. The Clear button removes everything that is staged.
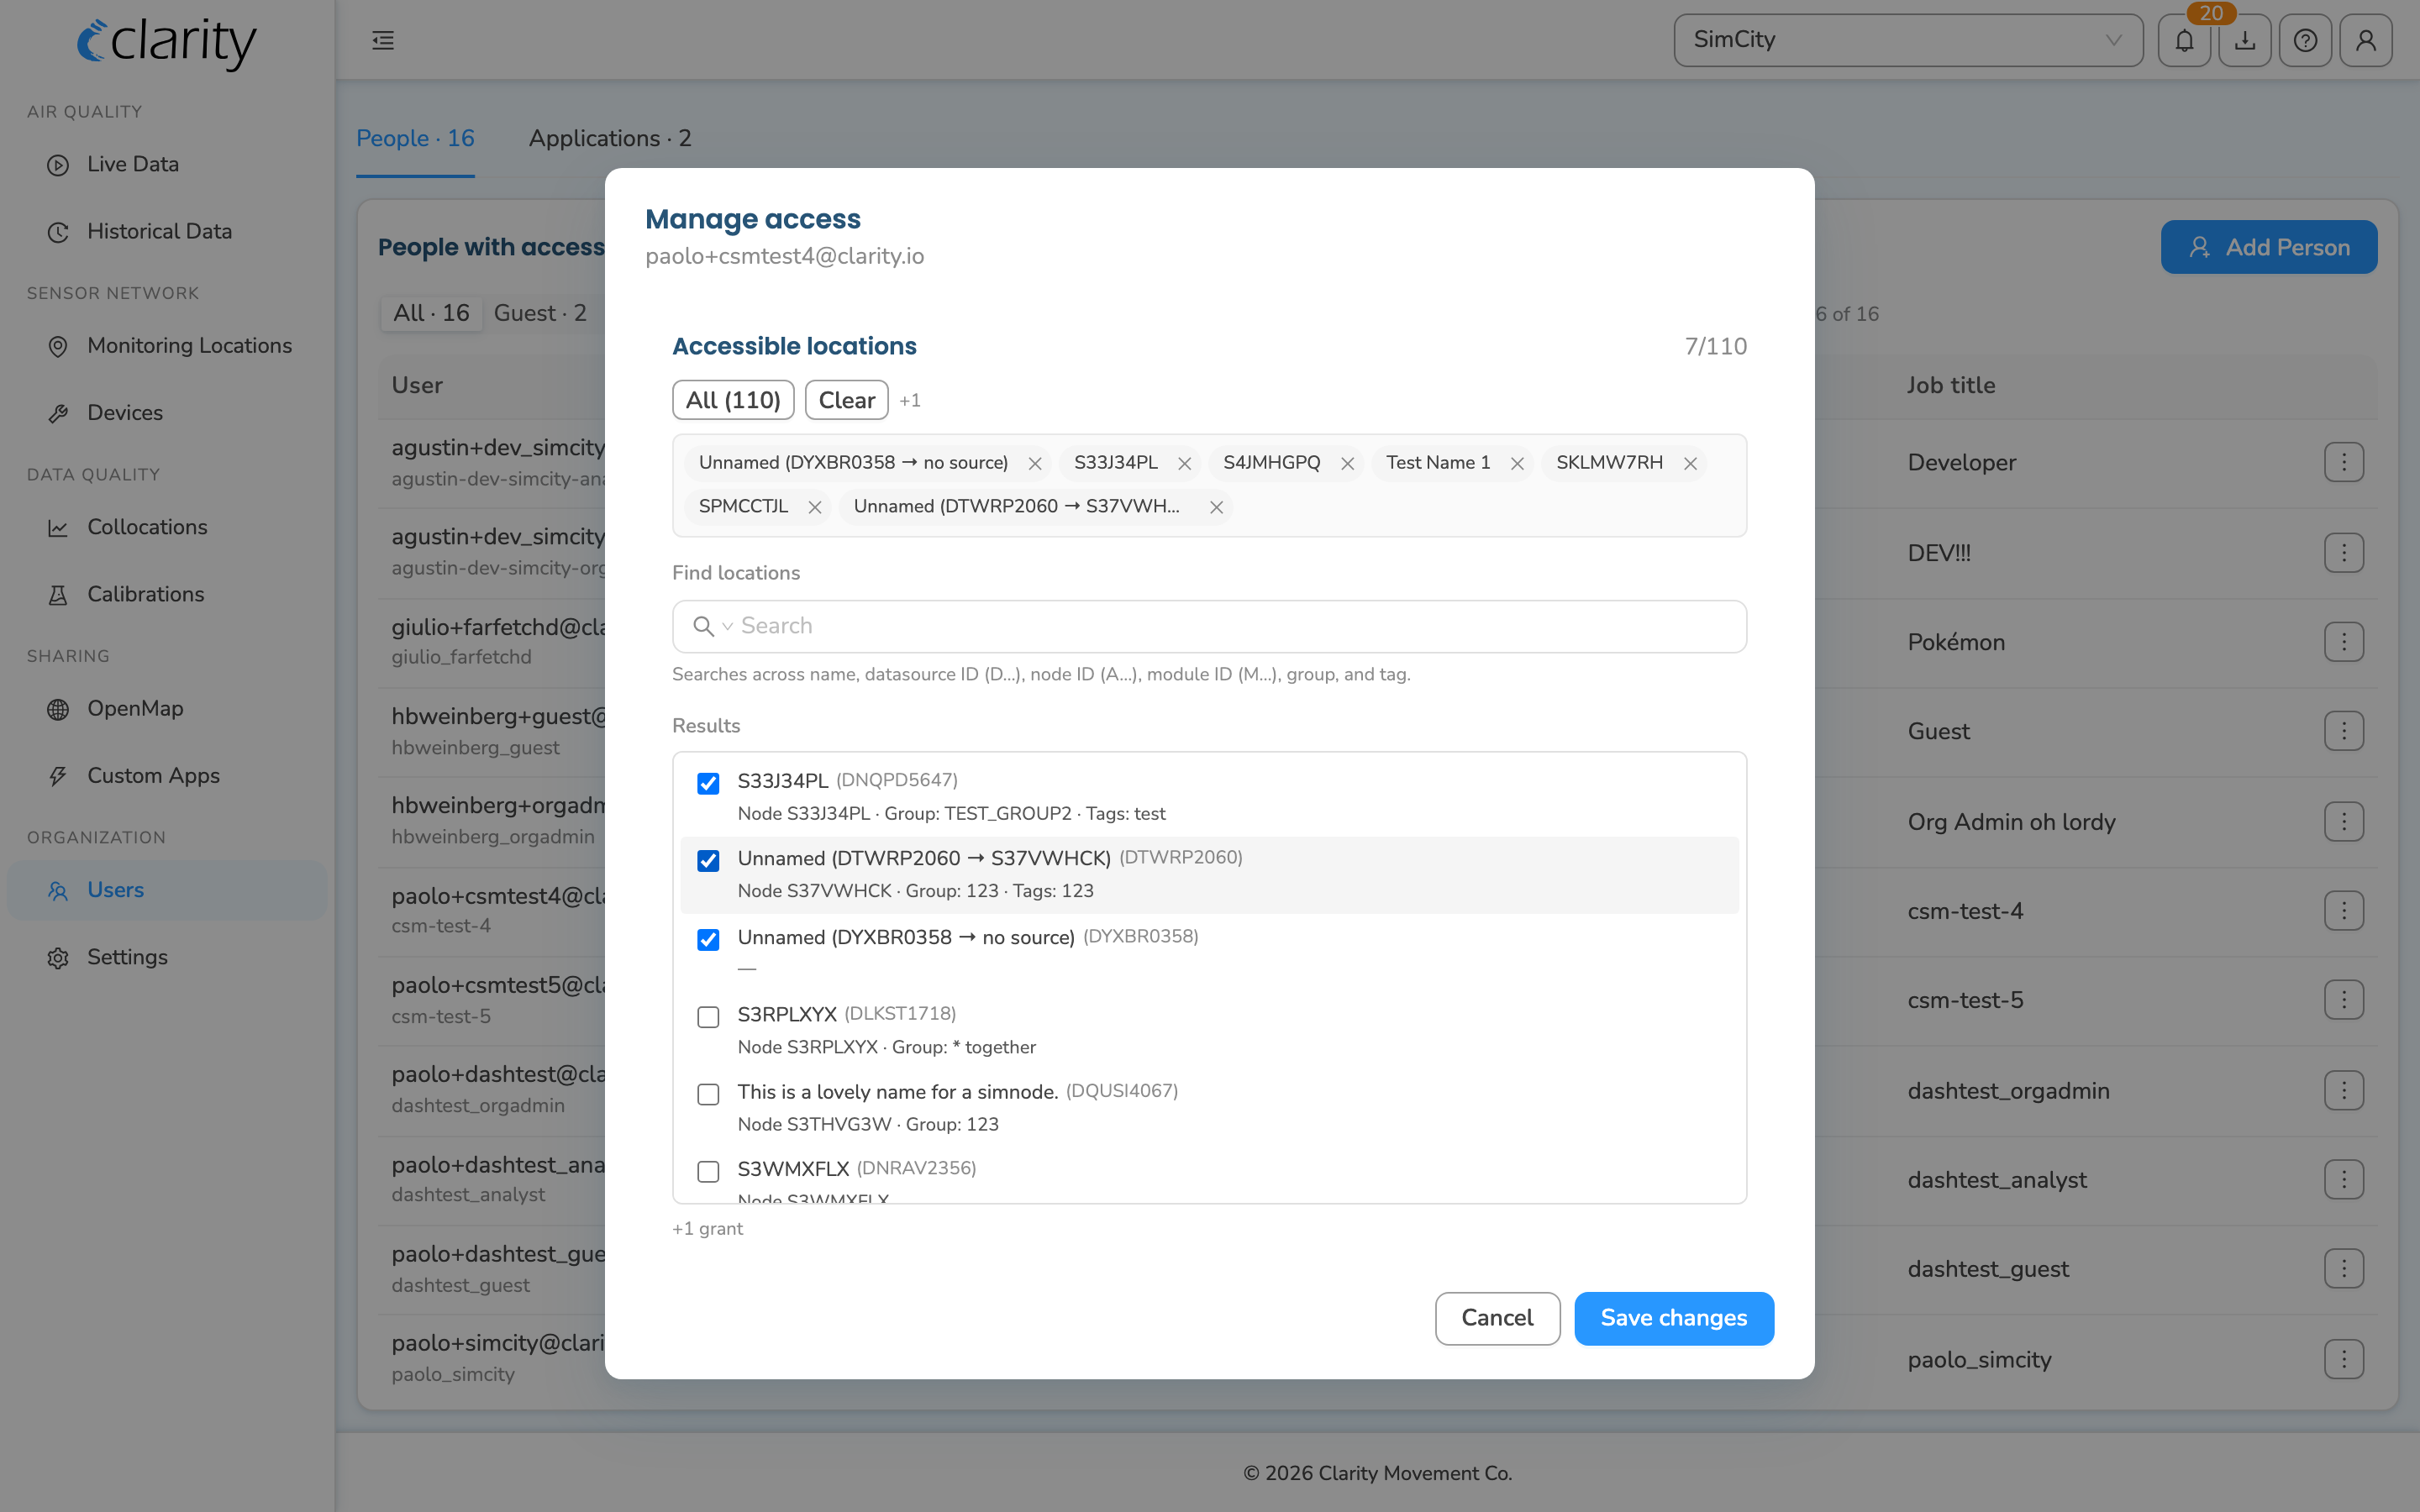
- As you make changes, a hint shows what's about to happen, for example
+2 grant · −1 revoke.
- Click Save changes. The Guest can now view data for exactly the monitoring locations you selected; any you removed are no longer visible to them.
Note: The old standalone "Manage Guest" page and its separate Add access to datasource / Remove access buttons have been retired. Granting and revoking are now done together in one Accessible locations picker — make all your changes, then click Save changes once.
Other actions on a person's row
The same row actions menu (the ⋯ button) also offers:
- Edit role(s) — change which roles the user holds (for example, promote a Guest to Observer).
- Remove from org — remove the user from your organization (this option doesn't appear on your own row).
Terminology changes applied
- Datasources / Datasource → Monitoring Locations / monitoring location (article title/subtitle, the access-management steps, and the picker references).
- Organization > Users > People (sidebar nav path) → Users (a page under the Organization sidebar group,
/users), which opens on a People tab (alongside an Applications tab). The standalone "Sign up completed" / "Sign up pending" tables are now one roster with a Status (Active/Pending) column. - 'Manage Guest' page → an in-place Manage access modal opened from the Guest's row on the Users page (no standalone page).
- 'Add access to datasource' button and the separate Actions > Remove access flow → a single Accessible locations multi-select picker (grant by selecting, revoke by deselecting), saved with Save changes.
- 'Actions' button (old blue button) → the per-row actions menu (⋯) on the People table.
- Organization (sidebar folder) and its Resources sub-item → retired; access is managed under the top-level Users page, and the article is reframed around "monitoring locations" rather than "resources."
- Overview (old sidebar landing page) → Live Data (
/live-data); not referenced in the steps, but noted because it appeared in the old screencasts.
What's next
- Manage your organization's users.
- Understand user roles and permissions.
- Name, group and tag your monitoring locations.
Was this article helpful?
Yes, thanks! / Not really
Still need a hand? Email us at support@clarity.io or create a support ticket, and our team will get back to you.