Checking Node-S and accessory module compatibility on the Dashboard
⚠️ Heads up: A module paired with an incompatible Node will not upload data. Always confirm compatibility before you pair.
As new firmware versions ship, some accessory modules stop being compatible with older Node-S firmware. The Clarity Dashboard lets you check, at any time, which modules a given Node can pair with — and the reverse, which Nodes a given module can pair with — so you avoid a silent "paired but no data" situation.
If your screen looks different from the screenshots below, your account may not have the device-management role (see Who can do this).
Where compatibility lives
There are two equally valid ways to check compatibility, depending on where you start:
- The fast lookup — open the compatibility readout for a single device from the Devices page (a node → its compatible modules, or a module → its compatible nodes). It is read-only: it tells you what fits, it does not pair anything.
- Inside the pairing wizard — when you actually go to pair, the Pair module wizard only lets you select compatible, available nodes, so compatibility is enforced for you as you go.
Both start from the same place in the sidebar.
Find the Devices page
In the left sidebar, look under the Sensor network group and click Devices. This single Devices page has two tabs — Deployed devices and Inventory devices — covering every node and module your organization owns.
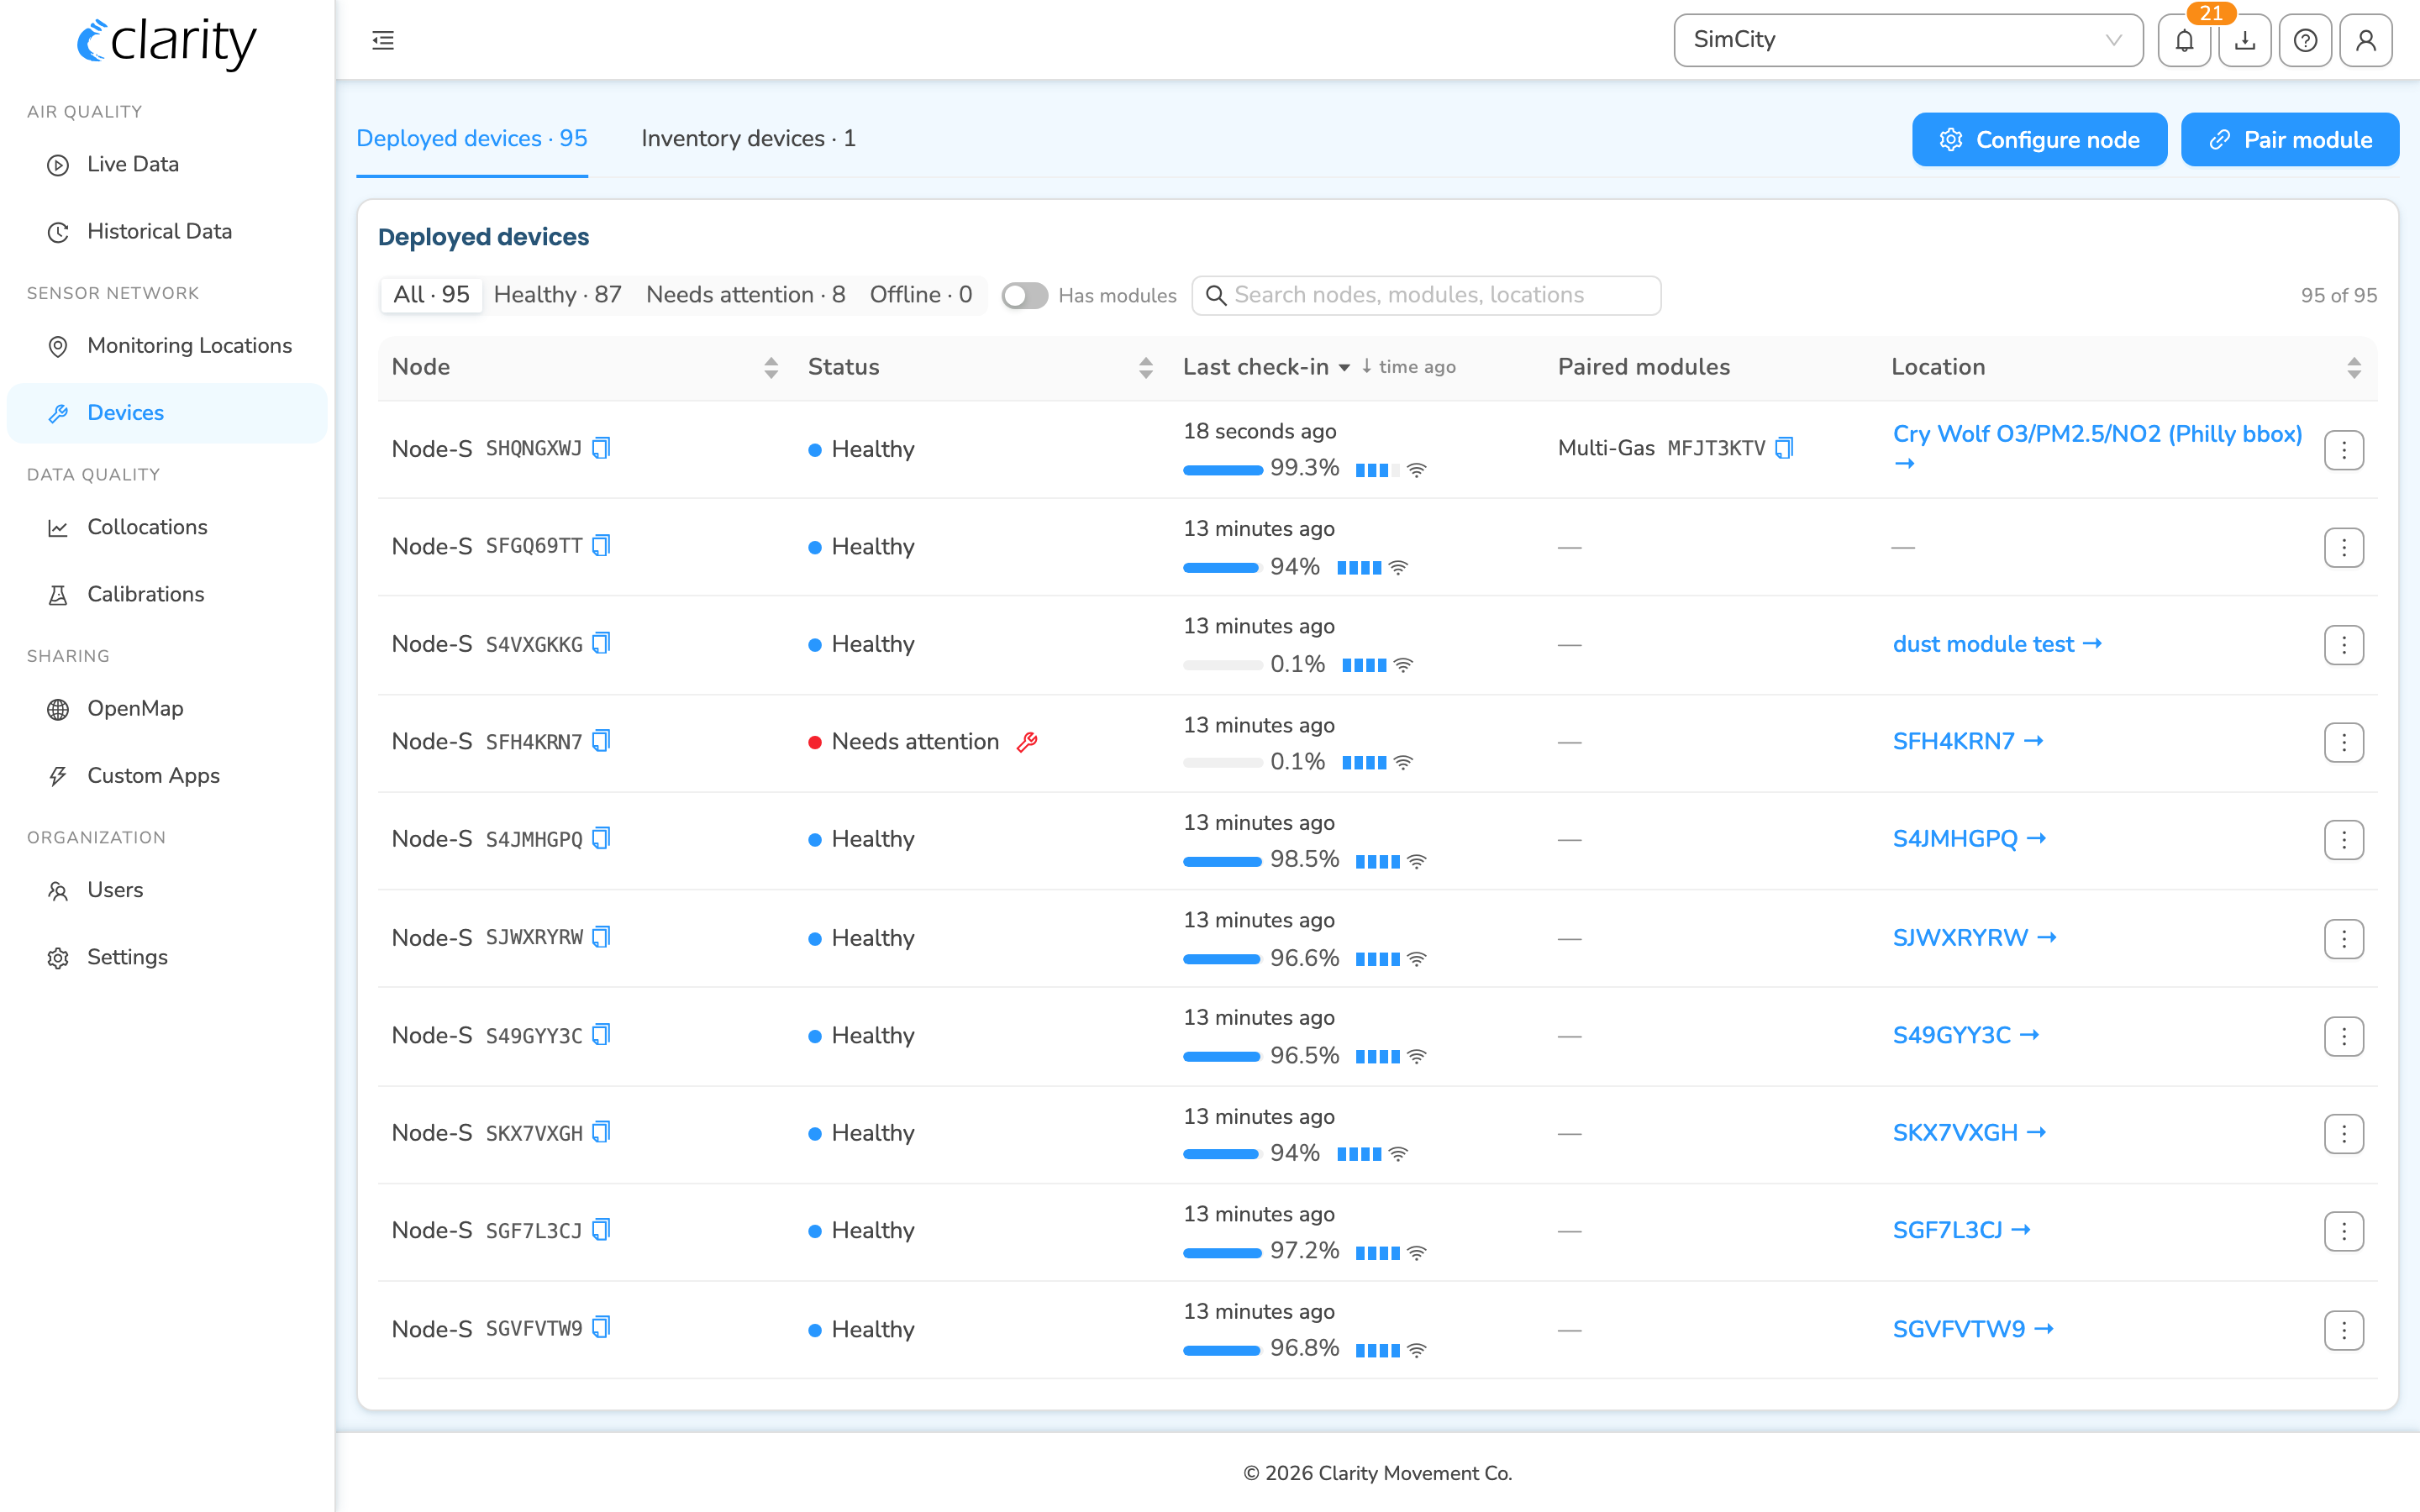
The page header also carries two primary buttons in the top-right — Configure node and Pair module — which are always visible regardless of the active tab.
Check the modules compatible with a Node
A Node-S you want to check will be in one of the two tabs:
- Inventory devices — nodes that aren't deployed to a monitoring location yet.
- Deployed devices — nodes that are currently installed and reporting.
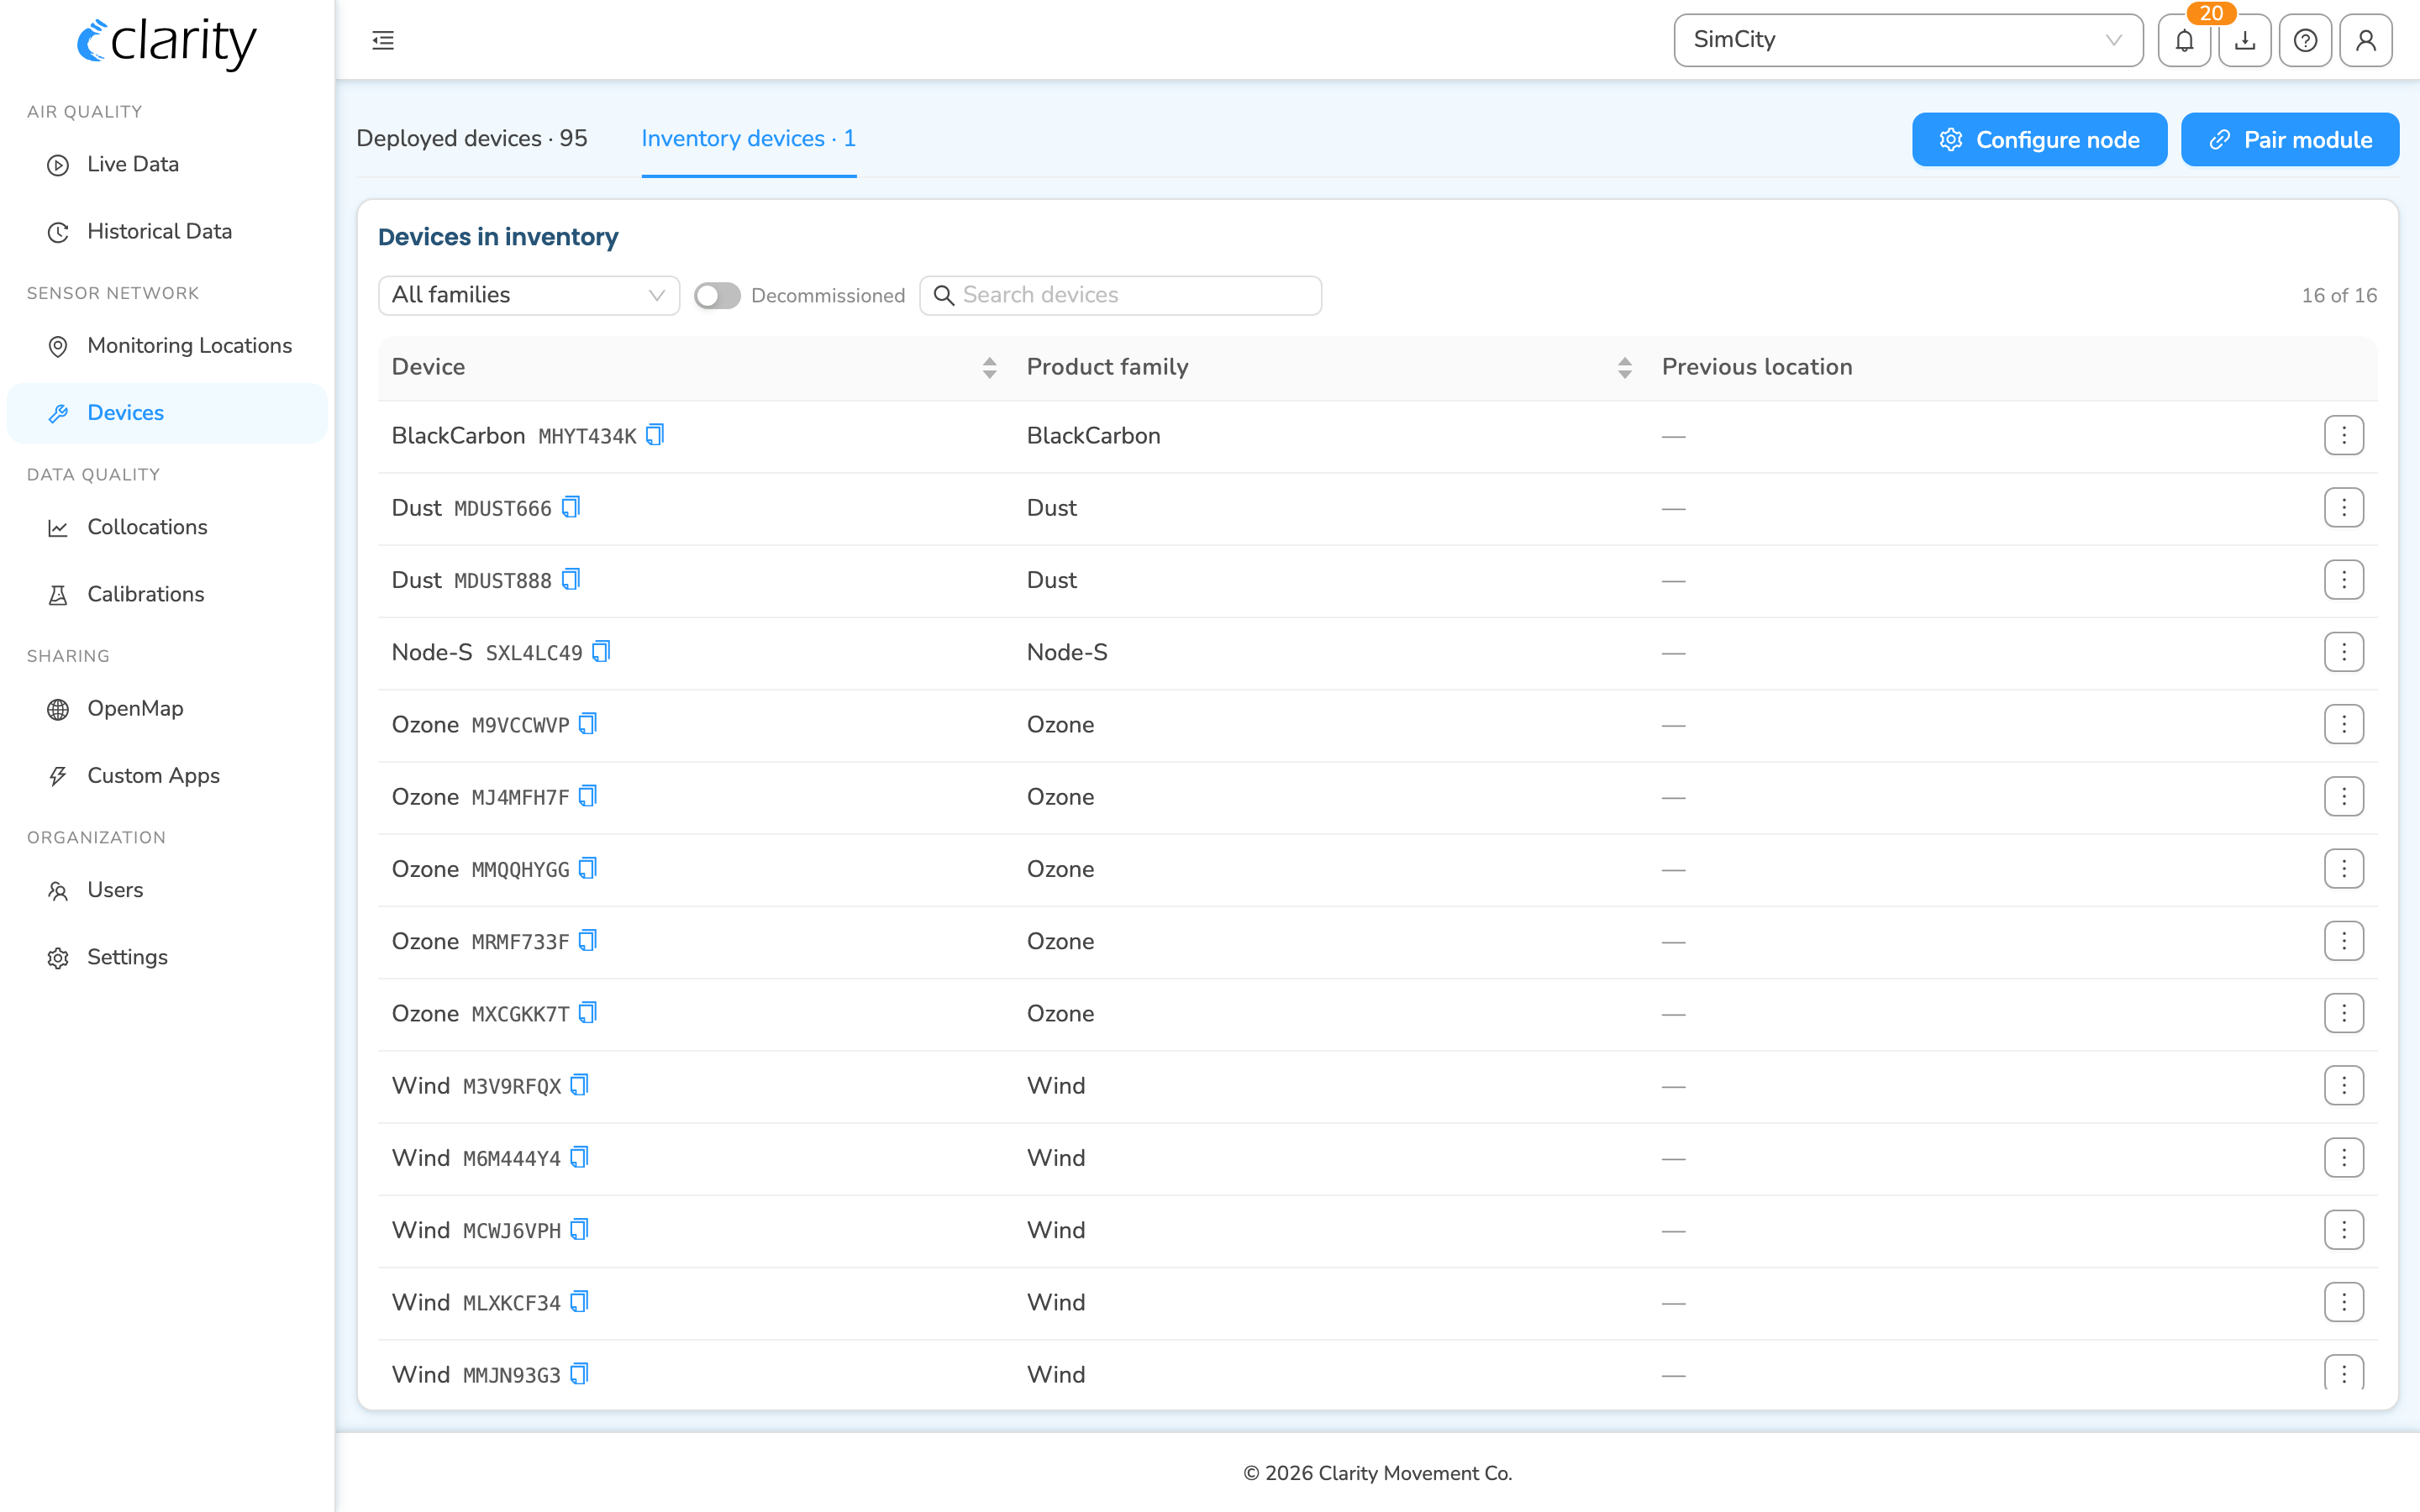
From the Inventory devices tab (the usual case before pairing)
- Open Devices and click the Inventory devices tab.
- Find the Node-S row you want to check. You can narrow the list with the product family dropdown, the search box, or the Decommissioned toggle.
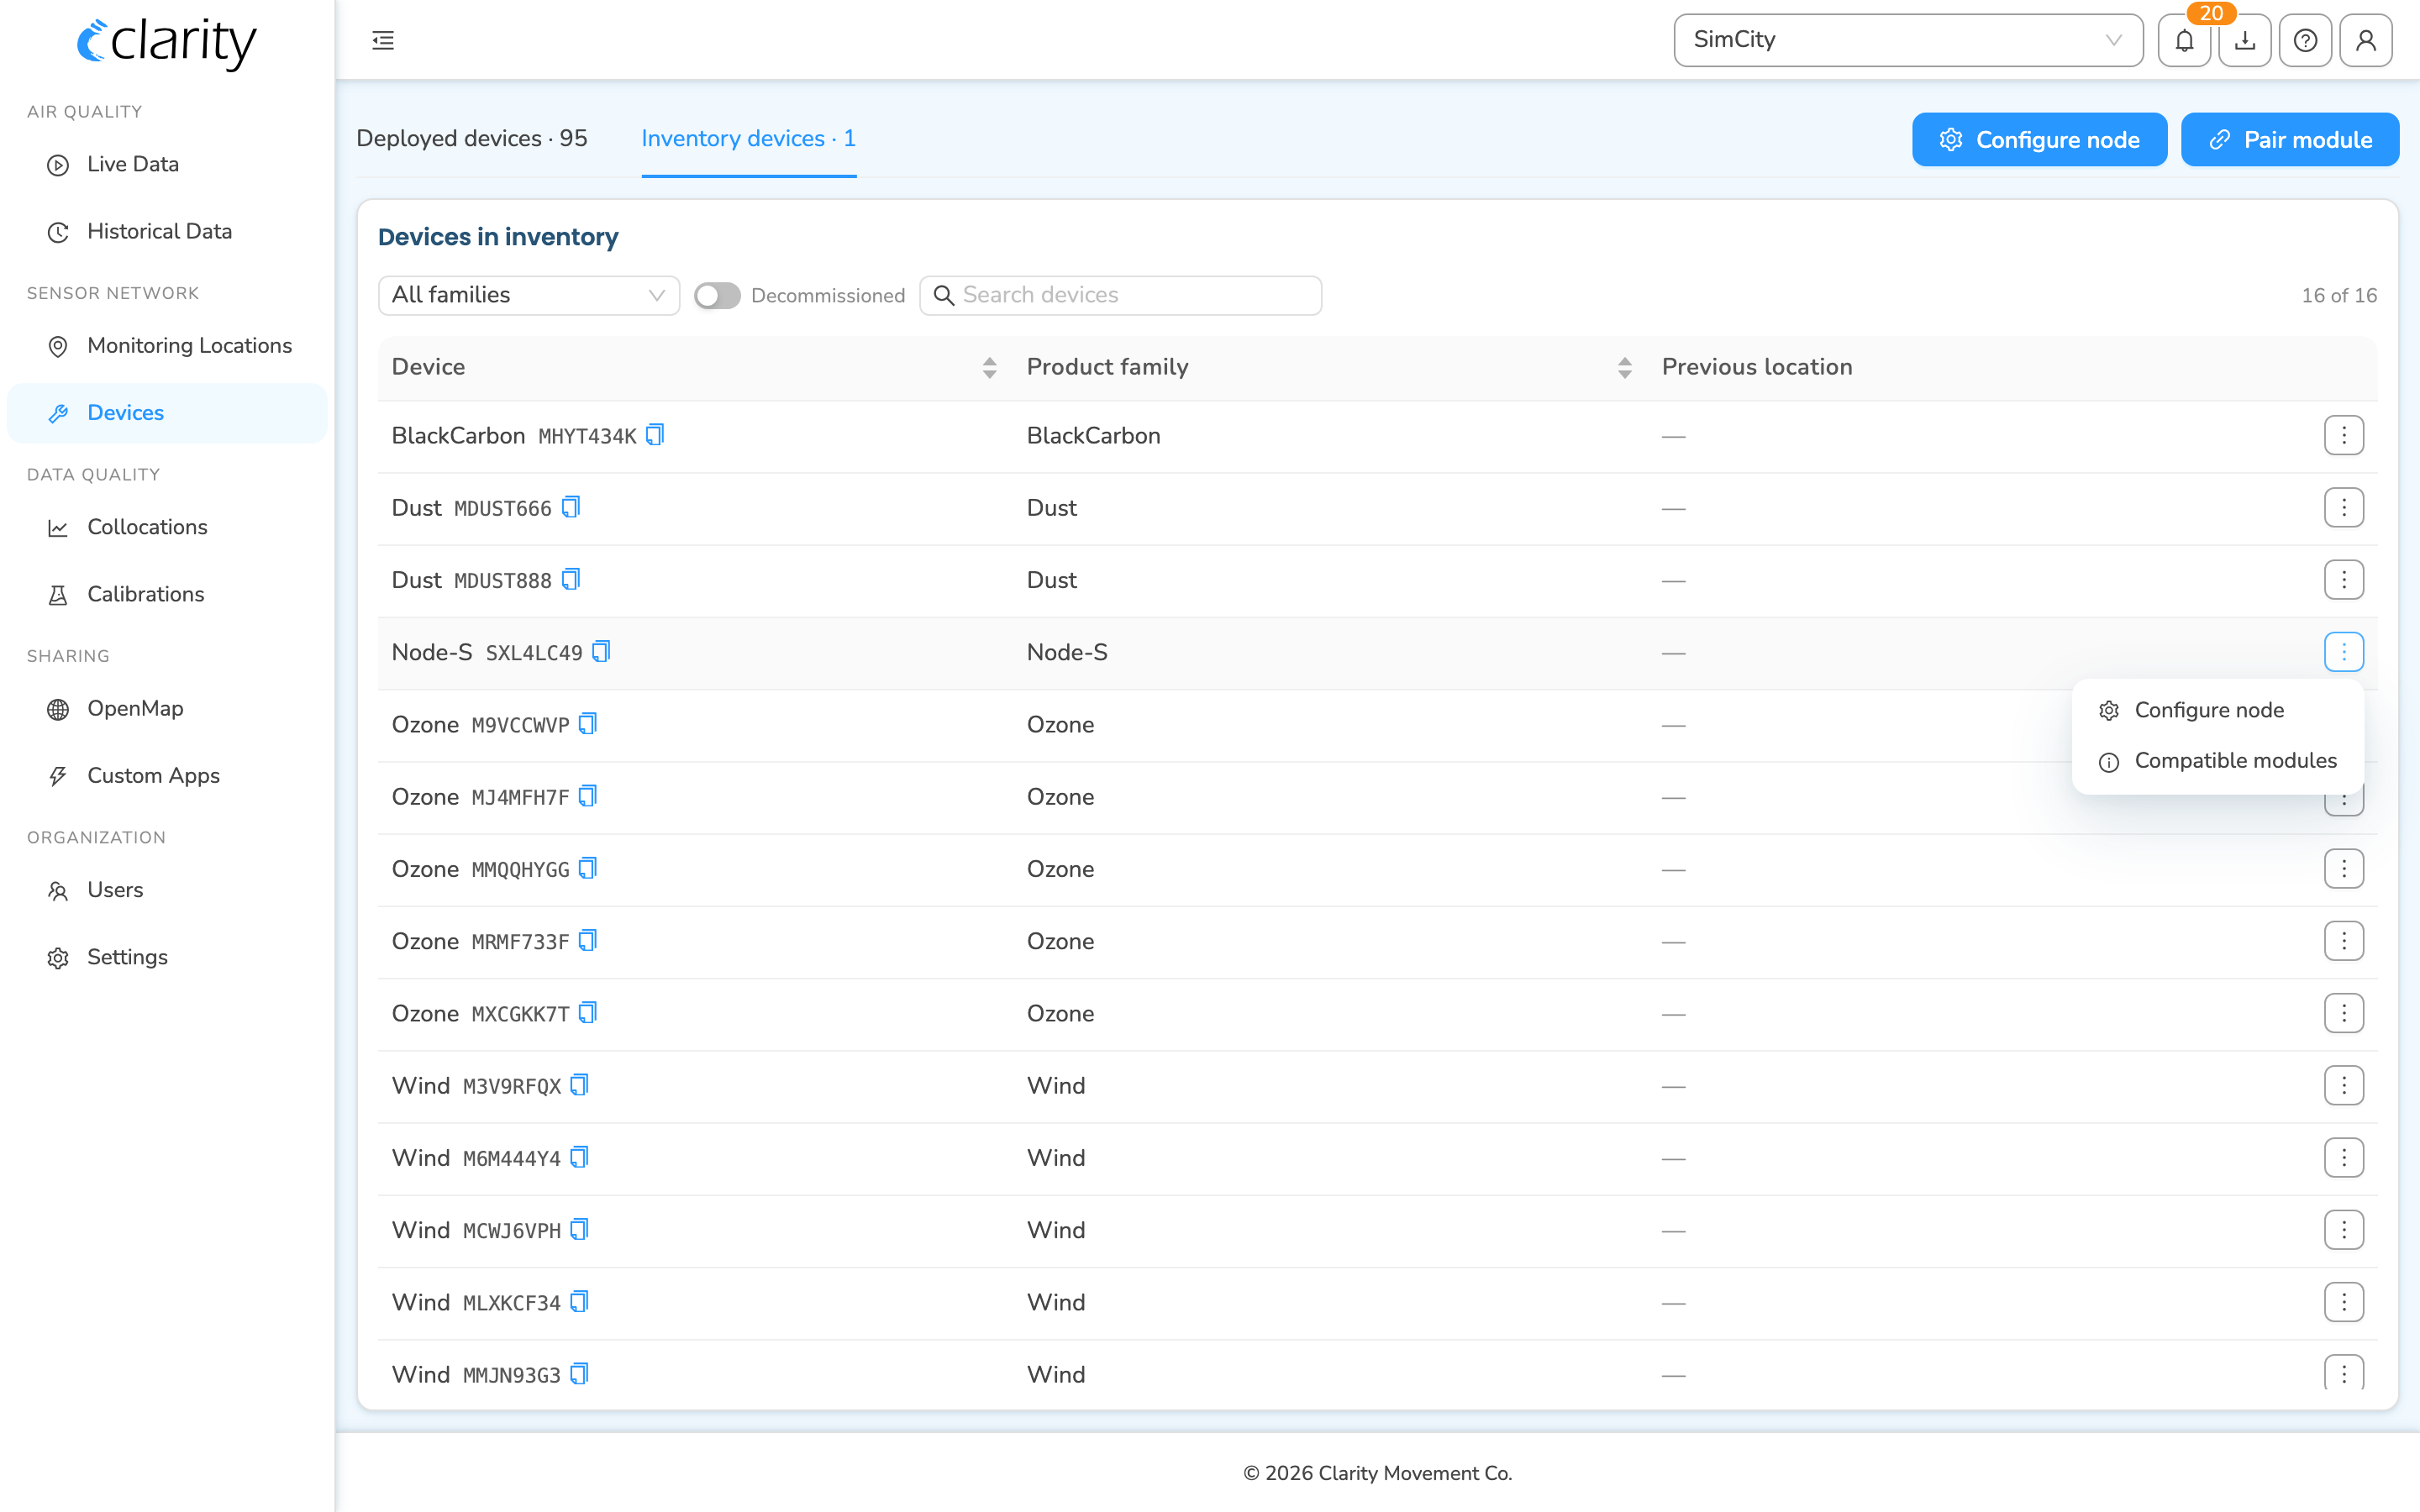
- Click the ⋮ (row actions) menu at the right end of that row.
- Choose Compatible modules.
From the Deployed devices tab
If the Node is already deployed, the entry point is different. The ⋮ (row actions) menu on a Deployed row contains: Diagnostics, Manage monitoring location, Open in Live Data, and Load historical data. Compatibility is not in that menu.
To check a deployed node's compatible modules, use the dedicated lookup on the Inventory devices tab as above (it works for any node you own), or open the Pair module wizard (below), which surfaces the same per-node compatibility as you pick.
Read the compatibility result
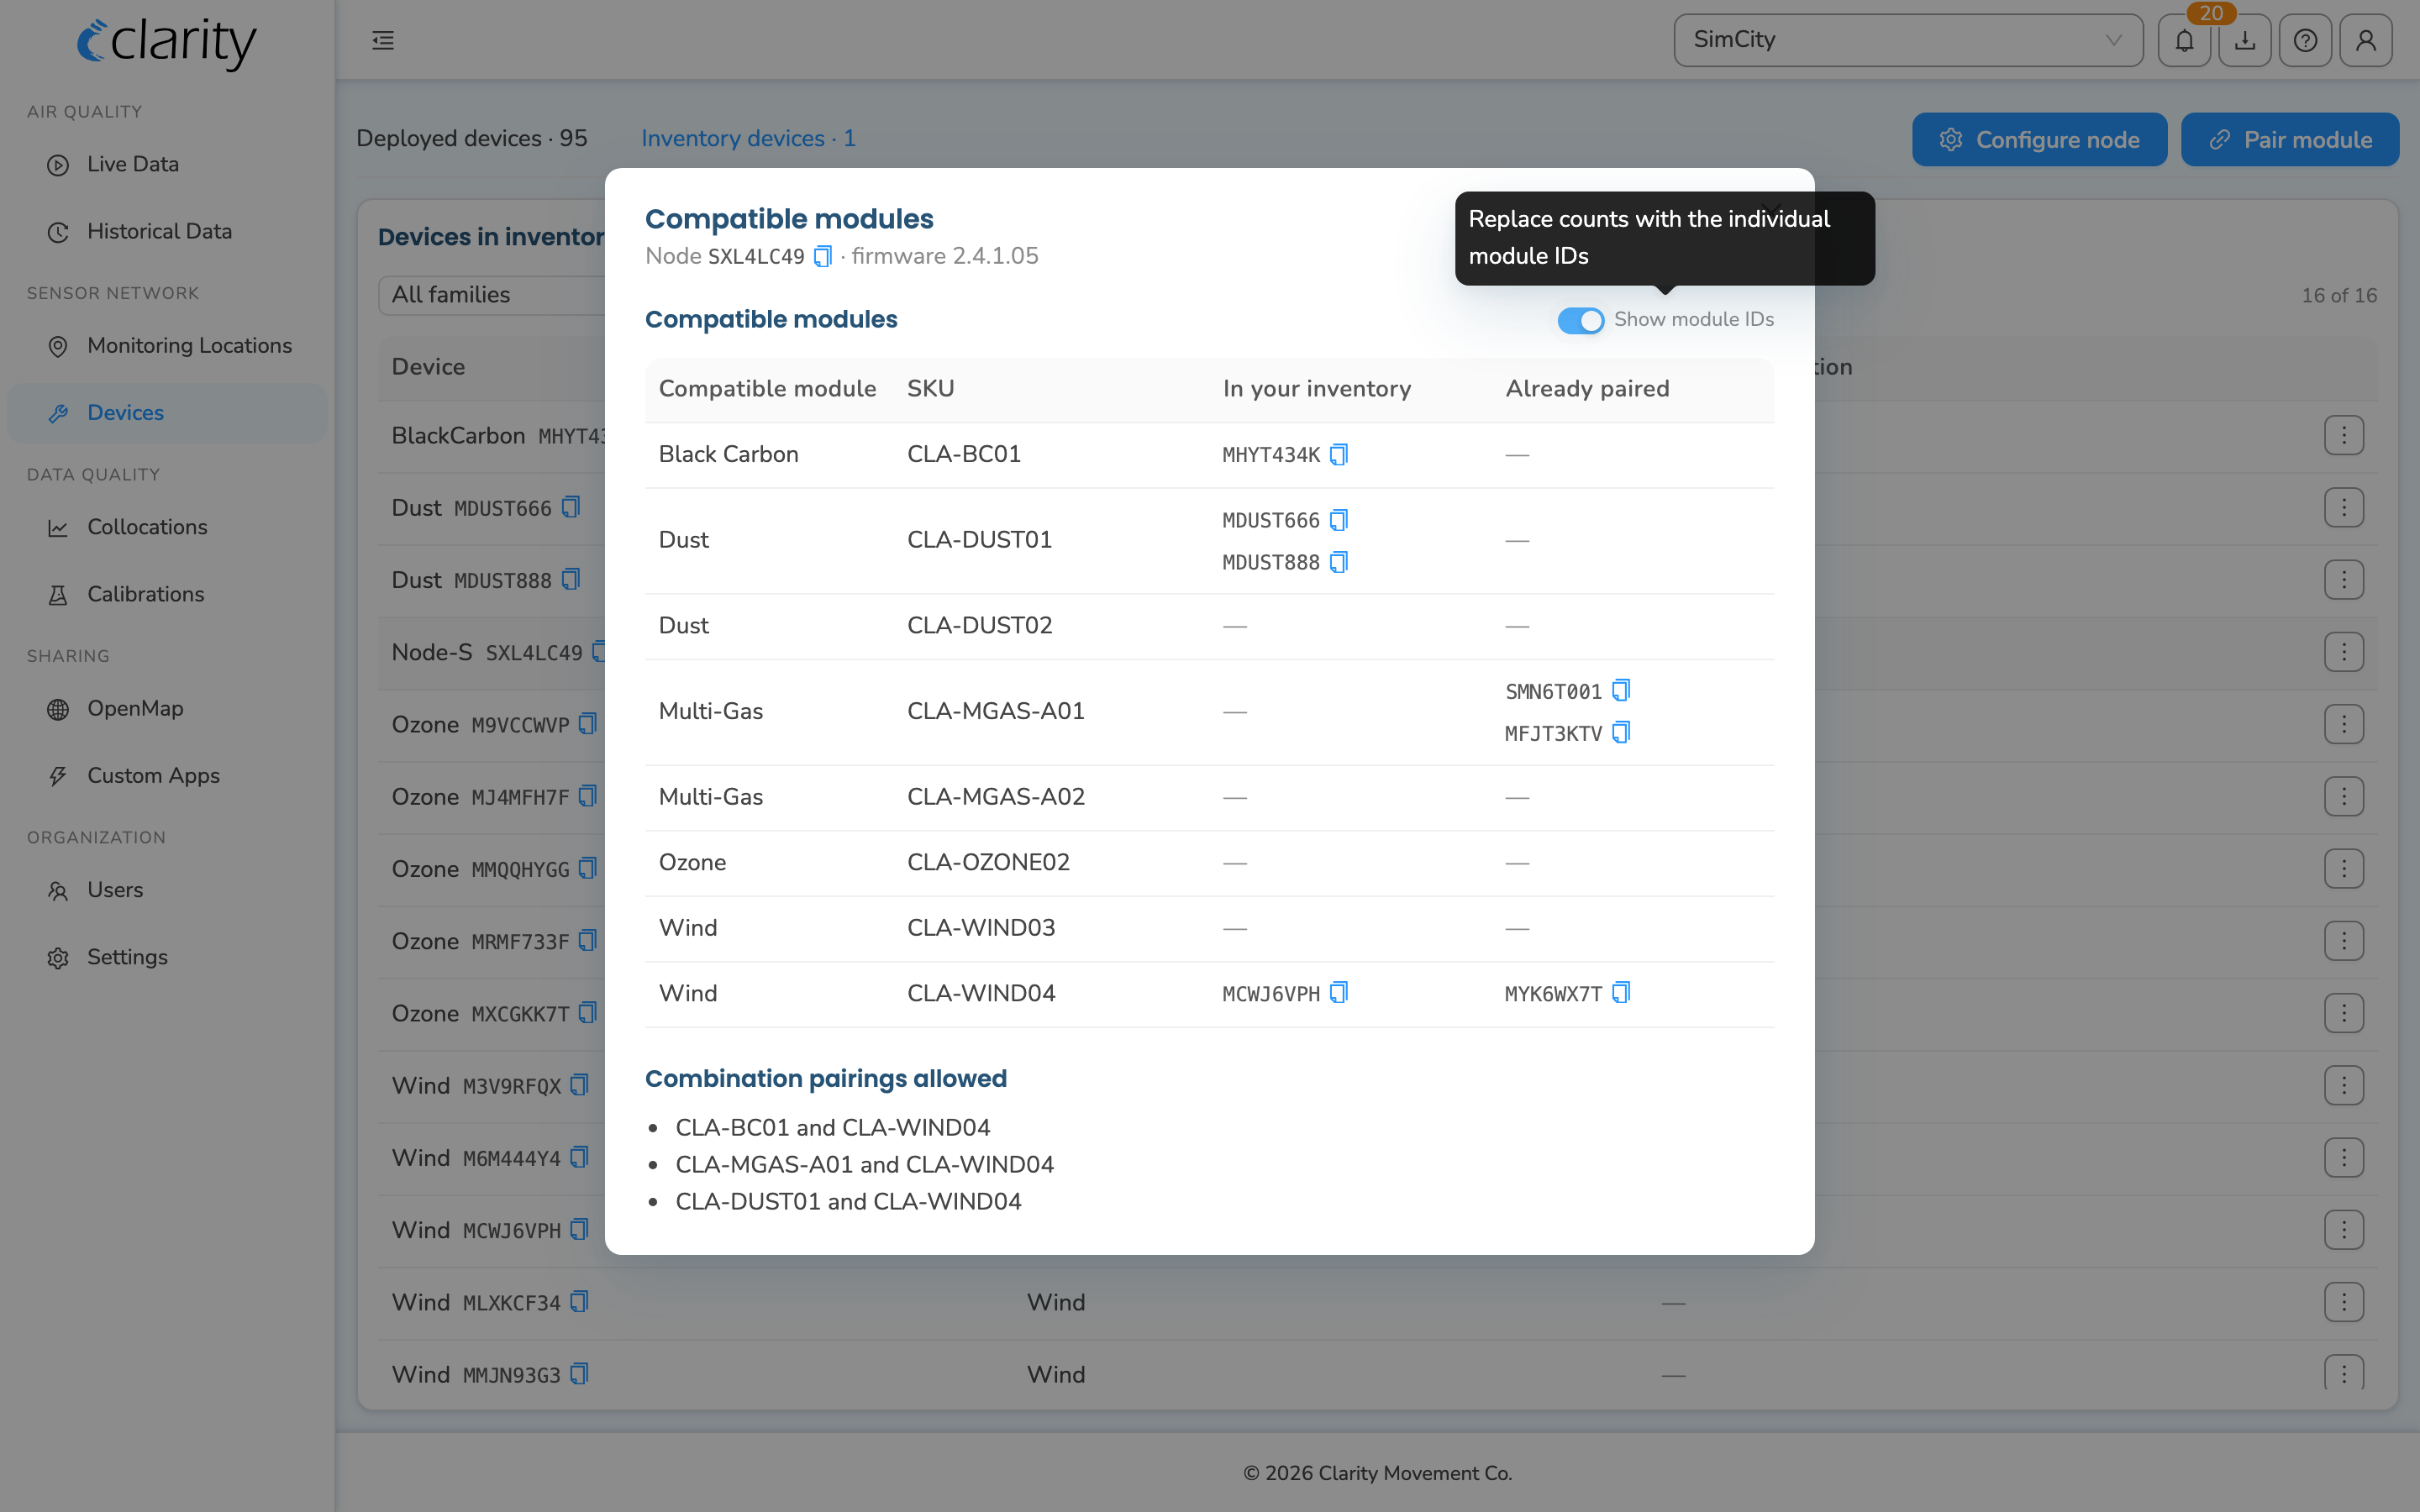
When you choose Compatible modules, a modal opens titled Compatible modules, with the subtitle showing the Node ID and its current firmware version (for example, Node A7Z457WH · firmware 1.2.3).
The modal lists every module SKU the Node's firmware can pair with, in a table with these columns:
| Column | What it means |
|---|---|
| Compatible module | The kind of module (e.g. Dust, Black Carbon). |
| SKU | The module's SKU. |
| In your inventory | How many matching modules you own that aren't paired yet. |
| Already paired | How many matching modules are already paired to a node. |
Toggle Show module IDs (top-right of the table) to replace the counts with the individual module IDs, so you can match the exact module in your hand.
Below the table you may also see:
- Combination pairings allowed — module SKUs that can be paired together on the same node.
- Currently paired with this node — the modules already attached to this node.
The reverse check: which Nodes fit a module
The Devices page also lets you check compatibility starting from a module — useful when you're holding an accessory and want to know where it can go.
- Open Devices and click the Inventory devices tab.
- Find the module's row (unpaired modules appear here alongside inventory nodes).
- Open the ⋮ (row actions) menu and choose Compatible nodes.
The Compatible nodes modal shows every node in your org across two tabs — Deployed and Inventory — with a Pairing status for each:
- Available to pair (blue) — compatible and ready; a Pair button appears on the row.
- Not available (amber) — the firmware supports the module, but another module is already paired, so it can't take this one right now.
- Not compatible (grey) — the node's firmware doesn't support this module.
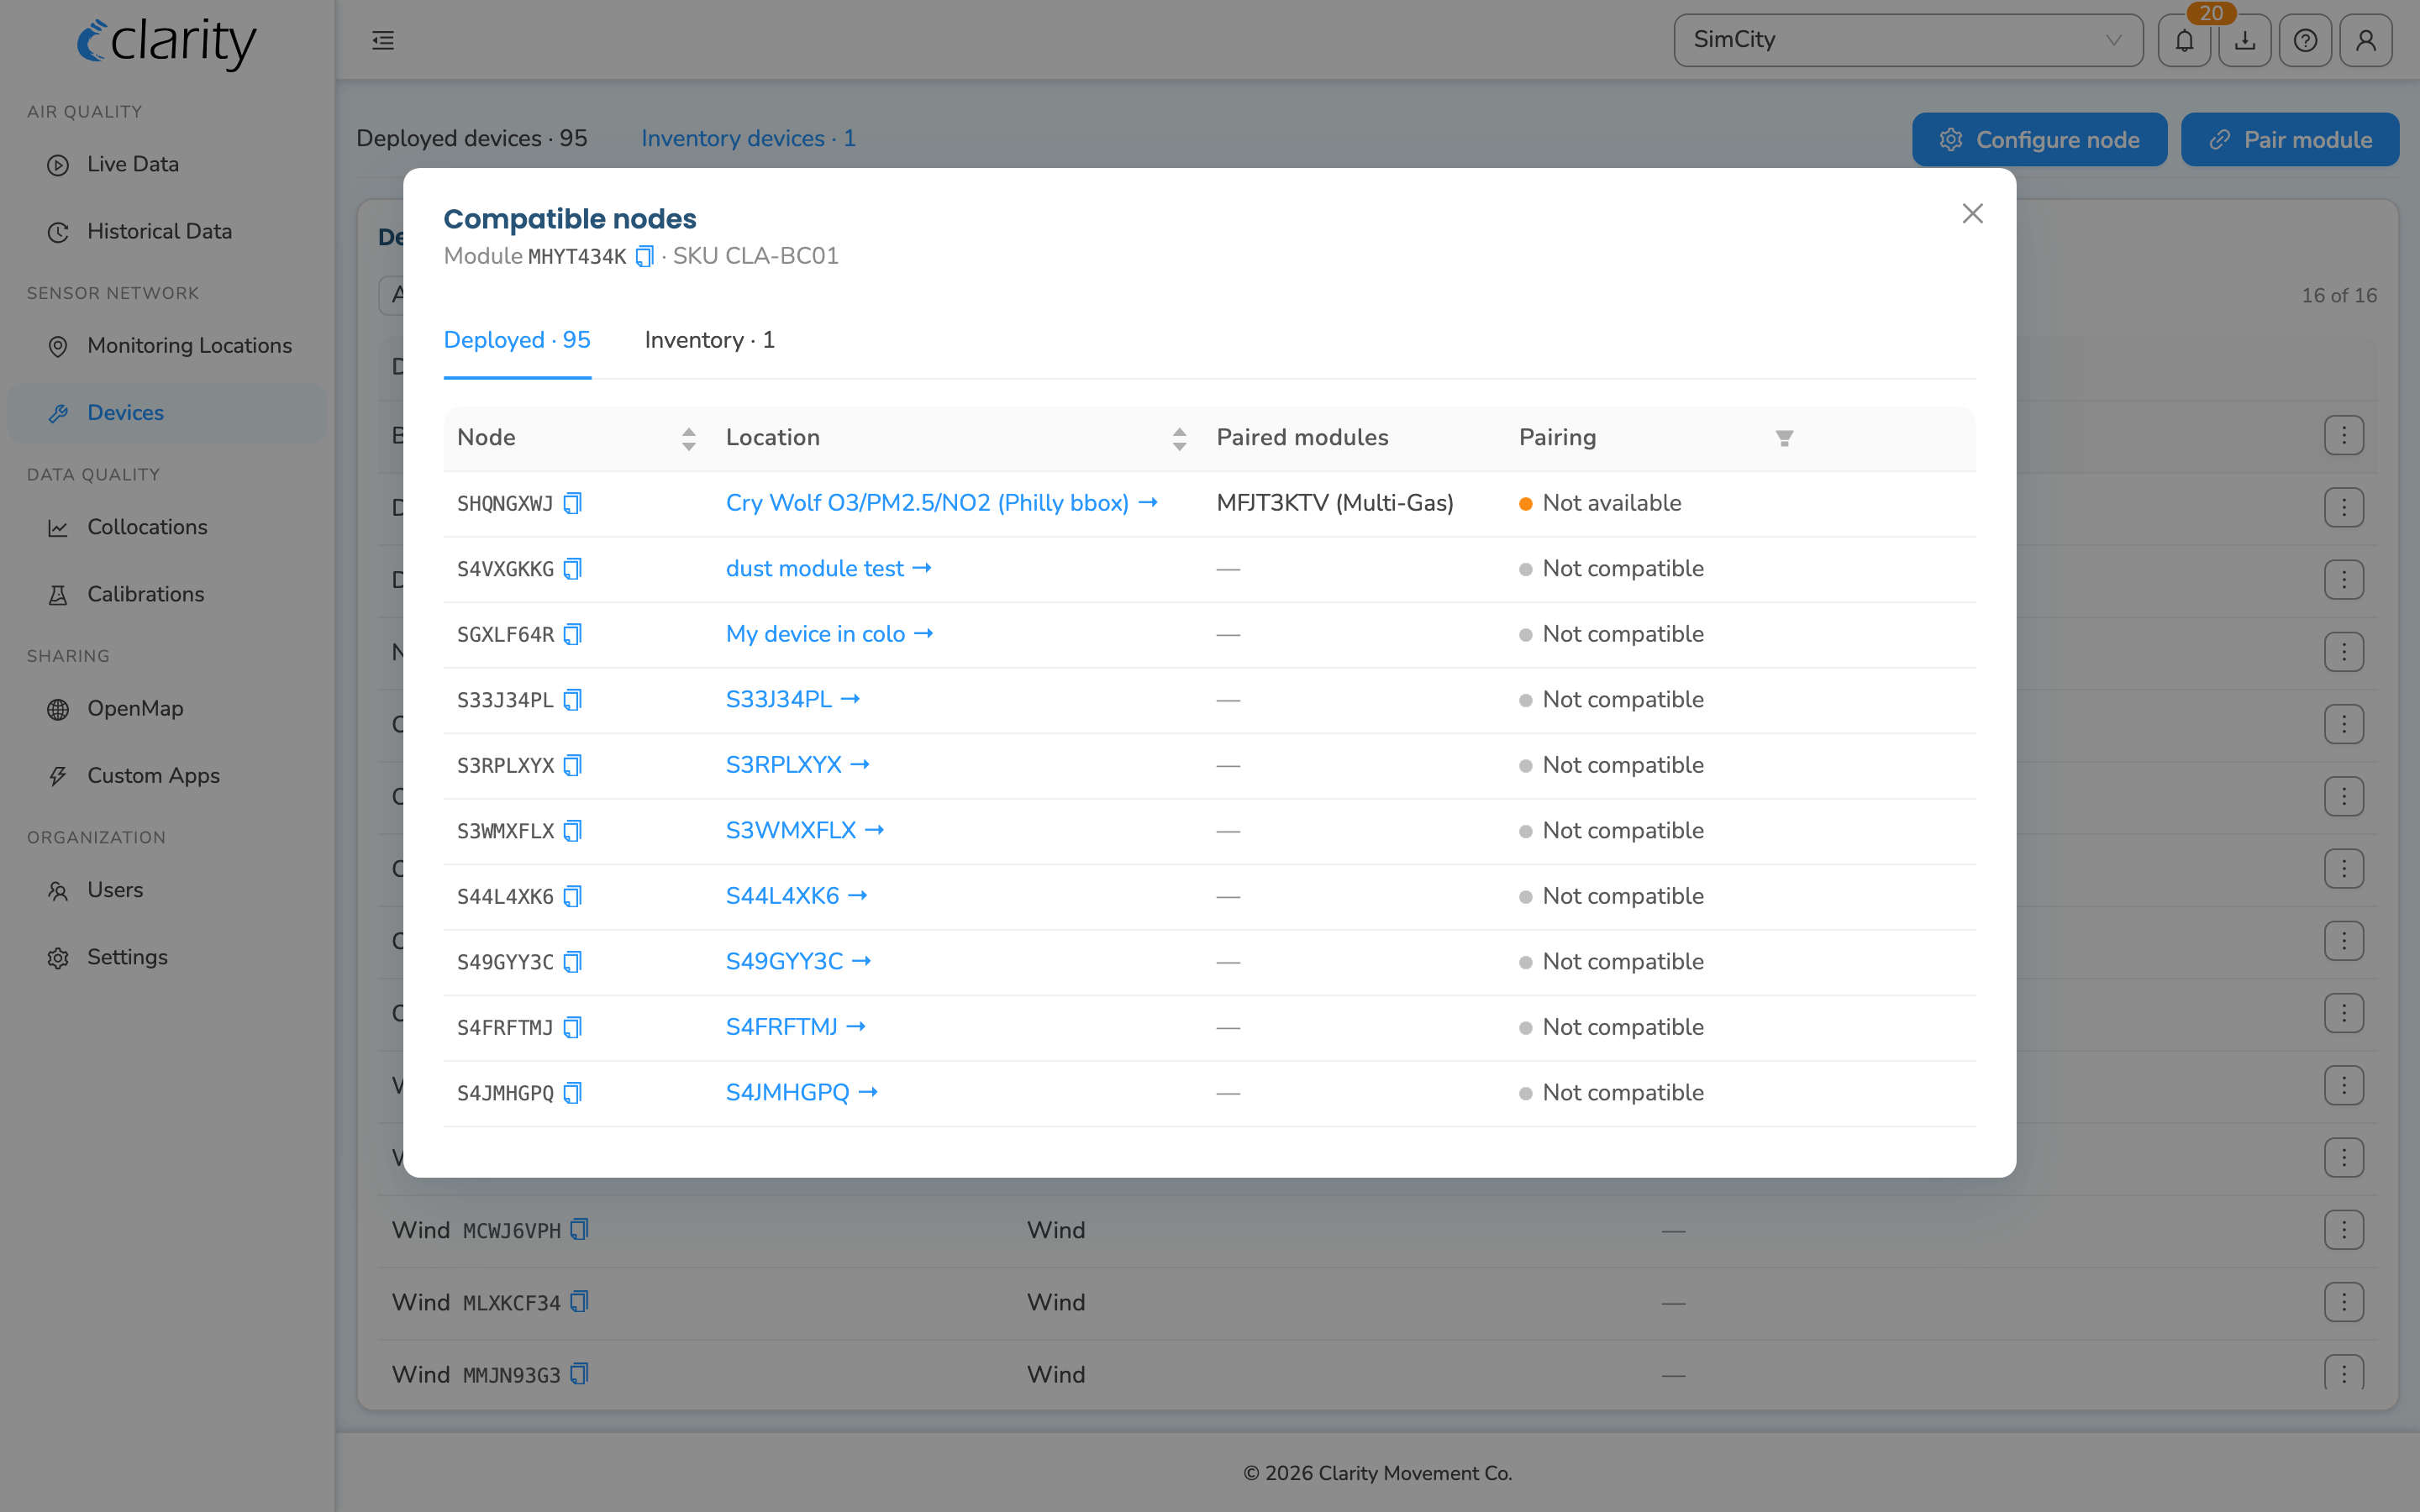
When a node is Available to pair, you can pair directly from this modal (with a confirmation dialog).
Compatibility is enforced when you pair
You don't have to memorize the compatibility table before pairing. The Pair module wizard (top-right Pair module button, or the Pair module row action on an unpaired module) checks compatibility for you:
- On the node selection step, nodes are grouped into Available to pair, Compatible, but not available, and Not compatible — and only the available ones are selectable.
- The confirm step warns you if the module is already paired elsewhere.
- A power-compatibility advisory appears on the review step before you commit.
So even if you skip the standalone compatibility check, the wizard won't let you pair an incompatible combination.
Who can do this
The compatibility lookups (Compatible modules / Compatible nodes) are available to any organization member who can open the Devices page.
The pairing actions themselves (the Pair module / Configure node buttons and the in-modal Pair button) require an org admin or technician role. If you don't have it, those controls appear disabled with a tooltip explaining the requirement — contact your org admin.
What's next
- Get an overview of the Node-S and add-on modules.
- Unpair a Module from a Node-S.
- Deploy your Clarity Node-S.
- Troubleshoot Accessory Module alarms.
Was this article helpful?
Yes, thanks! / Not really
Still need a hand? Email us at support@clarity.io or create a support ticket, and our team will get back to you.