How to make your air quality data public on OpenMap
Share your live air quality data with your community on Clarity OpenMap.
Your data is private by default. We never share it publicly without your permission.
When you're ready, you can publish any of your monitoring locations to Clarity OpenMap — Clarity's free public air quality map. You stay in control: you choose which locations to share, the public name each one appears under, and whether to hide its exact address.
Note: Once a location is public, anyone on the internet can view and download its data and use it as they wish.
Everything below happens on the Monitoring Locations page. Sharing is managed inline, right alongside each location.
Before you start
- You need to be signed in as an organization member. Sharing controls live on a member-only page, so guests with read-only access won't see them.
- Only Clarity nodes with a primary subscription can be published to OpenMap. The OpenMap sharing controls are hidden for reference sites, shared (shadow) subscriptions, and locations managed by another organization.
Find the Monitoring Locations page
- Log in to the Clarity Dashboard.
- In the left sidebar, under Sensor network, click Monitoring Locations.
You'll land on the locations list. Any location that's already public shows a blue globe icon next to its name; hover it to see the tooltip "Shared on OpenMap."
Share a single location (quickest for one)
- On the Monitoring Locations page, click the row for the location you want to publish. Its detail panel opens on the left.
- Scroll to the OpenMap sharing section. It shows the current state — Private or Public — under the line "Show this location's air quality publicly on OpenMap."
- Click the pencil (Edit) button next to the Private/Public label.
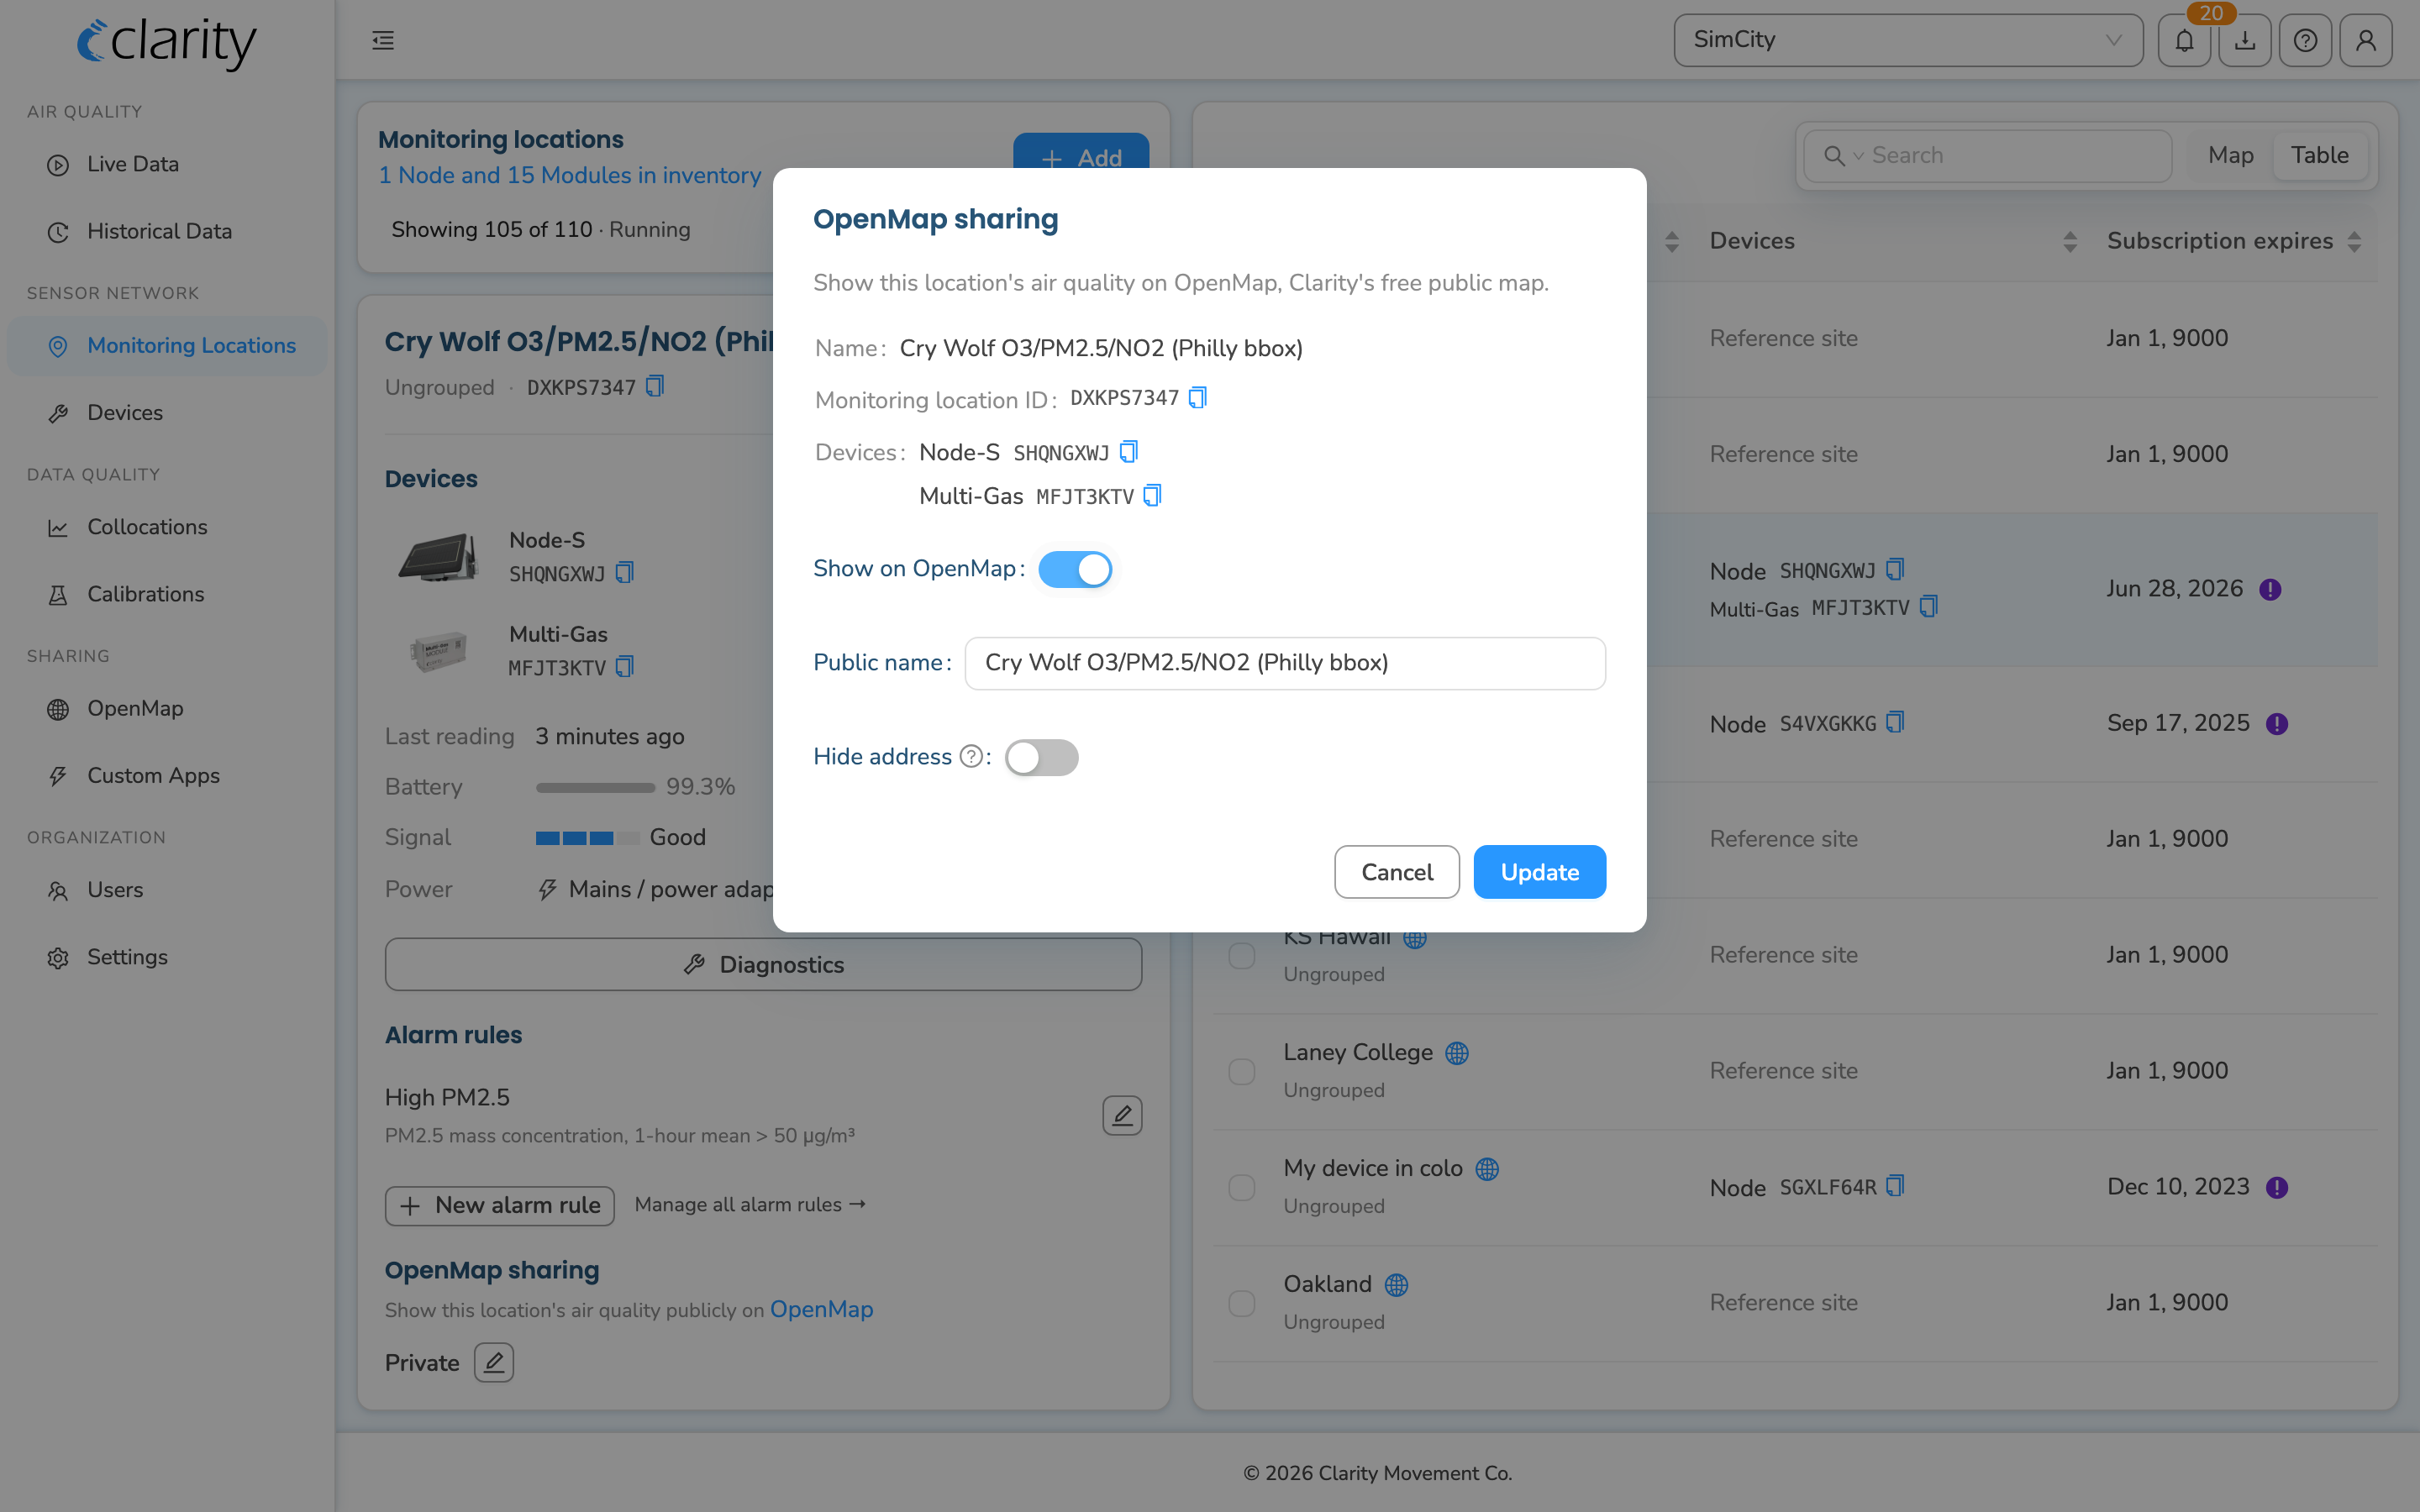
- The OpenMap sharing dialog opens. It confirms which location you're editing (name, ID, and attached devices), then offers:
- Show on OpenMap — turn this toggle on to publish the location.
- Public name — the name this location appears under on OpenMap. It doesn't have to match your internal name, and it's required when sharing is on.
- Hide address — turn this on if you don't want the exact address and street view shown publicly.
- Click Update to save.
The section now reads Public and shows the public name (and "Hide address: Yes" if you set it). The globe badge also appears next to the location in the list.
Share several locations at once (bulk)
-
On the Monitoring Locations page, use the checkboxes in the list to select every location you want to manage. The header checkbox selects or clears all the locations currently shown, and you can search or filter the list first to narrow things down.
-
With more than one location selected, the left panel switches to a multi-select view. Click Manage OpenMap sharing.
-
The OpenMap sharing dialog opens with a table — one row per selected location. For each row you can set:
- On OpenMap — the toggle on the right; flip it to Public (or back to Private).
- Public name — editable once the location is set to Public.
- Hide address — a Show/Hide toggle, editable once the location is Public.
Rows you change are highlighted, and a count of how many locations you've modified appears at the bottom.
-
Click Save to apply all your changes at once.
Make a location private again
Use the same steps as above and turn Show on OpenMap (single) or the On OpenMap toggle (bulk) off, then save. The globe badge disappears and the location is no longer shared publicly.
What's next
- Embed OpenMap widgets on your website.
- Fix why your data isn't showing on OpenMap.
- Explore Custom Apps and embedded dashboards.
- Give applications access to your data via API.
Was this article helpful?
Yes, thanks! / Not really
Still need a hand? Email us at support@clarity.io or create a support ticket, and our team will get back to you.