How do I turn on my Clarity Node-S?
Powering on your Node-S is simple — it turns on as soon as you plug in a cable. This article shows you how, and explains the sounds it makes so you know whether it connected.
Before you start
- Make sure the device has been configured on the Dashboard first — see deploying your Node-S.
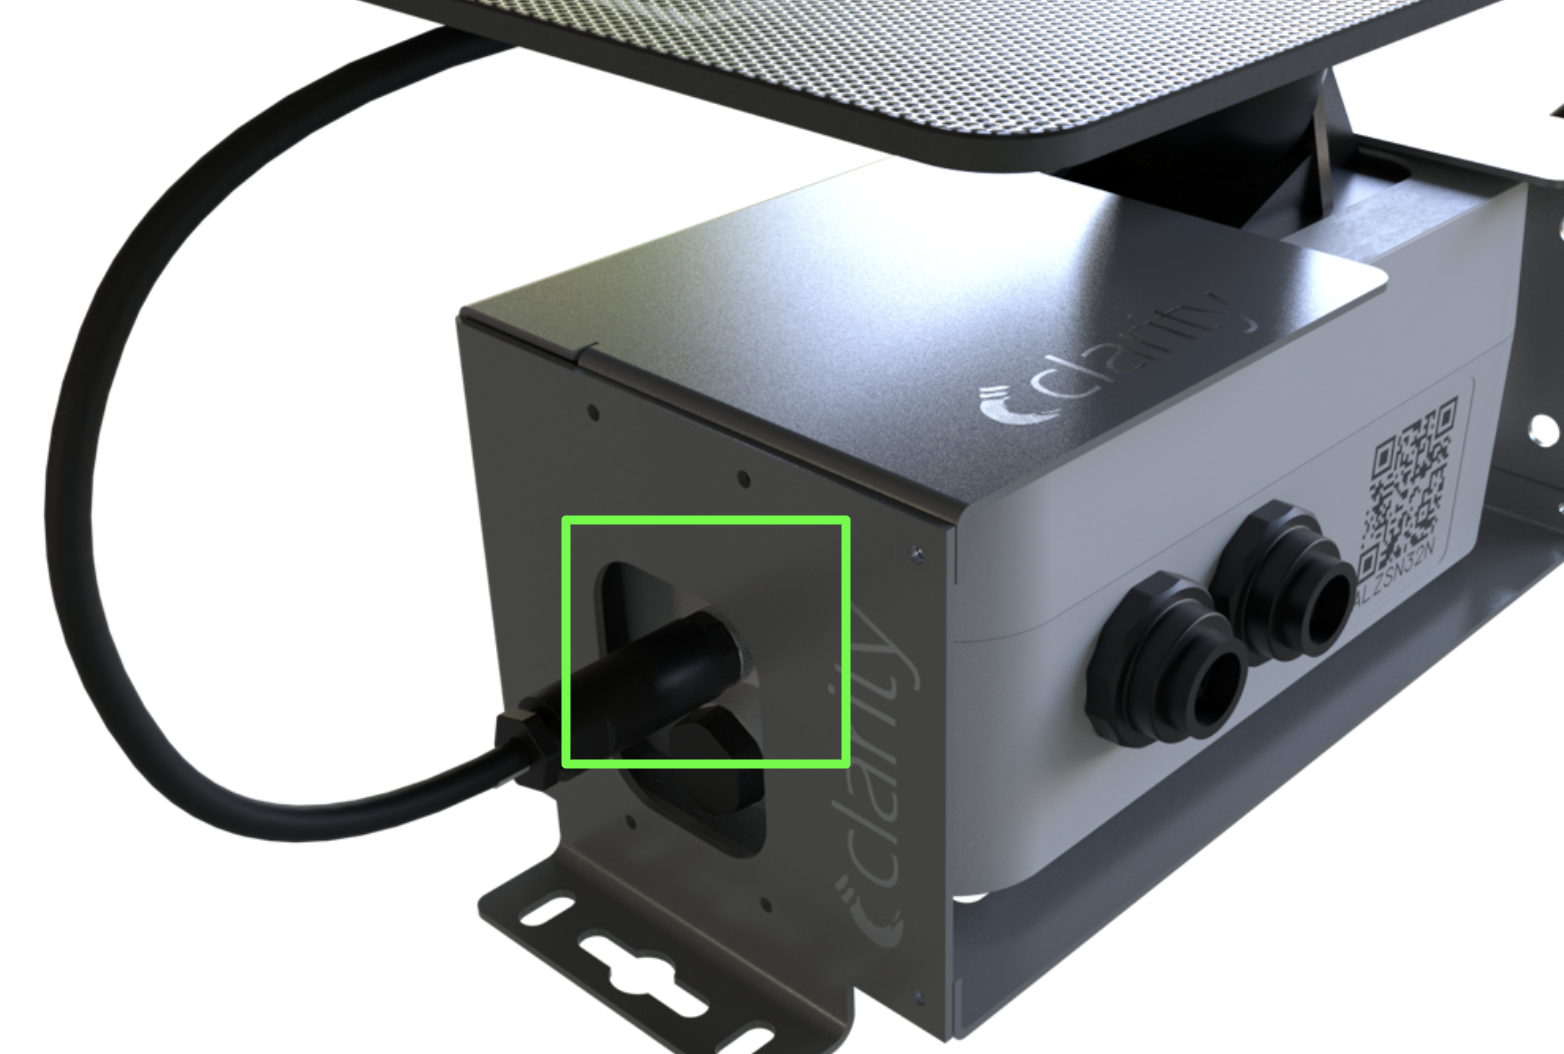
1. Plug in a power cable
The Node-S powers on when you plug either the solar panel cable or the AC adapter charging cable into the device body.
- Using the solar panel — connect the solar panel cable to the device body, and the Node-S turns on.
- Using the AC adapter — plug the charging cable into the device body and connect the AC adapter to a power outlet.
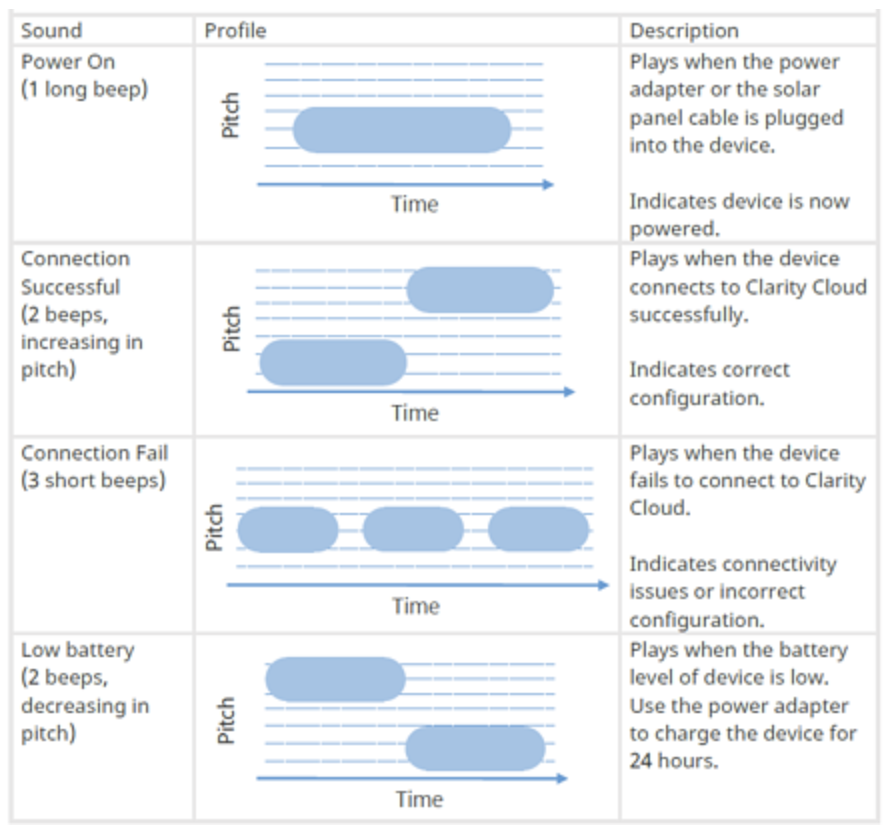
2. Listen for the startup sounds
When it powers up successfully, the device plays the Power On sound and tries to connect to Clarity Cloud. What you hear next tells you what's happening:
- Connection Successful sound — the device starts uploading data. (Listen: Connection Successful sound.)
- Connection Failure sound — confirm the device has been configured on the Dashboard first (see deploying your Node-S).
- Low Battery sound — charge the device for at least 24 hours before proceeding.
You're done! Once you hear the Connection Successful sound, your Node-S is online and uploading data.
Note: The Node-S powers on whenever there's sufficient battery and a cable is plugged into the device body. To avoid draining the battery and collecting spurious data during storage, unplug the solar panel or charging cable when the device isn't in use.
What's next
- Confirm your device is uploading data.
- Deploy your Node-S in the field.
- Two low beeps on power-up? Here's what it means.
Was this article helpful?
Yes, thanks! / Not really
Still need a hand? Email us at support@clarity.io or create a support ticket, and our team will get back to you.