Dust Module Siting Guide
Picking a good spot for your Dust Module helps it report accurate PM10 data. This guide covers the key considerations. For general device siting, also see the Node-S siting guide.
Survey the site first
If you can, survey the site before deployment day. It helps you identify exactly where to mount the device, confirm you have the right tools and mounting accessories (see deploying the Dust Module), and take photos or diagrams for later.
Choosing a mounting location
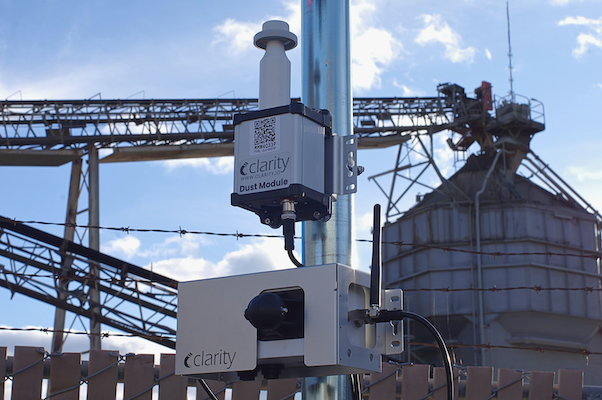
The Dust Module can be mounted above, below, or next to the Node, secured to a pole, fence, or railing with zip ties or hose clamps. To site it well:
- Avoid installing near sources of heat and moisture (like an external HVAC unit) or direct pollution sources (like a restaurant exhaust vent).
- Keep it at least 6 meters (20 ft) from obvious pollution sources like an exhaust vent, generator, or outdoor grill.
- Maintain a vertical gap of at least 25 cm (10 in) above the Dust Module for unobstructed inlet airflow and to prevent water splashing between devices in heavy rain.
- Ideally place it away from buildings for better airflow. If you must mount on a building, use the upwind side.
- Mount at about 3–5 m (10–16 ft) above street level for general population exposure (higher for more regional air quality).
- Choose a secure location, ideally behind a fence or away from heavy foot traffic.
- If using the External Power System, check the location isn't shaded by buildings, trees, or other structures — the device and solar panel should face south (northern hemisphere) or north (southern hemisphere).
- If powering via the provided wall adapter, make sure cords are properly weatherproofed.
What's next
- Deploy the Dust Module.
- Dust Module maintenance.
- Node-S siting guide.
Was this article helpful?
Yes, thanks! / Not really
Still need a hand? Email us at support@clarity.io or create a support ticket, and our team will get back to you.